House On The Crescent

All Posts By Elody Von

McGee & Co Furniture Review — The Best Pieces Worth Buying Right Now

By Posted on 0 Comments7min read0 views

McGee & Co Furniture Review — The Best Pieces Worth Buying Right Now

McGee & Co Furniture Review — The Best Pieces Worth Buying Right Now
McGee & Co Furniture Review 10 min read

There's a specific frustration that comes with shopping McGee & Co for the first time. The site is beautiful. Everything looks like it belongs together. You add things to your cart, look at the total, and then spend twenty minutes trying to decide what to cut and whether what you're keeping is actually the right thing.

Most people end up either buying nothing or buying based on what photographed best rather than what will serve them longest. This review is built to fix that — specific products, honest quality assessments, and a clear sense of which McGee & Co pieces are worth the price and which are better skipped.

How to Think About McGee & Co Quality

McGee & Co sources from multiple manufacturers and applies their aesthetic standards rather than manufacturing everything themselves. This means quality is not uniform across the catalog — some pieces are genuinely excellent for the price, some are fair value, and some are pieces where the aesthetic is stronger than the construction. The categories that tend to perform best: upholstered seating, lighting, and textiles. The categories where quality is more variable: case goods — tables, dressers, buffets — where construction details are harder to evaluate from photos.
McGee & Co — The Pieces Actually Worth Buying
Specific products with the quality to back up the price — researched and ranked
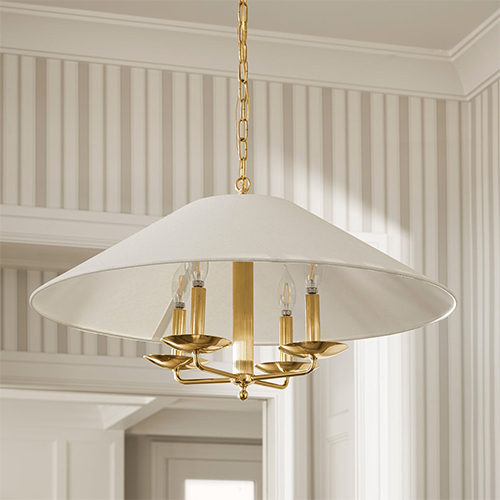
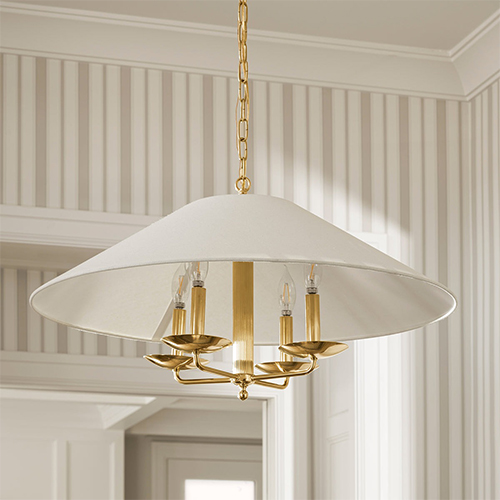
McGee and Co Thea Chandelier
Best Lighting

Thea Chandelier

Rattan · Brass · Small / Med / Large
  • Tight, well-made rattan weave
  • Heavy brass hardware
  • Looks better in person than photos
  • Best ROI piece in the catalog
Check Price on McGee & Co
McGee and Co Dawson Bed
Best Bedroom

Dawson Bed

Bouclé or performance fabric
  • Solid wood frame — no sag
  • Bouclé headboard holds up well
  • Works in most bedroom palettes
  • Makes room look finished
Check Price on McGee & Co
McGee and Co Textiles
Best Value

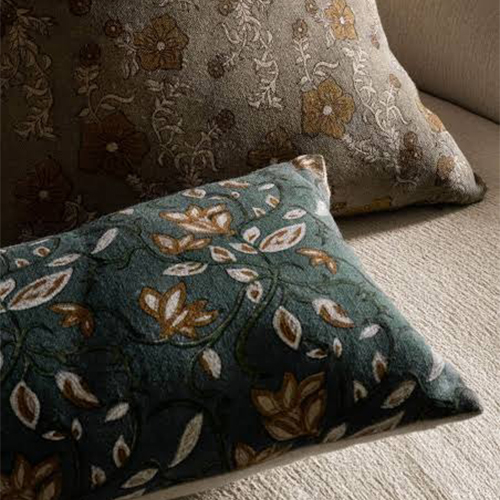
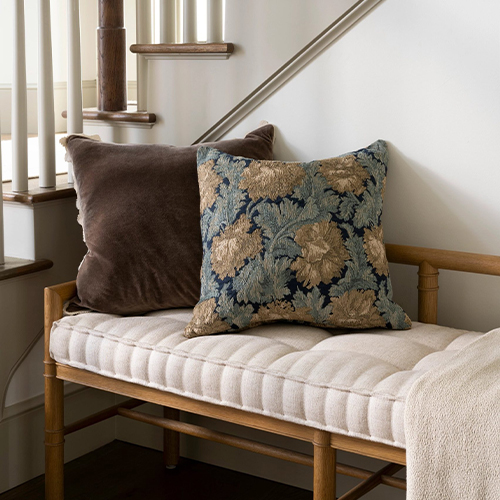
Linen Pillows & Throws

Linen blend · Multiple colorways
  • Best quality-to-price in catalog
  • Dense inserts — holds shape
  • Lowest risk first purchase
  • Start here before furniture
Check Price on McGee & Co

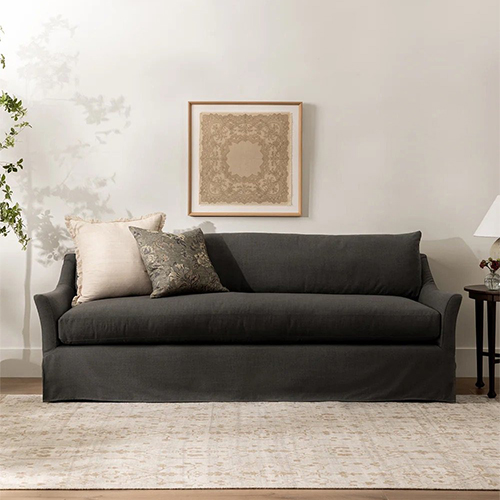
Siena Sofa — Still the Best Thing McGee & Co Makes

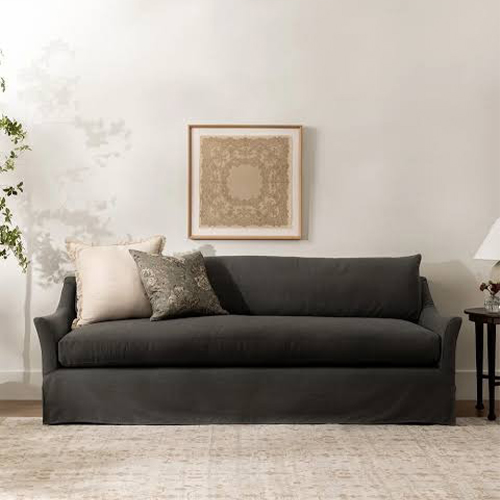
The Siena Sofa has been in the catalog long enough to have a real track record and the track record is good. Deep seat — 24 inches from front to back — that actually lets you sit in it rather than perch on it. Low profile with a clean-lined frame in white oak or walnut. The frame is kiln-dried hardwood, not the engineered wood that shows up in fast furniture at similar price points. The cushion filling holds its shape over time. The performance fabric option looks like linen but cleans like a synthetic — right choice for households with kids, pets, or anyone who uses their sofa for anything other than looking at it. Lead time runs eight to twelve weeks. Order before you need it. Price runs $3,000 to $4,500 depending on configuration and fabric.

Lead time tip: The Siena books up fast — order 10 to 12 weeks before you need it, not when you're ready to furnish the room.

Thea Chandelier — The Piece With the Best Return on Investment

A statement chandelier does more design work per dollar than almost anything else you can put in a space. The Thea is the McGee & Co lighting piece worth knowing about most — woven rattan shade, brass hardware, available in small, medium, and large. The rattan is well-made, the weave tight and even, the material thick enough to be structurally sound. The brass hardware is appropriately heavy and reads as quality in person in a way that photos honestly undersell. This is a chandelier that looks more impressive installed and lit than in a product image — the opposite of most things bought online. Price runs $500 to $900 depending on size.


Dawson Bed — The Right Bedroom Anchor for Most Rooms

The Dawson does something hard — it looks designed without looking designed. The low profile, the clean-lined upholstered headboard, the solid wood frame visible at the legs — it reads as considered without drawing attention to itself. The bouclé headboard option is the one worth getting if you can. Bouclé adds warmth and visual interest without pattern or color, works in bedrooms pulling toward both warmer and cooler palettes, and holds up well to regular use. The frame is solid, slats included, center support leg prevents sag over time. Price runs $1,800 to $2,500 depending on size and fabric.


Linen Pillows and Throws — Best Value in the Entire Catalog

The most underrated section of the McGee & Co website is textiles. The throw pillows and blankets represent the best quality-to-price ratio of anything they sell. The linen-blend throw pillows have substantial inserts — dense enough that pillows hold their shape and look full rather than deflated. The throw blankets have actual weight — blankets you can use rather than decorative pieces that provide no warmth. The practical reason to start here: a $60 throw pillow tells you more about whether the McGee & Co aesthetic works in your room than any amount of website browsing.

What to Skip — Save Your Money on These

  • Lower-priced side tables and accent tables — veneered surfaces over engineered wood, lightweight frames that feel wrong in person
  • Entry-level flatweave and printed rugs — fine for low-traffic bedrooms, show wear quickly in living rooms and entryways
  • Some outdoor pieces — mixed durability feedback, not all built for real outdoor conditions long-term
  • New catalog pieces without reviews — wait for buyer feedback before committing to anything recently added

McGee & Co — Buy vs Skip at a Glance

ProductWorth Buying?Price RangeReason
Siena Sofa✓ Yes$3,000–$4,500Solid construction, proven track record
Thea Chandelier✓ Yes$500–$900Best ROI piece in catalog
Dawson Bed✓ Yes$1,800–$2,500Solid frame, bouclé holds up well
Linen Pillows & Throws✓ Yes$40–$200Best value in entire catalog
Entry-level accent tables✕ Skip$300–$600Aesthetic stronger than construction
Budget flatweave rugs✕ Skip$200–$500Show wear quickly in high traffic

McGee & Co rewards selective buying. Start with lighting and textiles, move to upholstered seating, be careful with case goods. Buy the right pieces and they'll last years.

Shop McGee & Co — Official Site

How to Cook Steak on a Pit Boss Pellet Grill – Getting the Perfect Crust and the Right Internal Temperature
By Posted on 0 Comments9min read0 views
How to Cook Steak on a Pit Boss Pellet Grill – Getting the Perfect Crust and the Right Internal Temperature

How to Cook Steak on a Pit Boss Pellet Grill

People who say you can’t cook a great steak on a pellet grill haven’t figured out how to use a pellet grill correctly. That’s the honest starting point of this guide.

The common criticism of pellet grills for steak is valid but solvable. The concern is that pellet grills don’t get as hot as gas or charcoal grills, and a hot sear is what produces the Maillard reaction — the browning that gives a steak its crust, its flavor, and the reason it looks and smells the way a properly cooked steak should. The criticism is true. The default pellet grill temperature range of 225°F to 450°F doesn’t match the 600°F+ that a charcoal chimney at full roar produces.

The solution is the reverse sear method, which takes this apparent limitation and turns it into a genuine advantage. When you understand what the reverse sear is doing and why, you’ll cook better steak on your Pit Boss than most people cook on any grill.

Choosing the Right Steak

Not every steak is equally suited to the pellet grill or to the reverse sear method.

Best choices for the Pit Boss:

Ribeye — The most popular steak on a pellet grill for good reason. The fat content in a ribeye (the eye of fat in the center, the marbling throughout the muscle) provides self-basting during the cook and an intensely beefy flavor that stands up to smoke beautifully. A 1.5-inch ribeye on a Pit Boss with a proper reverse sear is one of the best things you can eat.

New York Strip — Less fat than the ribeye, firmer texture, beefy flavor. The strip has a fat cap on one edge that renders down beautifully during the smoke phase. Slightly less forgiving than the ribeye if overcooked because there’s less fat to provide moisture, so temperature monitoring is more critical.

Tomahawk — The ribeye with the long rib bone still attached. Visually spectacular, cooks exactly like a ribeye but takes longer because of the bone’s effect on heat transfer. The bone also conducts heat through the thicker part of the steak which can affect cooking evenness if you don’t know to expect it.

How to Cook Steak on a Pit Boss Pellet Grill — Getting the Perfect Crust and the Right Internal Temperature

T-Bone and Porterhouse — A strip and a tenderloin separated by a T-shaped bone. The challenge is that the tenderloin cooks faster than the strip, so the two different muscles will reach different temperatures at the same time. Manageable but requires attention.

Filet Mignon — Beautiful cut, extremely tender, very little fat. Works on the Pit Boss but is the most expensive cut and the least smoke-appropriate because the mild flavor of the tenderloin doesn’t gain as much from smoke exposure as the more robustly flavored cuts. If you’re cooking filet, a shorter smoke time and more emphasis on the sear is the right approach.

Thickness matters more than anything else: Thin steaks (under 1 inch) are not candidates for the reverse sear. They cook too quickly at low temperature and don’t have enough mass to develop any smoke flavor before they’re done. For steaks under an inch, skip the reverse sear and cook directly at high heat.

The sweet spot for the Pit Boss reverse sear is 1.5 inches to 2 inches thick. If you’re buying steaks for pellet grill cooking, ask your butcher to cut them to this thickness. Most grocery store steaks are cut thinner than this for display purposes; a butcher will cut to your specifications.

Seasoning

Great steak doesn’t need much. The goal is to enhance the beef flavor, not cover it.

Minimum approach:

  • Kosher salt — applied generously, at least 45 minutes before cooking or the night before
  • Coarse black pepper — applied just before the steak goes on the grill

That’s it. Salt and pepper is the foundation that every more complex steak seasoning is building on.

Why salt in advance: When you salt a steak and let it sit, the salt draws moisture to the surface (you can see a wet puddle on the steak within a few minutes). This moisture then slowly reabsorbs back into the meat over 30 to 45 minutes, taking the salt with it and seasoning the meat rather than just the surface. Salt applied immediately before cooking sits on the surface and draws out moisture that doesn’t have time to reabsorb, which can make the exterior wet and interfere with browning.

If you don’t have 45 minutes, salt immediately before the steak goes on — you’ll lose some of the deep seasoning benefit but you won’t have the wet surface problem either. What you want to avoid is salting 10 to 20 minutes before cooking, which is the worst of both worlds.

For more complex flavor:

  • Garlic powder (not garlic salt — it already contains salt and will make the steak too salty)
  • Smoked paprika
  • Onion powder
  • A small amount of cayenne if you like heat

Some people apply a light coat of olive oil or avocado oil before the rub to help the seasoning adhere and promote browning. Both work. Avocado oil has a higher smoke point than olive oil, which matters more during the sear phase than the smoke phase.

Pellet Selection for Steak

Beef is robust enough to handle stronger smoke woods than chicken or fish.

Hickory — The classic beef smoke wood. Strong, assertive, slightly sweet. For steaks specifically, where the smoke exposure time is shorter than a brisket cook, hickory works extremely well.

Oak — The most versatile beef smoke wood. Post oak in particular is the traditional smoke wood of Texas barbecue culture. Medium intensity, slightly nutty, never overpowering. Excellent with steak.

Cherry — Adds a deep mahogany color to the exterior of the steak and a mild, slightly sweet smoke flavor. Works well blended with hickory or oak to add color while the oak or hickory provides the primary smoke character.

Mesquite — The most intense smoke wood in common use. Works for steak only because the smoke exposure during a reverse sear is brief enough that mesquite doesn’t have time to turn bitter. If you love that campfire, southwest Texas smoke character, mesquite on a short steak cook is one place it works. Avoid it for longer cooks.

The Reverse Sear Method — The Approach That Changes Everything

The reverse sear takes the conventional grilling order — sear hot first, then finish at lower heat — and inverts it. You cook the steak slowly at low temperature first to bring it close to your target internal temperature throughout the entire thickness of the meat, then you sear it at maximum heat at the end to build the crust.

Why does this work better?

When you sear first and finish at lower heat, the outside of the steak goes through a temperature gradient. The crust is above 300°F while the center might be 70°F when the sear starts. By the time the center gets close to target temperature, the outer portion of the steak has been cooked through a range that can result in a thick gray band of overcooked meat surrounding a smaller perfect center.

The reverse sear eliminates this. By bringing the entire steak to near-target temperature slowly at 225°F, the whole thing is at nearly the same temperature edge-to-edge before the sear starts. The sear then happens over less surface area that needs heat, and it happens faster, creating the crust without continuing to cook the interior. The result is a steak that’s the right temperature from edge to edge with a perfect crust rather than a bullseye cross-section of overcooked-less overcooked-perfect-less overcooked-overcooked.

The steps:

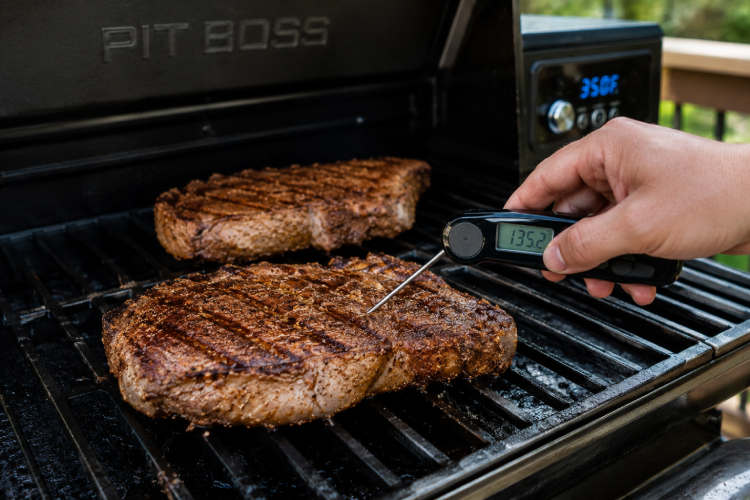
Step 1: Set the Pit Boss to 225°F and let it fully preheat. Place the seasoned steaks on the grill and insert a probe thermometer into the thickest part of one of them, horizontally through the edge of the steak so the tip is at the center.

Step 2: Smoke at 225°F until the internal temperature reaches the target pull temperature. This varies by your preferred doneness:

  • Rare: Pull at 110°F to 115°F
  • Medium-rare: Pull at 120°F to 125°F
  • Medium: Pull at 130°F to 135°F
  • Medium-well: Pull at 140°F to 145°F

At 225°F, a 1.5-inch ribeye takes approximately 25 to 40 minutes to reach these temperatures. Check after 20 minutes and then every 5 minutes.

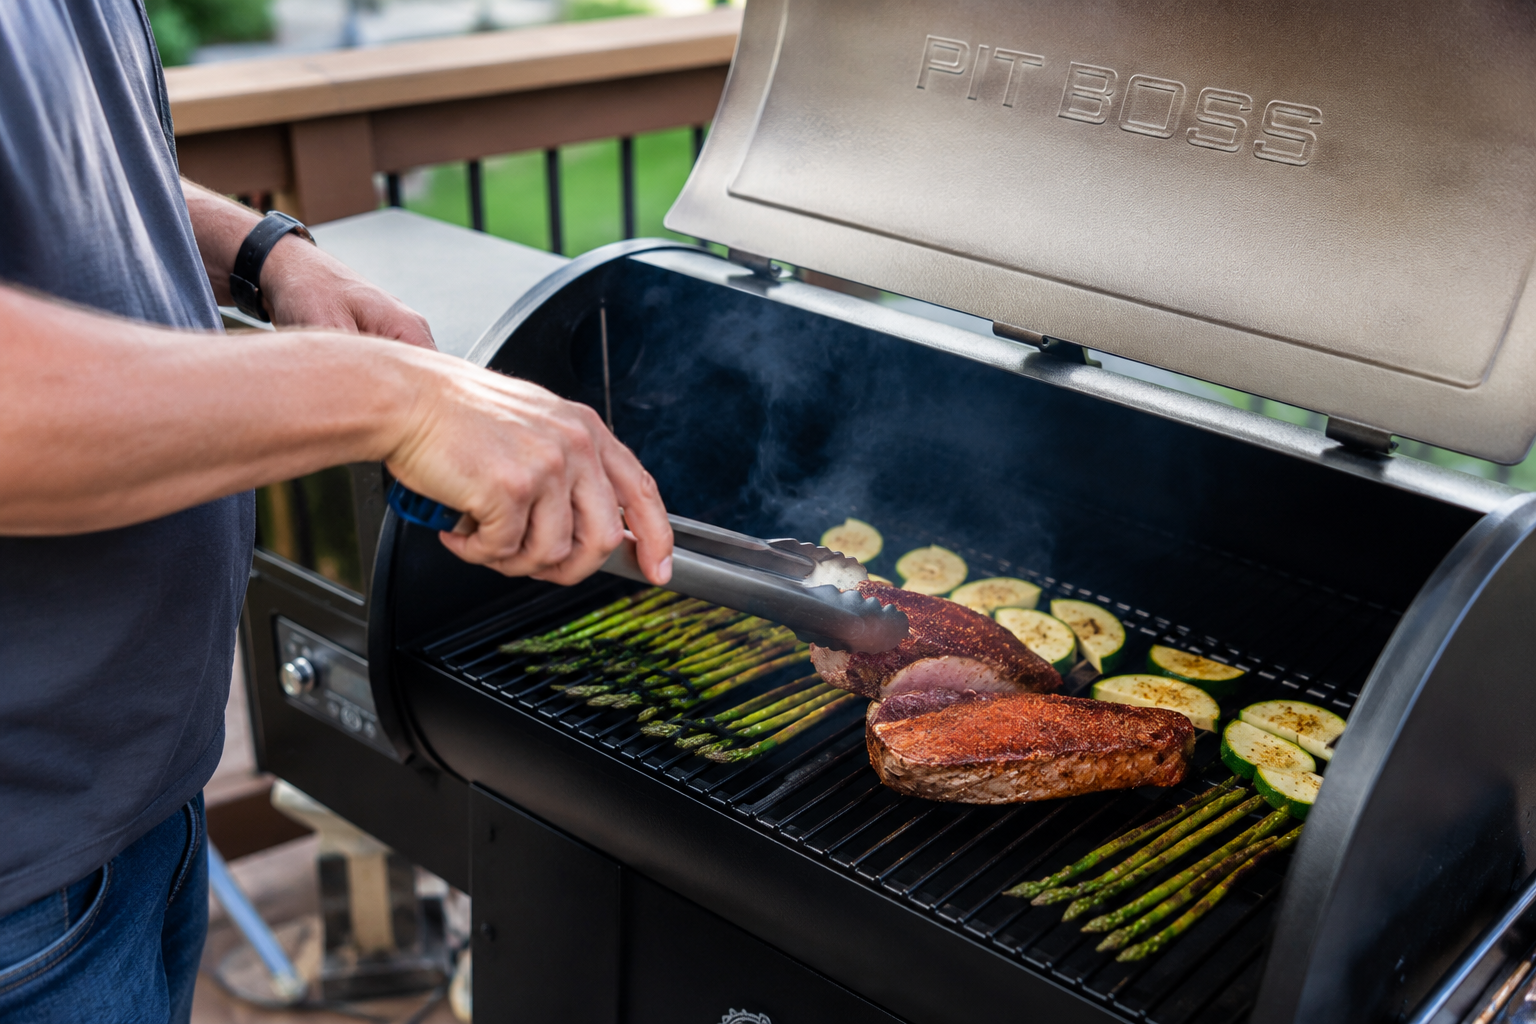
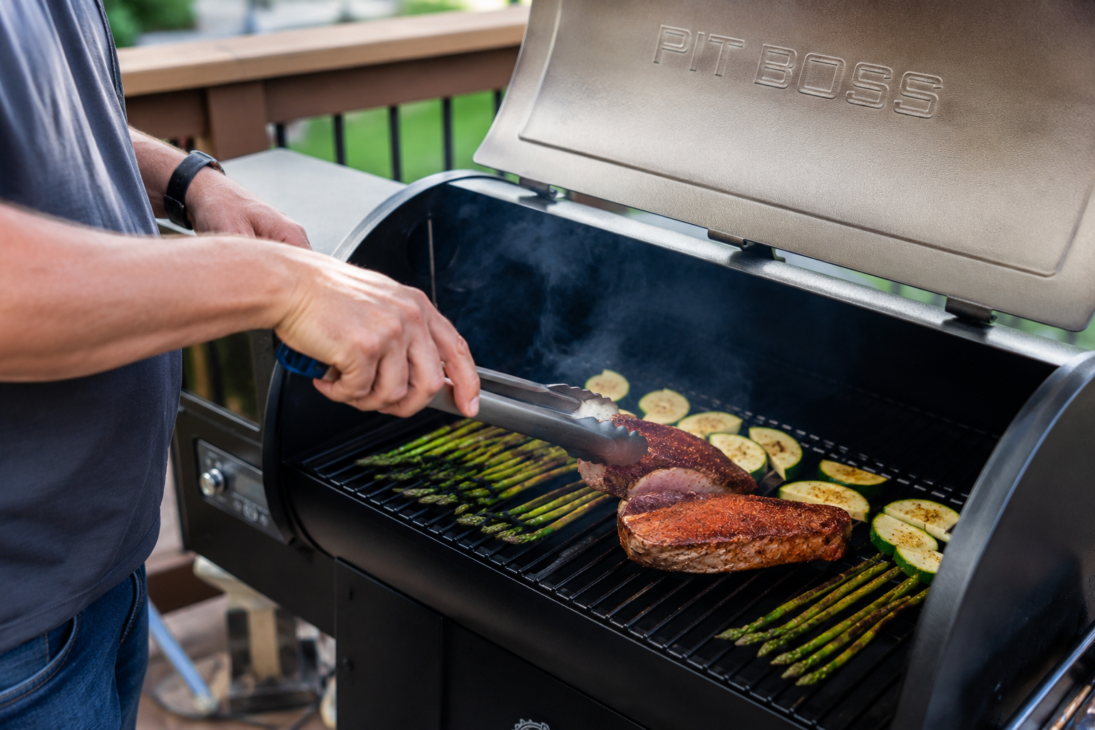
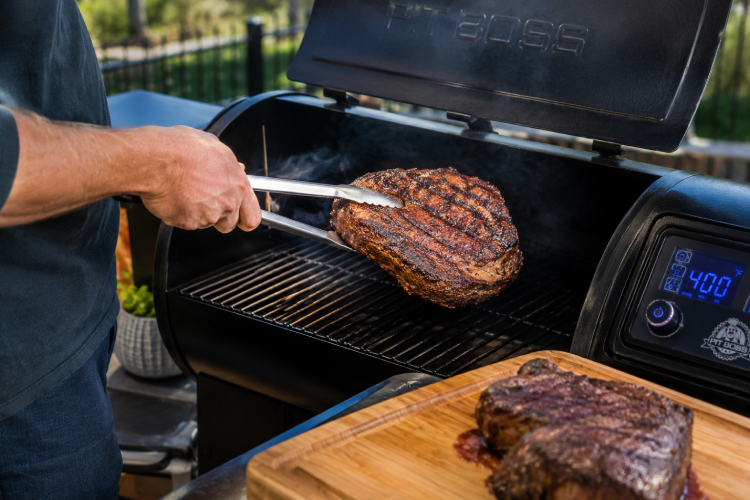
Step 3: Remove the steaks from the grill. Crank the Pit Boss to maximum temperature — the highest setting, typically 450°F to 500°F. On some Pit Boss models there is a sear mode or a slide plate that gives you direct flame access; use this if your model has it. It takes 15 to 20 minutes to fully preheat to maximum temperature. While the grill is preheating, let the steaks rest uncovered.

Step 4: When the grill is at maximum temperature, put the steaks back on. Sear for 1 to 2 minutes per side. You’re not cooking them further — you’re developing the crust. Don’t leave them on longer than this or you’ll push past your target internal temperature.

Step 5: Remove and rest for 5 minutes.

Direct High-Heat Method (for thinner steaks)

For steaks under 1 inch thick, the reverse sear doesn’t have enough time to work correctly. For these steaks, cook directly at the highest temperature your Pit Boss can produce.

How to Cook Steak on a Pit Boss Pellet Grill — Getting the Perfect Crust and the Right Internal Temperature

Lorem ipsum dolor sit amet, consectetur adipiscing elit. Ut elit tellus, luctus nec ullamcorper mattis, pulvinar dapibus leo.

Set to maximum temperature and preheat for 15 to 20 minutes. Place the steaks directly on the grates. Cook 2 to 3 minutes per side for medium-rare, monitoring temperature throughout. At high heat, a thin steak goes from undercooked to overcooked faster than you expect.

Finished Internal Temperatures

These are the finished temperatures after the rest period:

  • Rare: 120°F to 125°F (very red center, slightly warm)
  • Medium-rare: 130°F to 135°F (pink center, warm throughout)
  • Medium: 140°F to 145°F (slightly pink center, fully warm)
  • Medium-well: 150°F to 155°F (very little pink, fully cooked through)
  • Well done: 160°F+ (no pink, fully grey throughout)

The USDA recommends cooking whole muscle beef to 145°F internal. A medium-rare steak at 130°F is below the USDA guideline — this is the choice most steak-eating adults make daily with full understanding of the trade-off. If you’re cooking for someone with a compromised immune system, elderly individuals, or children, cooking to at least 145°F is the responsible choice.

The Butter Baste

This is optional but not really optional if you want the best possible steak. During the sear phase, a butter baste adds flavor and helps produce a more even, glossy crust.

In a small cast iron skillet or disposable aluminum pan on the grill during the sear phase, melt 2 tablespoons of butter with a smashed garlic clove and a sprig of thyme or rosemary. As the steaks sear, spoon the hot butter over them repeatedly. The butter promotes browning, the garlic and herbs infuse into the crust, and the result is a steak that tastes like something you’d pay $60 for at a restaurant.

Resting

Steak needs 5 minutes minimum rest. For large steaks over 1.5 inches thick, 8 to 10 minutes is better.

The standard advice about “the juices need time to redistribute” is accurate but it’s also worth noting what’s actually happening. Muscle fibers contract during cooking and squeeze liquid toward the center. During rest, the fibers relax and reabsorb some of that liquid. Cut in immediately and the liquid pours out; rest first and it stays in the meat.

Don’t tent the steak with foil during the rest unless the room is cold — foil traps steam and softens the crust you just worked to build.

Serving

Cut against the grain. This is the rule that matters as much as the cook itself. Find the direction of the muscle fibers and cut perpendicular to them. The same steak cut with the grain requires significantly more chewing than the same steak cut against the grain — the grain-against cut shortens the fibers, the grain-with cut means you’re chewing through long, intact muscle fibers.

For ribeye and strip steaks, the grain typically runs lengthwise through the steak. Cut across the width in ¾-inch to 1-inch slices.

Finish with a pinch of flaky salt (Maldon or similar) over the cut surface. The flaky salt adds crunch and pops the beefy, smoky flavor in a way that the kosher salt applied before cooking doesn’t replicate.

Quick Reference

Doneness

Pull temp (smoke phase)

Finished temp

Rare

110°F–115°F

120°F–125°F

Medium-rare

120°F–125°F

130°F–135°F

Medium

130°F–135°F

140°F–145°F

Medium-well

140°F–145°F

150°F–155°F

  • Pellets: Hickory, oak, or cherry
  • Smoke phase: 225°F, 25 to 40 minutes
  • Sear phase: Maximum heat (450°F+), 1 to 2 minutes per side
  • Rest: 5 to 10 minutes
  • Slice: Against the grain

Chicken Breast on a Pit Boss Pellet Grill — The Guide to Juicy Every Single Time

By Posted on 0 Comments7min read0 views

Chicken Breast on a Pit Boss Pellet Grill — The Guide to Juicy Every Single Time

Chicken Breast on a Pit Boss Pellet Grill — The Guide to Juicy Every Single Time

Chicken breast has a reputation problem and I get it. It’s the protein people default to when they’re trying to eat healthy, and because of that it gets cooked in a hurry, at the wrong temperature, with no preparation, and it comes out dry and flavorless and somehow gets blamed on the chicken rather than the technique. The chicken breast itself is fine. The cooking is usually the problem.

On a Pit Boss pellet grill, chicken breast can be something genuinely special — juicy with smoke flavor working all the way through, a slight char on the outside, and enough texture contrast to make it interesting rather than the protein you’re eating because you feel like you should. But it requires understanding a few things that most grilling guides skip over because they’re writing for people who are okay with mediocre chicken.

The Fundamental Problem with Chicken Breast

Chicken breast is lean, boneless, and completely unforgiving of overcooking. There’s no fat marbling inside the muscle to provide moisture as the temperature rises, and no bone to slow down the heat transfer. When chicken breast hits 165°F, the USDA says it’s done. When it hits 175°F, it’s dry. The window between done and too dry is about 10 degrees and can close in less than 5 minutes at high heat.

The solution is two-fold: prepare the chicken correctly before it goes on (brine), and cook it to the correct temperature while monitoring it constantly (thermometer).

Brining the Chicken Breast

This is the step that makes the biggest single difference to the end result. A brined chicken breast holds moisture through the cook in a way that unbrined chicken simply doesn’t.

Simple brine:

  • 4 cups cold water
  • 3 tablespoons kosher salt
  • 1 tablespoon sugar
  • Optional: garlic cloves, peppercorns, fresh thyme

Dissolve the salt and sugar in the water (you can use a cup of warm water to dissolve them and then add cold water to bring it to volume). Submerge the chicken breasts completely and refrigerate for at least 30 minutes. 1 to 2 hours is ideal. More than 4 hours and the texture starts to get mushy from the salt.

After brining, remove the chicken from the brine and pat completely dry with paper towels. Dry surface is important for getting any color or texture on the exterior.

If you don’t have time to brine: At minimum, season the chicken generously and let it sit at room temperature for 20 to 30 minutes before grilling. Cold chicken straight from the refrigerator onto the grill means the outside is cooking while the center is still catching up, which increases the risk of the exterior overcooking before the interior is done.

Getting the Chicken Breasts the Same Thickness

This is a step almost no home cook does and almost every good cook does. Chicken breasts taper from thick at one end to thin at the other. The thin end cooks twice as fast as the thick end. If you cook to the right temperature at the thick end, the thin end has been overcooked for 10 minutes. If you cook to the thick end’s timing, the thin end is dry and tough.

The fix is simple: pound the chicken breast to an even thickness using a meat mallet or rolling pin. Place each breast between two pieces of plastic wrap or in a zip-lock bag, and pound from the center outward until the entire breast is a consistent ¾ inch to 1 inch thick.

This is five minutes of work that produces dramatically more consistent results than any other single step besides brining.

Seasoning Options

Simple everyday seasoning:

  • 1 teaspoon kosher salt
  • ½ teaspoon black pepper
  • ½ teaspoon garlic powder
  • ½ teaspoon onion powder
  • ½ teaspoon smoked paprika
  • Drizzle of olive oil to help the seasoning stick and promote browning

Mix together and coat both sides of each chicken breast thoroughly. The olive oil also helps the exterior get some color on the grill rather than staying pale.

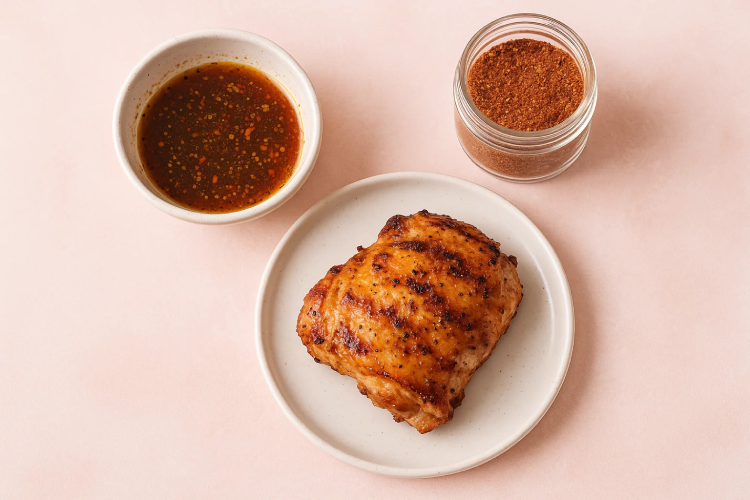
BBQ approach:
Start with the basic seasoning above and finish with a coat of your favorite barbecue sauce applied during the last 5 minutes of cooking. The sugar in BBQ sauce burns if applied too early, so brush it on at the end and let it caramelize rather than char.

Italian herb approach:

  • Salt, pepper, garlic powder
  • Dried oregano
  • Dried basil
  • Dried rosemary
  • Lemon zest if you have it

All of these work. The pellet grill adds smoke flavor that works as a fifth seasoning regardless of what you put on the outside, so simple seasonings often produce the best results because they let the smoke contribute without fighting it.

Pellet Selection

Chicken breast is mild enough that it can handle a range of smoke woods without being overpowered.

Apple or cherry wood pellets are the most popular choice for chicken. The mild, slightly sweet smoke complements poultry and produces good color on the exterior. Apple is the safer, more neutral choice; cherry gives a slightly darker color and a fraction more smoke intensity.

Pecan pellets work beautifully with chicken — slightly nuttier smoke, a little more depth than apple without being heavy.

Hickory: Use carefully with chicken breast. Hickory is strong enough that a full cook of chicken breast in heavy hickory smoke can produce a result that tastes more like smoke than chicken. If you like hickory, mix it 50/50 with apple to moderate the intensity.

Cooking Methods on the Pit Boss

There are two approaches that work well for chicken breast on a Pit Boss, and which you choose depends on whether you prioritize maximum smoke flavor or a grilled exterior.

Method 1: Low and slow, then sear

This is the “reverse sear” approach for chicken breast.

Start at 225°F. Place the chicken breast on the grill and smoke until the internal temperature hits 145°F to 150°F. This takes approximately 45 minutes to an hour depending on the size of the breast. At this point the chicken has absorbed significant smoke flavor and is close to done but not there yet.

Then crank the Pit Boss to its highest temperature setting (typically 450°F to 500°F) and sear the chicken for 2 to 3 minutes per side to develop color and texture on the exterior. Pull when internal temperature hits 160°F to 165°F.

This method gives you the best of both approaches — real smoke flavor from the low temperature phase, and good exterior texture from the high heat sear.

Method 2: Medium-high and direct

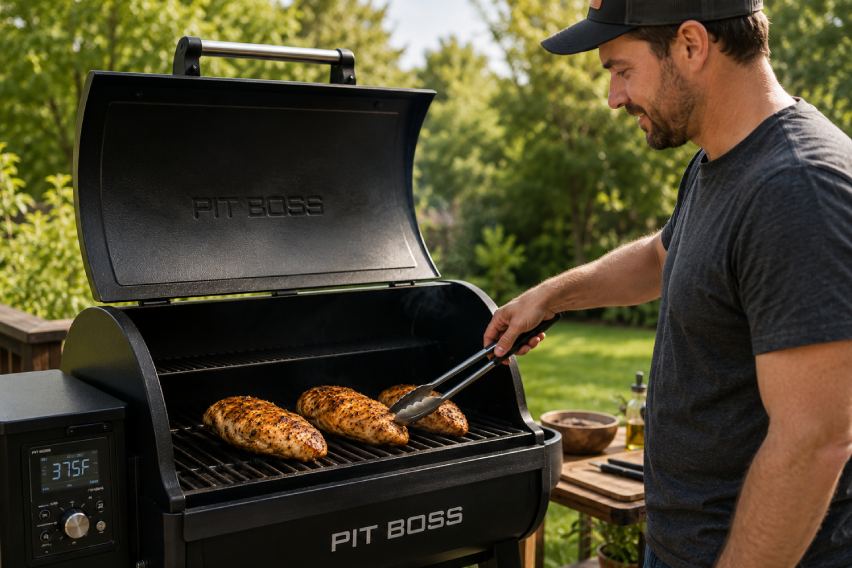
Set the Pit Boss at 375°F to 400°F and cook the chicken directly on the grates. At this temperature, the chicken develops color on the exterior while the interior cooks to temperature in approximately 15 to 20 minutes.

This method produces less smoke flavor than the reverse sear approach but takes half the time and still produces good results — the pellet grill ambient smoke during any cook contributes flavor even at higher temperatures.

Temperature Monitoring

Get a reliable instant-read thermometer and use it without apology. Cooking chicken breast without temperature monitoring is how you end up with dry chicken breast and a burned reputation for grilling.

Target internal temperature: 165°F at the thickest part of the breast. This is the USDA safe temperature. If you want to be more precise and are using a reliable thermometer, you can pull at 160°F — carryover cooking during the 5-minute rest will bring it to 165°F.

Insert the thermometer into the thickest part of the breast, parallel to the surface rather than straight down, to get a reading from the center of the meat rather than the underside. Keep the probe tip away from the grill grates or it’ll read the grate temperature rather than the meat temperature.

Resting

Chicken breast needs a rest of 3 to 5 minutes before cutting. This is less critical than with large cuts like brisket or turkey, but it’s still worthwhile — the juices redistribute during rest rather than running out onto the cutting board when you cut in immediately.

Tent the chicken loosely with foil while it rests. Tight foiling traps steam and softens any crust that formed on the exterior.

Serving

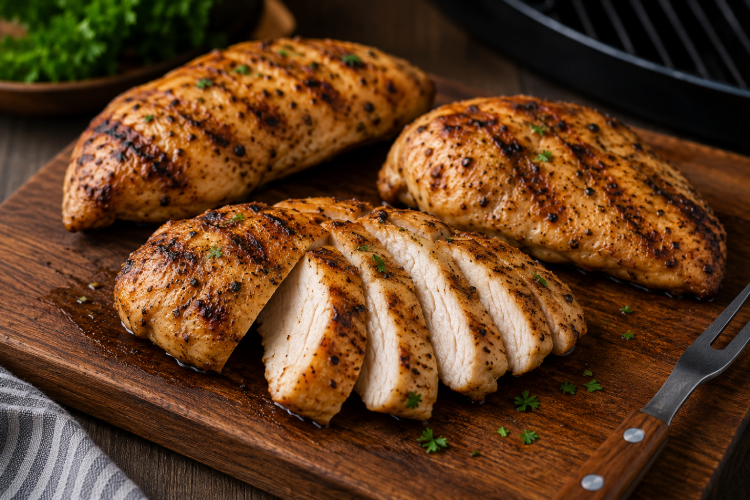
Slice against the grain of the chicken breast for the most tender result. The grain runs lengthwise through the breast; cutting perpendicular to this produces shorter, more tender mouthfuls.

A squeeze of fresh lemon over sliced smoked chicken breast makes the smoke flavor pop in a way that’s surprising if you’ve never tried it. The acid brightens everything.

Smoked chicken breast works in a dozen applications beyond serving whole — sliced over salads, chopped for tacos, folded into pasta, used in sandwiches. The smoke flavor carries through however you use it.

Troubleshooting

Chicken is dry: Almost always overcooked. Invest in a good thermometer and start checking at 155°F internal.

No color on the exterior: Skin or surface was wet before grilling. Pat completely dry and add a thin coat of olive oil or avocado oil before seasoning.

Rubbery texture: Could be undercooked, or the chicken went straight from the fridge to the grill. Let it come to room temperature before cooking.

No smoke flavor: Cook temperature was too high. Smoke absorption is most efficient at lower temperatures — cook at 225°F for at least the first half of the cook.

Quick Reference

  • Brine time: 30 minutes minimum, 2 hours ideal
  • Pound to: ¾ to 1 inch even thickness
  • Pellets: Apple, cherry, or pecan
  • Method 1: 225°F to 145°F, then sear at 450°F to 165°F
  • Method 2: 375°F to 400°F directly, 15 to 20 minutes
  • Done temperature: 165°F internal
  • Rest time: 3 to 5 minutes

Smoking Brisket on a Pit Boss Pellet Grill — How to Actually Get It Right

By Posted on 0 Comments9min read0 views

Smoking Brisket on a Pit Boss Pellet Grill — How to Actually Get It Right

Smoking Brisket on a Pit Boss Pellet Grill — How to Actually Get It Right

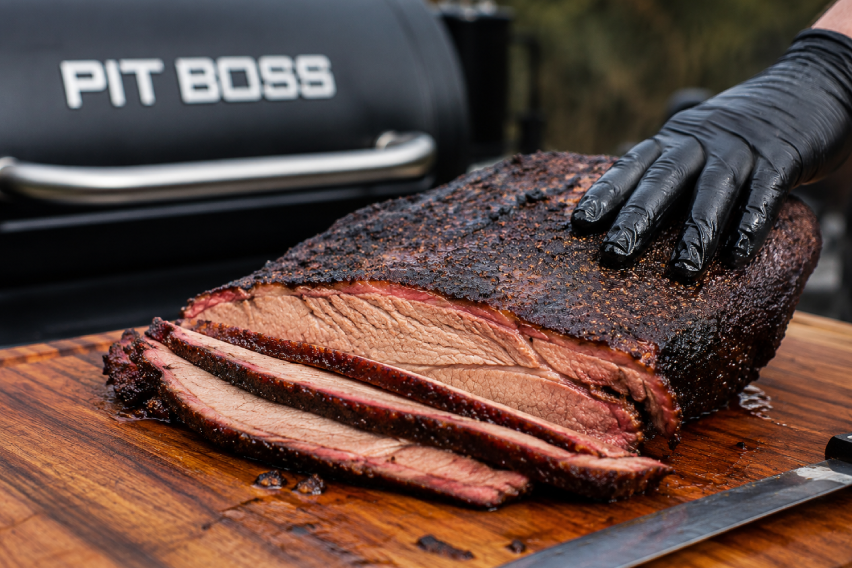
Brisket is the cook that sorts people into two groups. The first group tried it once, pulled a tough, dry, grey slab off the grill after eight hours and never went back to it. The second group figured out what went wrong, adjusted, and discovered that properly smoked brisket is the best thing you will ever eat off a grill. The gap between those two outcomes is almost entirely process.

Brisket is unforgiving of shortcuts in a way that other cuts aren’t. A chicken breast you pull 10 degrees too early is still edible. Brisket pulled too early is shoe leather. But when brisket comes off the Pit Boss exactly right — the flat sliceable and moist, the point falling apart, the smoke ring pink through the first quarter inch of meat, the bark dark and slightly crusty on the outside — it’s worth every hour it took.

This guide covers everything from buying the right brisket to slicing it correctly. Read through it completely before you start. Brisket is the one cook where you really need to understand the full picture before the meat hits the grill.

Choosing the Brisket

Brisket is a primal cut from the lower chest of the cow. The full packer brisket includes two distinct muscles: the flat (the leaner, thinner portion that most people picture when they think of brisket slices) and the point (sometimes called the deckle — a thicker, fattier muscle that sits on top of the flat and is the source of burnt ends if you’re making them separately).

Buy the full packer, not just the flat. A flat-only brisket cooked on a smoker almost always dries out because it lacks the fat protection of the point. The full packer allows the point’s fat cap to baste the flat during the cook. If you can only find a flat at your butcher, ask them to leave as much fat on it as possible.

Grade matters:

USDA Select is the minimum grade brisket in most grocery stores. The fat marbling is minimal and the results on a smoker are variable at best.

USDA Choice is what most competition pitmasters use and what you should aim for. Better marbling, more moisture in the flat, more consistent results.

USDA Prime is the top tier, with the most fat marbling. If you can find it at a price you’re comfortable with, it’s worth it — the additional intramuscular fat makes the flat significantly more forgiving during the long cook.

Wagyu brisket exists and is extraordinary if you have the budget. It’s also expensive enough that most people rightfully decide to get their technique sorted on Choice grade before spending Wagyu money.

Size: A full packer brisket typically runs 12 to 18 pounds. After trimming and shrinkage during the cook, you’ll lose roughly 30 to 40 percent of the raw weight. A 15-pound raw brisket yields approximately 9 to 10 pounds of finished meat. Plan for about ½ pound of cooked brisket per person.

Trimming the Brisket

This step takes 15 to 20 minutes and makes a meaningful difference to the finished result. Don’t skip it.

The fat cap — the thick layer of fat on one side of the brisket — needs to be trimmed down to approximately ¼ inch thick. This is enough fat to protect the flat during the cook and render down into flavor. More than ¼ inch and the fat doesn’t fully render, leaving a waxy, unpleasant layer. Less than ¼ inch and you lose the protection.

Smoking Brisket on a Pit Boss Pellet Grill — How to Actually Get It Right

Use a sharp boning knife or a flexible fillet knife. A dull knife on a brisket is genuinely dangerous because you end up using more pressure and losing control. Sharp knife, slow careful strokes.

Also trim off any hard, white fat chunks that you can see — particularly on the sides and underneath where the flat and point meet. Hard fat doesn’t render well and should be removed.

The brisket will look uneven after trimming. That’s fine. You’re going for a consistent fat cap thickness, not cosmetic perfection.

The Rub

Brisket in Texas — where the smoked brisket tradition is most deeply established — is cooked with nothing but salt and coarse black pepper. This “SPG” (salt, pepper, garlic) approach lets the beef flavor and the smoke do the talking, and it produces extraordinary results.

Classic Texas rub:

  • 2 parts kosher salt
  • 2 parts coarse black pepper (16 mesh is the standard — this is the grind you want, not fine ground)
  • 1 part garlic powder (optional, but most pitmasters include it)

Mix and apply generously to every surface of the brisket. Be more generous than you think is necessary — the brisket is a large piece of meat and a thin application of rub disappears into the bark without contribution.

Some people add additional spices — smoked paprika, onion powder, cayenne. These all work. But if this is your first brisket on the Pit Boss, start simple. Understand what the beef and smoke taste like together before you start adding complexity.

Apply the rub and let the brisket sit at room temperature for 30 minutes before it goes on the grill, or apply the rub the night before and refrigerate overnight uncovered. The overnight approach helps develop bark by drying the surface slightly.

Pellet Selection

Brisket is the cook where oak or hickory belongs.

Post oak: The traditional Texas smoke wood. Medium intensity, slightly nutty, no sweetness. Post oak complements beef without fighting it and has been the pit wood at the great Texas barbecue joints for generations. If you can find post oak pellets, use them.

Hickory: Stronger than oak, with a more pronounced smoke flavor. Works extremely well with brisket. If this is your first brisket cook, hickory produces the “this smells like barbecue” smoke that most people associate with the style.

Oak and cherry blend: Some pitmasters use a 70/30 oak and cherry blend. The cherry adds a slight sweetness and a darker bark color without changing the fundamental beef-and-oak flavor profile.

Avoid: Fruit woods alone (apple, peach) on brisket — they’re too mild for a 12-hour cook and the smoke flavor gets lost. Mesquite has too much intensity for a cook this long and can produce a bitter result.

Setting Up the Pit Boss

Fill the hopper completely. A brisket cook will run 12 to 16 hours. You’ll probably need to refill the hopper at least once — check it every 4 to 5 hours and refill before it runs low. Running out of pellets mid-cook and having the temperature drop significantly is the mistake you most want to avoid.

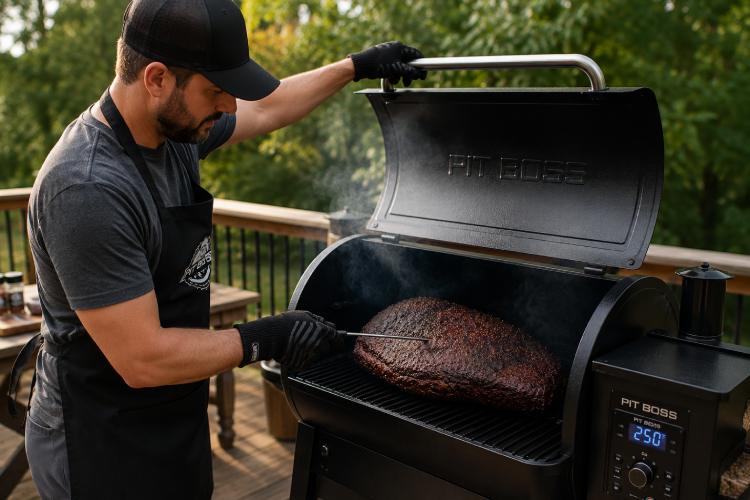
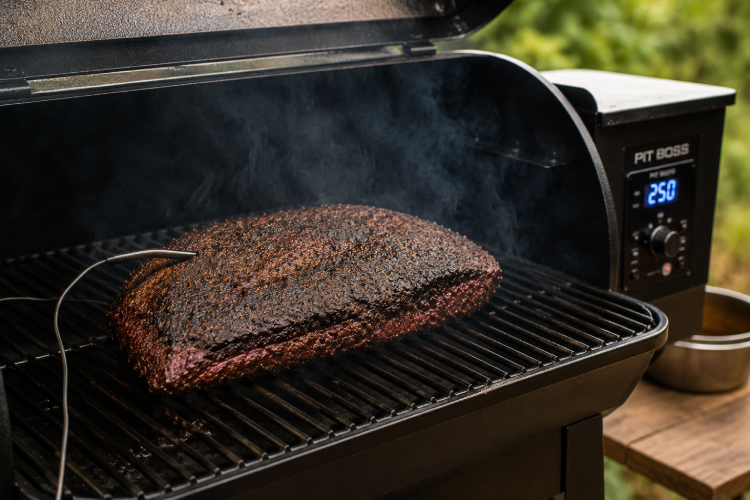
Temperature: 225°F to 250°F. This is the cooking temperature you’ll maintain through the majority of the cook. Some pitmasters cook entirely at 225°F for maximum smoke absorption. Some cook at 250°F to shorten the overall time slightly. 225°F gives you more time in the smoke and a slightly more pronounced smoke flavor; 250°F shaves an hour or two off the total time. Both approaches produce excellent brisket.

Let the Pit Boss fully preheat to temperature before the brisket goes on. This takes 15 to 20 minutes. Make sure you’re at stable temperature, not still climbing.

Read our full Pit Boss Grill Review!

Probe placement: Insert a leave-in probe thermometer into the thickest part of the flat, angled toward the center of the muscle. This is where the flat is slowest to cook and where you’re going to track the temperature through the stall and to the finish.

Placement on the grates: Put the brisket fat-side up or fat-side down? This is one of the most argued questions in barbecue. Fat-side up lets the rendering fat baste the meat as it drips down. Fat-side down creates a barrier between the direct heat from below and the flat. On a Pit Boss pellet grill with its convection-style heat, the heat source isn’t primarily from below the way it is on an offset smoker, so fat-side up works well and is the common recommendation.

The Cook — Phase by Phase

Phase 1: The Smoke (225°F, first 4 to 6 hours)

This is where the magic happens. The brisket is absorbing smoke at maximum efficiency during this phase because the surface is still cool and moist enough to attract smoke particles. Don’t open the lid unnecessarily during this phase — every lid lift drops the temperature 25 to 30°F and extends the cook time. Trust the process.

The bark is beginning to form during this phase. You’ll see the surface darken from the rub and the smoke exposure. This is good. You’re building the exterior crust that’s the defining feature of great smoked brisket.

Phase 2: The Stall

At some point between 150°F and 175°F internal temperature, the thermometer will stop moving. It will sit at the same temperature for what can feel like an alarming amount of time — sometimes 2 hours, sometimes 4 hours. This is completely normal and has a known explanation.

As the surface of the brisket heats up, moisture inside the meat migrates to the surface and evaporates. The energy being put into the brisket by the grill is being consumed entirely by this evaporative cooling effect — the same reason sweating keeps you cool on a hot day. The temperature isn’t rising because the energy balance is in equilibrium.

The stall resolves on its own. You can wait it out, or you can wrap the brisket at this point (see below).

Phase 3: The Wrap (optional but recommended)

Most pitmasters wrap the brisket in butcher paper or foil when it hits the stall (approximately 160°F to 165°F internal). Wrapping traps the heat and eliminates the evaporative cooling effect, pushing the brisket through the stall more quickly and protecting the bark from over-darkening during the remainder of the cook.

Butcher paper vs foil:

Butcher paper (specifically pink or peach unlined butcher paper, not wax paper) is the preferred wrapping method for most competition pitmasters. It breathes slightly, allowing some moisture to escape while still accelerating the cook. The bark holds up better through a butcher paper wrap than through foil.

Smoking Brisket on a Pit Boss Pellet Grill — How to Actually Get It Right

Foil (the “Texas crutch”) wraps tighter and accelerates the cook more aggressively. It can soften the bark if you wrap too early or leave it wrapped too long. The benefit is a more braised, tender result — some people prefer this.

To wrap: pull the brisket, place it on two overlapping sheets of butcher paper (or heavy-duty foil) fat-side down, pour a small splash of beef tallow or melted butter on top if you have it, and wrap tightly. Return to the grill.

Phase 4: The Finish

After wrapping, the temperature will begin rising again. You’re now cooking to probe tenderness, not just temperature. The target internal temperature for the flat is 200°F to 205°F, but temperature is the starting point for the probe test, not the finish line.

The probe test: Push the instant-read thermometer probe into the thickest part of the flat. It should slide in with essentially no resistance — like inserting a probe into room temperature butter. If you feel any resistance at all, the brisket isn’t ready. Put it back on for another 30 minutes and test again. This “probe tender” test is how you know the collagen has fully converted to gelatin and the brisket will actually slice and eat the way you want it to.

A brisket that tests probe tender at 195°F is done. A brisket that still has resistance at 210°F needs more time. The thermometer reading is a guideline; the probe feel is the actual indicator.

The Rest — The Most Important Step

More than any other cut of meat, brisket needs a proper rest. A minimum of 1 hour. Two hours is better. Some competition pitmasters rest brisket for 4 to 8 hours in a cambro cooler.

Here’s why this matters: brisket is full of collagen that has converted to gelatin during the long cook. This gelatin is what makes the meat moist and gives it that characteristic sticky richness. During the rest period, this gelatin sets slightly and the juices redistribute throughout the muscle. Cut into a brisket immediately off the grill and the juices run out and the gelatin hasn’t set — you get dry, stringy slices. Rest the brisket properly and you get slices that hold together and release moisture in your mouth rather than onto the cutting board.

How to rest: Wrap the brisket (still in its butcher paper or foil) in a towel and place it in a cooler. The insulation keeps it at safe serving temperature for 4 to 6 hours without any refrigeration needed. This is the hack that allows you to finish the brisket ahead of time without serving it cold.

Slicing

This is the final step that most people rush and it matters more than most people expect.

Separate the flat and the point before slicing. The flat and point have different grain directions, and you need to slice against the grain of each independently. Slicing with the grain produces chewy, stringy slices; slicing against the grain cuts through the muscle fibers and gives you tender slices.

Find the grain direction of the flat and slice perpendicular to it in ¼-inch thick slices. These are your primary brisket slices.

The point can be sliced similarly or cubed into burnt ends. Burnt ends — cubed, sauced, and returned to the smoker for another hour — are arguably the best thing that comes from a whole packer brisket.

Quick Reference

  • Best cut: Full packer, USDA Choice or Prime
  • Trim fat cap to: ¼ inch
  • Rub: Kosher salt, coarse black pepper, garlic powder
  • Pellets: Post oak, hickory, or oak-cherry blend
  • Cook temperature: 225°F to 250°F
  • Wrap at: 160°F to 165°F internal (butcher paper preferred)
  • Done temperature: 200°F to 205°F, probe tender
  • Rest time: Minimum 1 hour, 2 hours preferred

How to Smoke a Turkey on a Pit Boss Pellet Grill — The Complete Guide

By Posted on 0 Comments8min read0 views

How to Smoke a Turkey on a Pit Boss Pellet Grill — The Complete Guide

How to Smoke a Turkey on a Pit Boss Pellet Grill — Everything You Need to Know

Let me be honest with you about something before we get into any of this. Smoked turkey gets a bad reputation in a lot of households because someone, at some point, pulled a dried-out bird off a grill and declared the whole idea a mistake. That reputation is completely undeserved and almost always the result of two problems — no brine, and cooking too hot for too long without any attention to internal temperature.

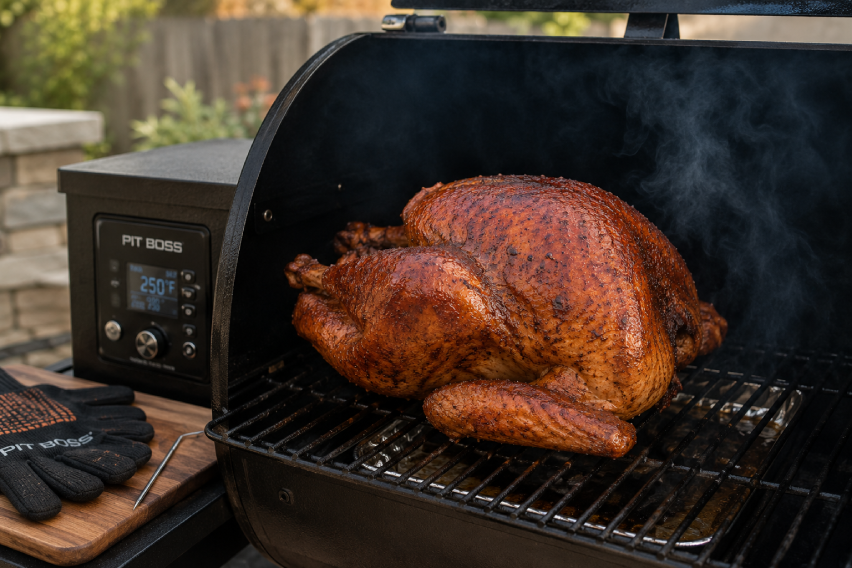
Get those two things right and a smoked turkey from a Pit Boss is genuinely one of the most impressive things you can put on a table. The smoke that gets into the skin and the meat during a low and slow cook does something to a turkey that oven roasting simply can’t replicate. You get this mahogany color on the outside, a faint smokiness in every bite, and — if the brine did its job — meat that’s actually moist rather than the chalky dry texture that’s ruined so many Thanksgiving memories.

So let’s talk about how to actually do this correctly.

Choosing the Right Turkey

Size matters on a pellet grill in a way it doesn’t in an oven, and this is the first decision most people don’t think carefully enough about.

A 12 to 15 pound turkey is the sweet spot for smoking. It fits comfortably on most Pit Boss grill grates with clearance for the lid, it takes 4 to 5 hours at smoking temperature, and it cooks evenly without the dramatic temperature difference between breast and thigh that larger birds develop. A 20-pound bird is manageable but requires more patience and more attention to ensure the thigh comes up to temperature before the breast dries out.

If you’re feeding a big group, smoke two 12-pound turkeys rather than one 22-pounder. Two smaller birds give you more surface area for smoke penetration, cook in less time, and carve into more manageable portions.

Fresh vs frozen: If you’re using frozen, give it a full 24 hours in the refrigerator for every 4 to 5 pounds of bird. A 14-pound turkey needs at least 3 days to fully thaw in the fridge. Partially thawed turkey going onto the grill is a food safety issue and a cooking nightmare — the outside will cook and dry out while the inside is still fighting to come to safe temperature.

The Brine — Don't Skip This

This is non-negotiable. Turkey is lean meat with very little fat marbling to protect it during a long cook. Without a brine, even a carefully cooked smoked turkey can finish dry. With a brine, you’ve given the meat a fighting chance.

Simple wet brine:

  • 1 gallon cold water
  • 1 cup kosher salt (not table salt — it’s too fine and too salty by volume)
  • ½ cup brown sugar
  • 2 tablespoons black peppercorns
  • 4 cloves garlic, smashed
  • Fresh herbs if you have them — thyme and rosemary work well
  • Optional: 1 orange cut in half, squeezed and dropped in

Dissolve the salt and sugar in a cup of hot water first, then add everything to the cold water. Submerge the turkey completely. If the bird floats, weight it down with a plate. Brine in the refrigerator for at least 12 hours and up to 24 hours. Longer than 24 hours and you start to get an unpleasantly salty result.

How to Smoke a Turkey on a Pit Boss Pellet Grill — Everything You Need to Know

After brining, remove the turkey, rinse it thoroughly under cold water, and pat it completely dry with paper towels. This is important — wet skin doesn’t crisp. Dry skin crisps.

Some people prefer a dry brine, which is exactly what it sounds like: rub kosher salt generously all over the bird, including under the skin if you can get your hand in there, and let it sit uncovered in the refrigerator for 24 to 48 hours. The salt draws out moisture, which then reabsorbs back into the meat along with the salt. Same principle, different process. Dry brining also dries the skin out beautifully for crispy results.

Pellet Selection

This is one of those decisions that sounds complicated and really isn’t. Turkey is mild enough that it takes smoke flavor well without being overwhelmed by it, which gives you some flexibility.

Apple wood pellets are the most popular choice for poultry and with good reason. The smoke is sweet, mild, and slightly fruity. It complements the turkey without dominating it. Apple is hard to go wrong with.

Cherry wood pellets give you a slightly deeper color on the skin — that dark mahogany look that makes a smoked turkey look like it belongs on a magazine cover. The smoke flavor is similar to apple but with a little more depth. Cherry and apple mixed is one of the classic poultry combinations.

Pecan pellets are a Texas tradition with poultry. Slightly nuttier smoke, more pronounced than apple but still solidly in the medium category. Works extremely well with turkey.

Hickory or mesquite: Use with caution. Both are heavy smoke woods that can overpower turkey meat during a long cook. If you love the idea of hickory, mix it 50/50 with apple to soften the intensity.

Setting Up Your Pit Boss

Start by filling the hopper completely. A whole turkey takes 4 to 6 hours and you don’t want to be refilling pellets mid-cook.

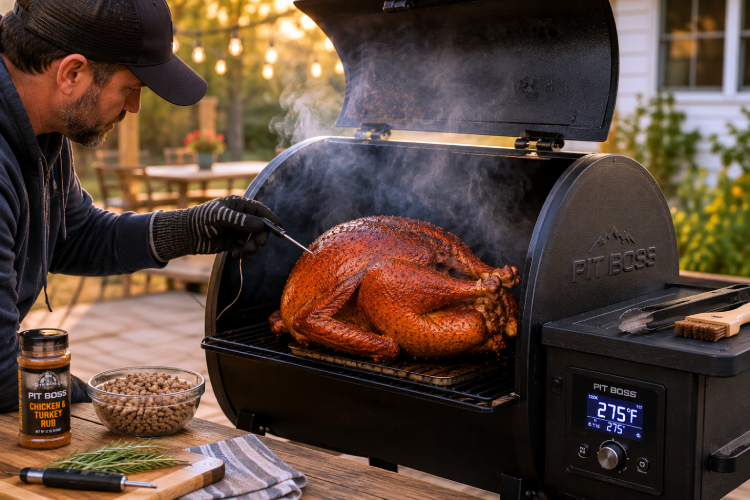
Temperature: Start at 225°F for the first 2 to 3 hours. This is where the smoke absorption happens — low temperature, maximum time for smoke to penetrate the meat. After 2 to 3 hours, bump it up to 325°F to finish. This higher heat crisps the skin, which stays soft and rubbery if you cook the entire bird at 225°F.

Turn on your Pit Boss and let it fully preheat before the bird goes on — this takes about 15 minutes. Make sure the grates are clean. Clean grates mean better heat distribution and no residual flavors from whatever you cooked last time.

Drip pan: Place a drip pan on the lower rack or directly below the turkey with about a cup of chicken broth in it. This does two things — it catches drips that would otherwise cause flare-ups, and the moisture from the simmering broth helps maintain a slightly humid cooking environment that protects the breast meat from drying out.

Prepping the Bird

Remove the giblets from the cavity — the turkey usually comes with a bag tucked inside the body cavity and sometimes one inside the neck cavity. Check both. Giblets going onto the grill with the turkey won’t ruin anything but they’re wasted space.

Spatchcocking (optional but worth considering): Removing the backbone and flattening the turkey before smoking is the move that solves almost every turkey problem simultaneously. The bird cooks in half the time, the skin across the entire surface gets equal exposure to heat, and the breast and thigh reach finished temperature at nearly the same time rather than the breast drying out while you wait for the thigh.

To spatchcock: place the turkey breast-side down, use heavy-duty kitchen shears to cut along both sides of the backbone and remove it. Flip the bird breast-side up and press firmly on the breastbone until you hear a crack and the bird lies flat. That’s it. Simple, and it transforms the cooking result.

Butter under the skin: Slide your hand between the breast skin and the breast meat and create a pocket. Push softened butter mixed with garlic, thyme, and a pinch of salt directly onto the breast meat. As the turkey cooks, the butter melts into the breast meat and keeps it moist while adding flavor that dry rubs on the outside can’t deliver into the meat itself.

Exterior rub: Mix together:

  • 2 tablespoons olive oil
  • 1 tablespoon kosher salt
  • 1 teaspoon black pepper
  • 1 teaspoon garlic powder
  • 1 teaspoon onion powder
  • 1 teaspoon smoked paprika
  • ½ teaspoon dried thyme
  • ½ teaspoon dried rosemary

Rub this over every exposed surface of the turkey. Work it into every crease and cavity.

The Cook

Whole turkey cook timeline (12–14 lb bird):

Smoke at 225°F for approximately 2 to 3 hours, then increase to 325°F until finished. Total time: 4 to 5 hours.

Spatchcocked turkey cook timeline:

Cook entirely at 325°F. Total time: 2 to 2.5 hours.

These are guidelines, not guarantees. Every turkey is different, every grill runs slightly differently, and ambient temperature affects cook time. The only thing that tells you the turkey is done is a thermometer.

Target temperatures:

  • Breast meat: 165°F — this is the USDA safe temperature. If you want juicier breast meat, pull at 160°F and let carryover cooking finish the job during the rest period.
  • Thigh meat: 175°F — the thigh is dark meat with more collagen, and it actually benefits from a slightly higher temperature to break that collagen down into gelatin. A thigh pulled at 165°F can be slightly chewy.

Insert the thermometer probe into the thickest part of the breast without touching bone for the breast reading, and into the thickest part of the thigh (avoiding the bone) for the thigh reading.

How to Smoke a Turkey on a Pit Boss Pellet Grill — Everything You Need to Know

The stall: You may notice the internal temperature stops rising somewhere around 150°F to 155°F and just sits there for 30 to 45 minutes. Don’t panic. This happens because moisture evaporation from the surface of the meat cools it at the same rate the heat is adding to it. It resolves on its own. Don’t crank the heat trying to push through it.

The Rest

This is the step that most people skip because the turkey looks done and the family is hungry. Don’t skip it.

Pull the turkey from the grill when the thigh hits 175°F. Tent it loosely with foil and let it rest for at least 20 to 30 minutes before carving. During this rest period, the temperature inside the bird continues to rise slightly (carryover cooking) and the juices that have been driven toward the center of the meat by heat redistribute back through the muscle fibers. Cut into a turkey immediately off the grill and those juices run out onto the cutting board. Rest the turkey first and they stay in the meat.

Carving and Serving

Remove the legs by cutting through the joint where the thigh meets the body — it should separate easily if the turkey is fully cooked. Separate the thigh from the drumstick the same way.

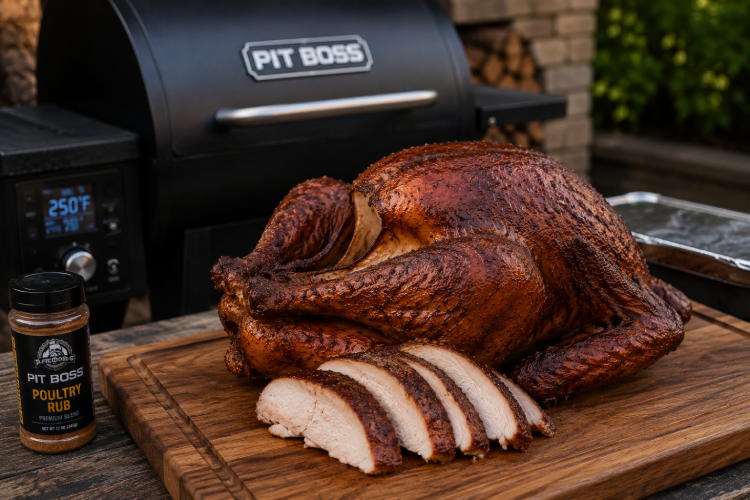
For the breast meat, slice parallel to the breastbone rather than across it. This cuts with the grain of the breast meat rather than against it, which gives you longer, cleaner slices.

The smoked turkey will have a pink ring just below the skin — the smoke ring. This is not undercooked meat. It’s a chemical reaction between the smoke compounds and the myoglobin in the muscle. It’s actually the visual evidence that your smoke penetrated the meat, which is exactly what you want.

Quick Reference

  • Bird size: 12 to 15 pounds ideal
  • Brine: Minimum 12 hours, maximum 24
  • Pellets: Apple, cherry, or pecan
  • Temperature: 225°F for 2–3 hours, then 325°F to finish
  • Breast done: 165°F internal
  • Thigh done: 175°F internal
  • Rest time: 20 to 30 minutes minimum

Fabrique Fashion Review 2026 – Designer Fashion That Delivers Impressive Value

By Posted on 0 Comments13min read1 views

Fabrique Fashion Review 2026 – Designer Fashion That Delivers Impressive Value

fabrique reviews

Fabrique offers a refreshing alternative for shoppers who appreciate designer-led fashion but do not necessarily want to pay traditional luxury-house prices.

Instead of presenting one fixed brand aesthetic, Fabrique works as a global designer collective. Its platform brings together more than 350 fashion creatives, allowing customers to discover clothing and accessories shaped by different design backgrounds, inspirations and creative perspectives. Every collection feels slightly different, yet the overall selection remains polished, modern and thoughtfully curated.

The brand became even more noteworthy in 2026 through its ready-to-wear collaboration with Vera Wang. The Spring/Summer 2026 capsule launched on March 18 and introduced Vera Wang’s recognisable design language through a more accessible contemporary fashion format.

For shoppers seeking distinctive silhouettes, premium-looking fabrics and named designer involvement without entering the highest luxury price bracket, Fabrique presents a strong value proposition.

Quick Highlights

  • ✅ Global designer collective featuring more than 350 creatives
  • ✅ Individual products are connected to named designers and their creative vision
  • ✅ Exclusive Vera Wang x Fabrique Spring/Summer 2026 collaboration
  • ✅ Broad range of dresses, denim, shirts, matching sets, tailoring and leather bags
  • ✅ Contemporary designer pricing that remains below many established luxury labels
  • ✅ Strong selection of elevated wardrobe essentials and statement pieces
  • ✅ Leather bags available in suede, calfskin, Nappa and top-grain leather
  • ✅ New collections and designer-led arrivals added regularly
  • ✅ Free shipping promotions available on the official website
  • ✅ Newsletter subscribers can receive 15% off their first purchase
  • ✅ Loyalty rewards can provide coupons worth up to $50
  • ✅ Seasonal promotions can make designer pieces even more accessible

Fabrique’s official store currently highlights free shipping, a 15% newsletter discount and a loyalty programme offering coupons of up to $50.

Best for: Style-conscious shoppers who want original designer fashion, premium materials and more exclusivity than mainstream contemporary brands, while spending considerably less than they might at traditional luxury fashion houses.

About Fabrique

Fabrique describes itself as a designer-collective brand rather than a conventional fashion label. Instead of relying on one creative director to define every collection, the platform collaborates with hundreds of designers from different regions and fashion backgrounds.

This approach creates a diverse catalogue that can include romantic occasion dresses, architectural tailoring, experimental denim, relaxed wardrobe essentials, sculptural knitwear and refined leather accessories.

The designer’s name is often displayed alongside the product, giving shoppers greater insight into the person and creative idea behind the garment. This adds a sense of provenance that is often missing from mass-market fashion.

Fabrique’s catalogue currently includes:

  • Designer dresses
  • Shirts and blouses
  • Jeans and denim
  • Skirts and trousers
  • Matching sets
  • Blazers and jackets
  • Trench coats
  • Knitwear
  • Coats
  • Shoulder bags
  • Hobo bags
  • Totes
  • Mini bags and leather accessories

The official site continues to release new pieces from its global creative network and describes its collections as exclusive designs produced in collaboration with more than 350 designers.

Fabrique Review: Full Breakdown

The Designer-Collective Concept

Fabrique’s greatest strength is its ability to offer multiple designer perspectives through one shopping platform.

Most fashion retailers either sell products from established third-party brands or create everything through one internal design team. Fabrique follows a different model. Independent designers contribute individual collections and products, while the platform provides the shared development, manufacturing and retail infrastructure.

This means customers are not limited to one repeated seasonal aesthetic. One designer may specialise in soft draping and romantic dresses, while another may focus on tailoring, leather accessories or unconventional denim.

The result is a collection that feels varied but still intentionally curated.

For customers, the model provides several benefits:

  • Greater design variety
  • Access to named creative talent
  • More distinctive silhouettes
  • Limited-feeling capsule collections
  • Designer storytelling attached to individual products
  • A broader choice than a traditional single-designer label

The platform is particularly appealing to shoppers who enjoy discovering new designers but prefer the convenience of purchasing through one central store.

Vera Wang x Fabrique

The Vera Wang collaboration is one of the strongest reasons to explore Fabrique in 2026.

The Spring/Summer 2026 ready-to-wear capsule was designed to present Vera Wang beyond bridal fashion, translating her aesthetic into modern wardrobe pieces. The collection officially launched on March 18, 2026.

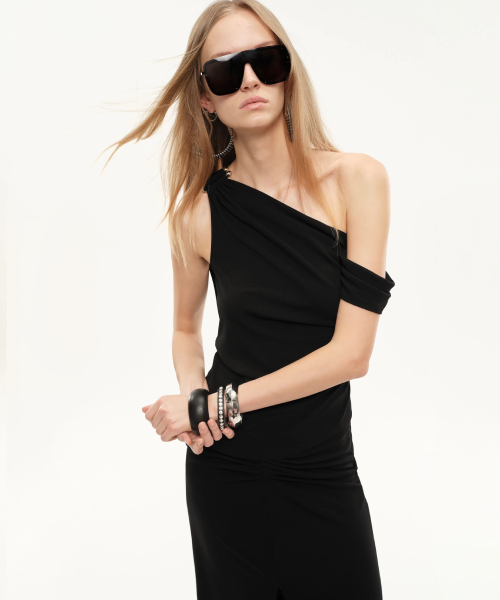
The collaboration includes contemporary separates and dresses that combine sculptural shapes, asymmetry, layering and Vera Wang’s signature approach to understated drama.

Current Fabrique listings include Vera Wang collaboration pieces such as:

  • Asymmetric pleated dresses
  • Layered accordion dresses
  • Cotton denim
  • Draped skirts and tops
  • Knit dresses
  • Silk statement pieces

Examples listed by Fabrique include Vera Wang dresses around $428, with more elaborate silk designs reaching approximately $578 before promotional discounts.

Compared with the pricing of many established luxury designer collections, this gives customers an opportunity to experience Vera Wang’s design language at a much more approachable price level.

Best for. Shoppers who admire Vera Wang’s modern, architectural and minimalist aesthetic but want something suitable for everyday, evening or occasion wear rather than bridal fashion.

Verdict. The collaboration strengthens Fabrique’s credibility as a serious designer platform and offers meaningful value for customers who want a recognisable luxury design perspective at contemporary pricing.

Quality and Materials

Fabrique’s selection includes a wide range of fabrics and construction techniques. Current product listings feature materials such as:

  • Silk and silk blends
  • Linen and linen blends
  • Cotton jacquard
  • Cotton-cashmere blends
  • Tencel and lyocell
  • Acetate blends
  • Merino wool
  • Alpaca blends
  • Calfskin leather
  • Nappa leather
  • Suede
  • Top-grain leather

Many products also include design details such as hand-painted prints, embroidery, smocking, pleating, lacework, draping and asymmetric construction.

For example, Fabrique’s dress collection currently includes hand-painted silk-linen organza, crinkled silk blends, cotton jacquard, embroidered lace and structured lightweight fabrics.

These fabric choices and finishing details help distinguish the brand from basic high-street fashion.

Best Fabrique Products Worth Buying

The Vera Wang capsule is ideal for customers seeking statement fashion with established designer credibility.

Top Features

  • Recognisable Vera Wang design direction
  • Modern asymmetrical silhouettes
  • Sculptural layering and draping
  • Dresses, separates and denim options
  • Contemporary pricing compared with traditional luxury collections
  • Exclusive availability through Fabrique

Best for. Evening dressing, creative events, modern occasion wear and customers building a more directional wardrobe.

Verdict. This is Fabrique’s most significant collaboration and one of the clearest examples of the value available through its designer-collective model.

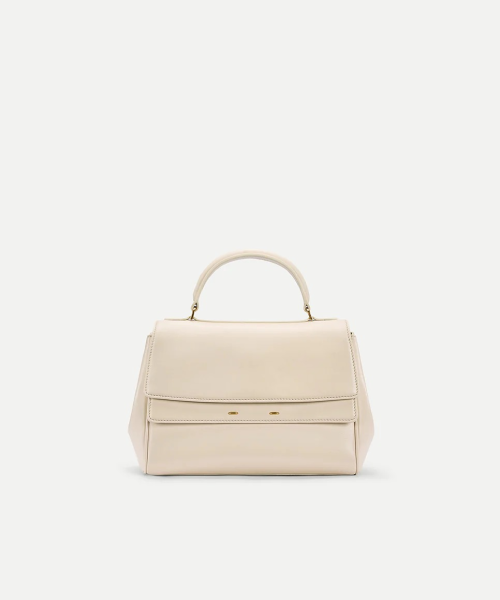
Fabrique’s leather bag collection is another standout category.

The range includes shoulder bags, hobo bags, totes, mini bags and charms produced in materials such as Nappa calfskin, nubuck, suede and top-grain leather.

Current prices include small leather accessories from approximately $88, mini leather bags around $198 and larger Nappa leather bags between roughly $368 and $528 before promotional discounts.

Top Features

  • Genuine leather constructions
  • Soft Nappa and suede options
  • Distinctive sculptural silhouettes
  • Designs credited to individual creatives
  • Practical shoulder, tote and hobo formats
  • Pricing below many established luxury handbag houses

Best for. Customers looking for an everyday designer bag that feels more distinctive than a standard department-store accessory.

Verdict. The bags offer an attractive balance of material quality, original design and accessible luxury positioning.

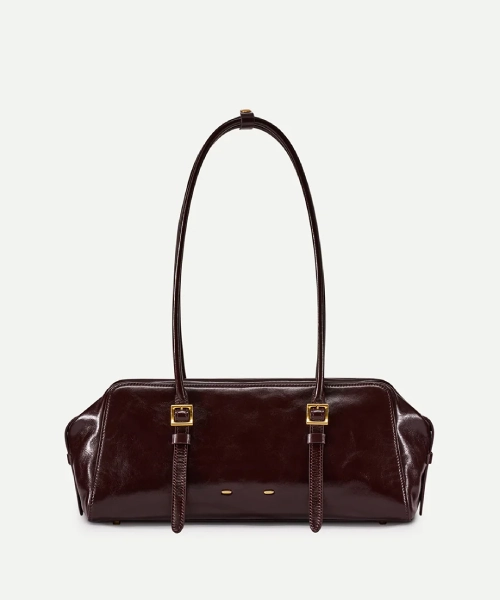
There are bags you buy for now, and bags you buy for the next ten years. The Monti is firmly the second kind.

Sophie Jousse spent years at Hermès, Celine, and Fendi before bringing her craft to Fabrique — and that background shows in every detail of this bag. The silhouette is clean and elongated, the hardware refined, and the leather genuinely exceptional. Treated through oil tanning, triple waxing and hand-polishing, it develops its own unique patina over time. Scratches soften. Markings become character. The bag you carry in five years will look better than the one you unboxed on day one.

Named after Rome’s most creative neighbourhood, the Monti carries that same quiet confidence — sophisticated without trying too hard.

Top Features:

  • Oil-tanned, triple-waxed European top-grain leather that ages beautifully
  • East-west baguette silhouette — lightweight, structured and everyday-practical
  • 18K gold vacuum-plated “gold bean” studs and column-inspired adjustable handles
  • Back hidden magnetic pocket + inner zip pocket
  • Available in 5 colours: Midnight, Ruby, Burgundy, Dark Brown, Golden Brown

Verdict: Crafted with a level of material intelligence that’s rare at this price point, the Monti is the kind of bag that outlasts trends, wardrobes, and almost everything else you’ll ever buy.

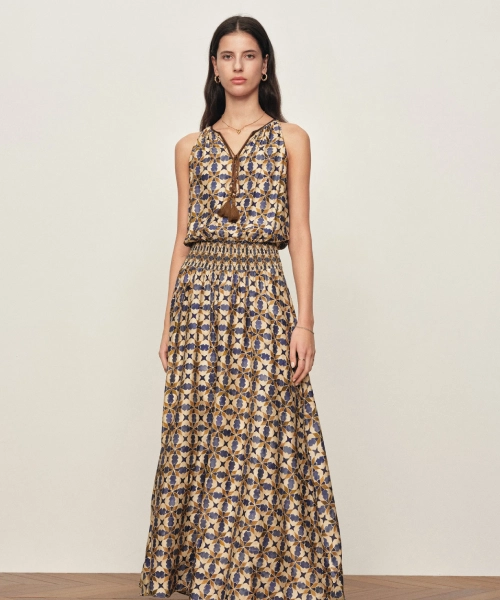
Some dresses are bought for one occasion. The Jocelyn is the kind you reach for again and again — the holiday dinner, the summer wedding, the evening that starts casual and ends late.

Designed by Jeanne Labib-Lamour — former creative director at La DoubleJ and BALLY — the Jocelyn draws inspiration from the hand-painted tilework of Southern Italian villas. The result is a print that’s rich and distinctive without being overwhelming, paired with a handcrafted beaded tassel tie and a shirred waist that moves with you rather than restricting you.

The crinkled silk blend fabric is lightweight, breathable, and naturally wrinkle-resistant — which means it travels beautifully and looks effortless without any effort at all.

Top Features

    • Crinkled silk blend (56.4% Modal, 29% Viscose, 14.6% Silk) — breathable and wrinkle-resistant
    • Shirred elasticated waist — flattering and adjustable across sizes
    • Handcrafted beaded tassel tie for an artisanal finish
    • Southern Italian tile-inspired print by a former La DoubleJ creative director
    • Full inner lining for comfort and coverage

Verdict: A summer dress that earns its price through thoughtful design, premium fabric and a print you genuinely won’t find anywhere else.

Fabrique’s matching sets provide a simple way to achieve a complete designer look.

Coordinated tops, skirts, trousers and knit pieces are designed to work together but can also be separated and styled with existing wardrobe items.

Top Features

  • Complete coordinated styling
  • Pieces can be worn separately
  • Useful for work, holidays and events
  • Strong cost-per-wear potential
  • Distinct designer identity
  • Easy transition from day to evening

Best for. Shoppers who want a polished outfit without spending additional time combining separate pieces from different brands.

Verdict. Because both pieces can be styled independently, matching sets can provide particularly good wardrobe value.

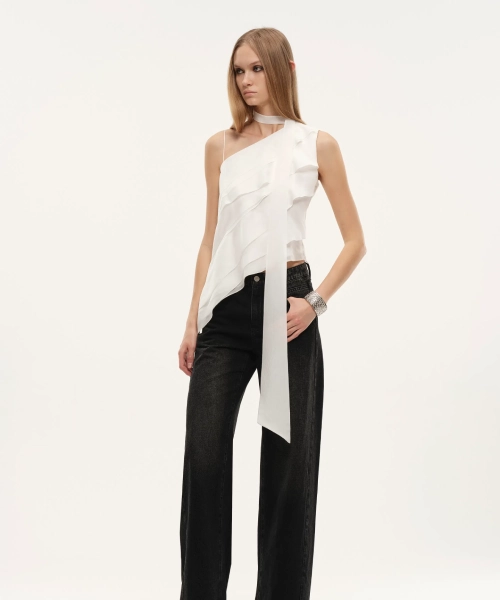
Vera Wang built her name on the idea that clothing can feel like an occasion in itself. The Veil Ruffle Top takes that philosophy and sets it free from the aisle entirely.

Crafted from mulberry silk and acetate blended tulle, cut on the bias and layered into cascading ruffles, this top catches light the way evening gowns do — yet somehow never feels overdressed. The asymmetric lines, trailing shoulder ties and adjustable belt give it a sense of movement and intention that’s hard to put into words until you’re actually wearing it.

The construction is genuine couture technique applied to ready-to-wear — oblique cutting, impermeable lining, hidden zip closure. These are not fast-fashion details. This is a top designed by someone who has spent a lifetime thinking about how clothes move on a body.

Top Features

  • Mulberry silk and acetate blended tulle (68% Acetate, 23% Silk, 9% Polyester)
  • Bias-cut oblique construction — a genuine haute couture technique
  • Cascading multilevel ruffles with asymmetric diagonal shoulder design
  • Adjustable thin belt for a customisable fit
  • Impermeable lining — sheer layers look intentional, not revealing
  • Exclusive to Vera Wang x Fabrique SS26 collection

Verdict: Paired with tailored trousers or dark denim, the Veil top elevates everything around it. Genuine Vera Wang vision at a fraction of traditional luxury pricing — one of Fabrique’s most compelling pieces this season.

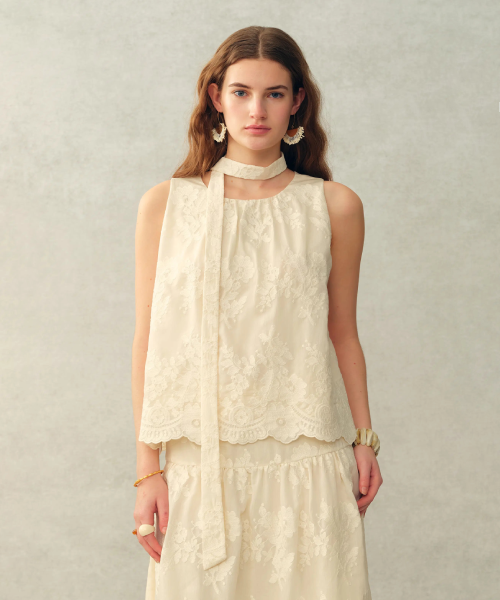
Fabrique also offers shirts, jeans, skirts and everyday separates with more design detail than ordinary wardrobe basics.

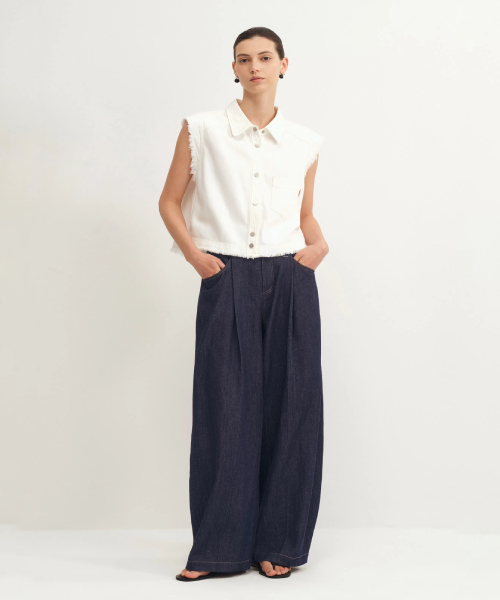
Popular listings include puff-sleeve shirts, transparent burnout denim, barrel-leg jeans, embroidered tops and draped trousers. Current examples generally fall within approximately $158 to $298 before sale pricing.

Top Features

  • Fashion-forward denim washes and finishes
  • Contemporary fits
  • Elevated everyday shirts
  • Easy integration into existing wardrobes
  • Lower entry prices than dresses and outerwear
  • Individual designer credits

Best for. First-time Fabrique customers who want to experience the brand through an everyday piece before investing in a dress, coat or leather bag.

Is Fabrique Worth It?. Fabrique is worth considering for shoppers who evaluate value through more than the lowest possible purchase price.

Best for: Buyers looking for fashion-forward denim with a unique designer aesthetic. The Ariel Transparent Burnout Straight Cropped Jeans combine premium craftsmanship a modern straight-leg fit, and subtle burnout detailing to create a statement piece that’s easy to dress up or down.

Top Features:​

  • Premium straight-leg cropped silhouette that offers a flattering, contemporary fit for everyday styling.
  • Distinctive transparent burnout detailing adds texture and a high-fashion edge without overpowering the design.
  • Crafted from high-quality denim with a comfortable feel and durable construction for long-lasting wear.
  • Versatile cropped length pairs effortlessly with sneakers, heels, ankle boots, and loafers across every season.
  • Designed by Fabrique Fashion, known for combining modern trends with elevated tailoring and premium materials.

One Honest Drawback: The transparent burnout detailing gives these jeans a bold designer look, which may not suit shoppers who prefer classic, minimalist denim. Their premium construction also places them in a higher price range than standard everyday jeans.

Verdict: The Ariel Transparent Burnout Straight Cropped Jeans are an excellent choice for anyone seeking standout designer-inspired denim. With their unique burnout finish, premium fabric, and versatile straight cropped fit, they deliver a stylish balance of comfort, quality, and contemporary fashion that justifies the investment.

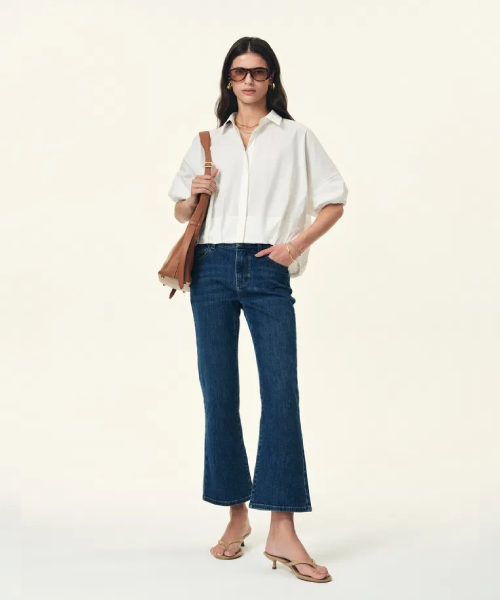
Best for: Shoppers looking for an elevated everyday blouse with a modern silhouette. The Claire Drop Shoulder High-Low Puff Sleeve Shirt blends relaxed tailoring with feminine details, making it ideal for both work and weekend wear.

Top Features:

  • Trendy drop-shoulder design creates a relaxed yet polished look.
  • Elegant high-low hem offers extra coverage and effortless styling.
  • Statement puff sleeves add volume and a sophisticated touch.
  • Crafted from premium-quality fabric for all-day comfort and durability.
  • Designed by Fabrique Fashion with a focus on contemporary fashion and versatile wear.

One Honest Drawback: The oversized silhouette and puff sleeves create a fashion-forward look that may not appeal to those who prefer more fitted, minimalist shirts.

Verdict: The Claire Drop Shoulder High-Low Puff Sleeve Shirt is a stylish wardrobe essential that combines comfort, quality, and modern design. Its versatile silhouette makes it easy to pair with jeans, tailored trousers, or skirts, making it a worthwhile investment for everyday and smart-casual outfits.

The brand offers value through:

  • Named designer involvement
  • Exclusive collections
  • More than 350 creative perspectives
  • Premium and natural fabric options
  • Detailed silhouettes and surface treatments
  • Limited-feeling pieces
  • Lower pricing than established luxury labels
  • Regular sales and first-order incentives

A typical Fabrique dress may cost more than a mass-market garment, but it is also designed to offer more individuality, stronger materials and a clearer creative identity.

The more relevant comparison is not inexpensive high-street fashion. Fabrique competes most naturally with contemporary and luxury designers whose dresses can cost several times more.

Fabrique vs More Expensive Designer Competitors

Brand

Indicative Dress Pricing

Design Model

Value Position

Fabrique

Commonly around $238–$478; selected collaboration pieces approximately $578

Collective of 350+ global designers

Strong designer value at contemporary pricing

A.L.C.

Selected full-price dresses around €690–€795

Established contemporary designer label

Higher-priced contemporary fashion

Zimmermann

Examples around €795–€3,650

Established luxury ready-to-wear and resort label

Premium luxury pricing

KHAITE

Common examples around $1,180–$5,400

New York luxury designer house

Significantly higher luxury pricing

Fabrique pricing is based on current official dress listings. Selected A.L.C. examples have been listed around €690–€795, Zimmermann dresses around €795–€3,650 and current KHAITE examples from approximately $1,180 to above $5,000.

This comparison shows why Fabrique should be viewed as an accessible designer platform rather than an overpriced fashion retailer.

While KHAITE and Zimmermann operate firmly within the luxury category, Fabrique provides creative silhouettes, premium materials and designer attribution at a fraction of those prices.

How to Get the Best Value at Fabrique

To maximise value when shopping:

  1. Subscribe to the newsletter for the available first-order discount.
  2. Review the Best Sellers section for proven customer favourites.
  3. Explore seasonal sale collections.
  4. Compare the fabric composition of individual products.
  5. Choose versatile pieces that can be styled in multiple ways.
  6. Use matching-set pieces separately to increase cost per wear.
  7. Join the rewards programme for future coupons.
  8. Check new arrivals regularly because the designer selection changes frequently.

Fabrique currently advertises seasonal reductions of up to 50% on selected products, along with newsletter and loyalty incentives.

Where to Buy Fabrique

Fabrique products are available through the brand’s official online store.

Shopping directly provides access to:

  • The widest available collection
  • Vera Wang collaboration pieces
  • New designer arrivals
  • Best-selling items
  • Seasonal sale pricing
  • Newsletter discounts
  • Loyalty rewards
  • Official product descriptions and fabric information

Frequently Asked Questions

Is Fabrique a legitimate fashion brand?

Yes. Fabrique operates as a designer-collective fashion platform and works with more than 350 global designers. Its official catalogue includes clothing, leather goods, seasonal collections and the 2026 Vera Wang ready-to-wear collaboration.

Is Fabrique a luxury brand?

Fabrique can be described as accessible or contemporary designer fashion.

Its use of named designers, premium fabrics, leather goods and exclusive collaborations gives it many luxury characteristics. However, its pricing remains substantially below luxury labels such as KHAITE and many Zimmermann collections.

Why are Fabrique clothes valuable?

The value comes from the combination of original design, individual designer involvement, premium materials and lower prices than established luxury fashion houses.

Customers are not simply paying for a logo. They are purchasing a product connected to a particular designer and creative concept.

How much do Fabrique dresses cost?

Many current dresses are listed between approximately $238 and $478. Selected Vera Wang and premium silk designs may cost around $578 before promotions.

How much do Fabrique bags cost?

Current leather accessories begin at approximately $88, while full-size leather bags commonly range from around $198 to $528 before discounts.

Does Fabrique offer discounts?

The official website advertises a 15% newsletter signup discount, loyalty coupons worth up to $50 and seasonal promotions on selected products.

What is the Vera Wang x Fabrique collection?

It is a Spring/Summer 2026 ready-to-wear collaboration designed to introduce Vera Wang’s aesthetic through modern wardrobe pieces beyond bridal fashion. The collection officially launched on March 18, 2026.

What should I buy first from Fabrique?

Good first-purchase options include:

  • A signature blouse
  • Designer denim
  • A versatile dress
  • A matching set
  • A suede or Nappa leather bag
  • A Vera Wang collaboration piece

First-time customers may find a blouse, denim piece or simple dress particularly easy to incorporate into an existing wardrobe.

Final Verdict

Fabrique has created a fashion platform that makes designer creativity more accessible.

Its greatest advantage is not simply the number of products available. It is the diversity of creative perspectives behind them. With more than 350 designers contributing to the platform, shoppers can explore different silhouettes, cultural influences, materials and styling ideas without moving between dozens of separate boutiques.

The Vera Wang Spring/Summer 2026 collaboration adds further credibility, while Fabrique’s dresses, matching sets, tailoring and leather bags provide multiple entry points at different budgets.

Fabrique is not positioned as inexpensive fast fashion, nor should it be evaluated against basic mass-market clothing. Its real value becomes clear when compared with designer labels charging $1,000, $2,000 or even $5,000 for individual garments.

For shoppers who want distinctive designer fashion, quality materials and a sense of exclusivity without paying traditional luxury-house prices, Fabrique is a compelling and valuable brand to explore in 2026.

Proper Cloth Review — Are Custom Dress Shirts Actually Worth the Price?

By Posted on 0 Comments7min read108 views
Proper Cloth Review 10 min read

Most men own dress shirts that don't quite fit. The shoulders are right but the chest is tight. The chest is right but the collar gaps. The collar is right and there's a foot of extra fabric billowing around the waist. This is not a personal failing — it's a structural problem with how off-the-rack shirts are made. They're built for a statistical average that matches nobody precisely.

Proper Cloth exists to fix this. You provide your measurements, they build the shirt to those measurements, and the result fits you rather than the average person your size. The execution is more complicated than the premise suggests, which is why this review exists.

What Proper Cloth Actually Is

Proper Cloth is a New York-based made-to-measure shirt company that operates entirely online. They launched in 2008 with a specific focus on making custom shirts accessible — not at the price of a bespoke Savile Row shirt, but at a price point where someone who needs to dress well for work can actually afford to build a wardrobe of shirts that fit properly.

The process: you either take your own measurements or use their Smart Size quiz, which generates a recommended size based on your height, weight, and build. You then customize the shirt — collar style, cuff style, placket, pocket, fabric — and they build it to your specifications. Price range runs from around $80 for entry-level fabrics to $200+ for premium options.

The Fit System — How It Actually Works

Proper Cloth's Smart Size quiz asks about your height, weight, age, build, and how you like shirts to fit. The algorithm generates a starting size that's reasonably accurate for most people on the first order — not perfect, but accurate enough that the adjustments needed are minor. If you have actual measurements you can enter those directly, which produces a more accurate starting point especially for people with proportions that diverge from standard builds.

The remake policy on first orders is important and underused. If your first shirt doesn't fit right, Proper Cloth will remake it at no charge based on your feedback. Most people who give up on Proper Cloth after one shirt give up before using the tool that makes the system work. After two or three orders with adjustments, most customers have a profile that produces shirts that fit consistently without further tweaking.

Proper Cloth — Top Picks Worth Ordering
Made-to-measure shirts built to your measurements — not the statistical average
Proper Cloth Oxford Shirt
Best Casual

Oxford Cloth Button-Down

OCBD · Multiple colors · Made to measure
  • Wardrobe staple done right
  • Works casual or with blazer
  • Same fit system as dress shirts
  • Best casual Proper Cloth pick
Start Your Shirt on Proper Cloth
Proper Cloth Linen Shirt
Best Summer

Linen Shirt

Premium linen · Relaxed fit · Made to measure
  • Heavier quality linen fabric
  • Relaxed fit looks intentional
  • Not thin or poorly constructed
  • Best linen shirt at this price
Start Your Shirt on Proper Cloth
Proper Cloth Premium Fabric Shirt
Best Premium

Premium Fabric Shirt

Two-ply · Egyptian cotton · European mills
  • Two-ply or Egyptian cotton
  • Luxury hand feel and drape
  • Comparable to $400 RTW shirts
  • Best fabric quality available
Start Your Shirt on Proper Cloth

Proper Cloth Dress Shirts — The Core Product

The dress shirt is where Proper Cloth started and where they're still strongest. The customization options cover everything that actually matters — collar spread and height, cuff style and button count, placket style, back pleat or no pleat, pocket or no pocket, shirt tail length. For most professional environments, the decisions that matter most are collar spread and shirt tail length. Collar spread affects how the shirt looks with different tie knots and without a tie. Shirt tail length determines whether the shirt stays tucked reliably — most off-the-rack shirts have tails too short for taller men, and Proper Cloth lets you specify this.

First order tip: Start with a mid-range fabric ($120-$150 range). Good enough to evaluate fit properly, not so expensive that a sizing adjustment feels like a loss.

Proper Cloth Oxford Cloth Button-Down — The Casual Star

OCBD shirts are wardrobe staples that most men wear constantly, and the off-the-rack versions almost universally have the same fit problems as dress shirts. A well-fitting OCBD from Proper Cloth worn casually or with a blazer is one of those pieces that elevates an outfit without requiring any thought. The same made-to-measure system applies — same fit profile, same measurement process, same remake policy on first orders.


Proper Cloth Linen Shirt — Better Than Most

Linen is notoriously variable in quality and construction. Most mass-market linen shirts are thin, poorly constructed, and finish their first wash looking like they've been worn for a decade. Proper Cloth's linen options use heavier, better-quality fabric and the made-to-measure construction means the relaxed fit of linen looks intentional rather than like the shirt is simply too big.


The Fabric Selection — Where Proper Cloth Shines

Proper Cloth's fabric library is one of the most extensive available from any online shirtmaker. Hundreds of options across cotton broadcloth, poplin, Oxford cloth, twill, chambray, linen, and more. Entry-level fabrics at $80 to $100 are solid. Mid-range at $120 to $150 step up noticeably in hand feel and drape. Premium fabrics at $160 and above include two-ply options, Egyptian cotton, and European mill fabrics genuinely comparable to luxury ready-to-wear at three times the price.

What Proper Cloth Gets Right

The fit system works once you engage with it properly. The combination of Smart Size quiz, direct measurements, and the remake policy on first orders means most people can get to a consistent fit within two or three orders. The fabric selection is genuinely impressive. Customer service is responsive and the remake policy is honored without friction. The value proposition improves over time — by the fifth shirt, you're ordering quickly from a calibrated profile with consistent fit every time.

Where They Fall Short

The first order experience is imperfect by design — getting to a perfect fit requires going through the adjustment process. The website can be overwhelming with hundreds of fabrics and dozens of customization options. Turnaround time is three to four weeks. No physical locations means you can't feel the fabric before ordering.

Is Proper Cloth Worth the Price

For anyone who dresses professionally regularly and has struggled with off-the-rack shirt fit — yes, clearly. A $120 Proper Cloth shirt that fits properly looks better than a $200 off-the-rack shirt that doesn't. The honest strategy: commit to two orders minimum before evaluating. Use the remake policy on the first order if the fit isn't right. By the second order you'll know whether the system works for you — and if it does, you'll wonder why you spent years in shirts that didn't fit.

Proper Cloth Products — Quick Comparison

ProductPrice RangeBest ForKey Feature
Custom Dress Shirt$80–$200+Professional wearFull customization
Oxford Button-Down$90–$150Smart casualWardrobe staple
Linen Shirt$100–$160Summer & casualQuality linen fabric
Premium Fabric Shirt$160–$200+Special occasionsTwo-ply Egyptian cotton

Proper Cloth is for men tired of shirts that almost fit. Commit to two orders, use the remake policy, and you'll never go back to off-the-rack dress shirts.

Start Your Custom Shirt — Proper Cloth

McGee & Co Review — Is This Premium Home Decor Brand Actually Worth It?

By Posted on 0 Comments7min read78 views
McGee & Co Review 10 min read

Studio McGee built one of the most recognizable interior design aesthetics of the last decade. Clean lines, warm neutrals, natural textures, the kind of spaces that look effortlessly put together without feeling cold or sterile. McGee & Co is where that aesthetic becomes shoppable — the retail brand that Shea and Syd McGee launched so that people who couldn't hire Studio McGee as their interior designer could at least buy the pieces that define the look.

The question isn't whether the pieces are beautiful. They are. The question is whether the quality justifies the price and whether buying from McGee & Co is actually the right move for someone who loves the aesthetic.

What McGee & Co Actually Is

McGee & Co is not a manufacturer. They're a curated retail brand — they source pieces from various manufacturers, apply their design standards and aesthetic filters, and sell them under the McGee & Co label. What you're paying for is curation and trust. The pieces they carry have been selected to work within a specific aesthetic, which means if you buy multiple things from them, they'll likely work together in your space. That's genuinely valuable if you're not a trained designer.

The brand launched in 2014 alongside the Studio McGee design firm. The Netflix show Dream Home Makeover accelerated awareness significantly and brought a large new audience to both the design studio and the retail brand.

The McGee & Co Aesthetic — What It Actually Is

The core look: warm neutrals — whites, creams, taupes, warm greys — layered with natural materials. Linen, jute, rattan, white oak, unlacquered brass. Silhouettes that are clean but not minimal — there's warmth and detail in the pieces, just nothing excessive or fussy. It's an aesthetic that photographs extremely well and also works well in real homes — warm enough to feel livable, structured enough to feel designed, and neutral enough that it doesn't go out of style quickly.

McGee & Co — Top Picks Worth Buying
Curated home decor and furniture that actually works together in real spaces
McGee and Co Thea Chandelier
Best Lighting

Thea Chandelier

Rattan · Brass hardware · Multi-size
  • Woven rattan shade
  • Solid brass hardware
  • Multiple sizes available
  • Anchors any dining room
Check Price on McGee & Co
McGee and Co Dawson Bed
Best Bedroom

Dawson Bed

Bouclé or performance fabric
  • Low profile upholstered frame
  • Bouclé headboard option
  • Solid wood construction
  • Makes bedroom look finished
Check Price on McGee & Co
McGee and Co Textiles
Best Value

Textiles & Throw Pillows

Linen blend · Wool rugs · Throws
  • Substantial throw blankets
  • High-quality pillow inserts
  • Wool rug options available
  • Best entry point for brand
Check Price on McGee & Co

McGee & Co Siena Sofa — The Statement Piece Worth Knowing

The Siena Sofa is probably the most-discussed McGee & Co furniture piece and it earns the attention. Deep seat, low profile, clean-lined frame in white oak or walnut finish, cushions in a performance fabric that works for real households rather than just showrooms. The performance fabric is worth noting specifically — it looks like linen, doesn't feel synthetic, and handles everyday use in a way that pure natural fabrics often don't.

The seat depth is generous. This is a sofa you actually sink into rather than perch on, which sounds obvious but isn't a given at this price point. Lead times run eight to twelve weeks — this is not fast furniture. If you need something quickly, this is not the piece. If you're furnishing thoughtfully and can wait, the Siena is worth it. Price around $3,000 to $4,500 depending on configuration.

Lead time tip: Order the Siena Sofa before you need it — 8 to 12 weeks is typical. Place the order when you start planning the room, not when you're ready to furnish it.

McGee & Co Thea Chandelier — The Lighting Piece That Changes a Room

McGee & Co's lighting is some of the strongest work they do and the Thea Chandelier is the centerpiece of that category. Woven rattan shade, brass hardware, available in multiple sizes for different room scales. Lighting is where most people make the biggest design mistake — they treat it as an afterthought and then wonder why their space doesn't look like the design photos they saved. A statement chandelier in the right space does more work than almost any other single piece.

The rattan is genuinely well-crafted — not the thin brittle rattan in lower-priced versions, but substantial weaving that holds its shape. Price runs $500 to $900 depending on size. For a lighting piece that will anchor a room for years, that's justifiable.


McGee & Co Dawson Bed — The Bedroom Anchor

Low profile, clean-lined upholstered headboard in bouclé or performance fabric, solid wood frame. The bouclé option is particularly good — it adds warmth and visual interest without pattern or color, which makes it work in almost any bedroom color scheme. The headboard height is substantial enough to feel like a design choice but not so tall that it overwhelms smaller rooms. Assembly is manageable for two people, slat system included. Price around $1,800 to $2,500 depending on size.


McGee & Co Textiles — The Underrated Part of the Brand

Most people come to McGee & Co for furniture and lighting. The textiles are quieter but genuinely good and often represent better value. The throw blankets are thick and substantial. The linen-blend options have a texture and weight that reads as genuinely quality. The rugs vary more — wool options are worth spending on, lower-priced options are fine for low-traffic areas. Throw pillows are where McGee & Co shines quietly — fabric quality, insert quality, and size options better than most brands at this price point.


What McGee & Co Gets Right

The curation is the main value. Everything on the site works together — buy a sofa, a rug, throw pillows, and a side table from McGee & Co and know that the pieces will cohere. For people who find sourcing home decor stressful, that's worth real money. The aesthetic has longevity — rooted in classic proportions, natural materials, and warm neutrals, none of which will feel dated in five years the way trend-driven design does.

Where They Fall Short

Lead times are the biggest friction point. Eight to twelve weeks on furniture is not unusual in the premium category but McGee & Co's popularity means they sometimes push beyond that, and communication during the wait isn't always proactive. Some pieces are aesthetically strong but constructed to a lower standard than the price implies — lighting and smaller decor tend to be stronger quality-to-price than some case goods.

Is McGee & Co Worth the Price

For someone whose aesthetic genuinely aligns with what McGee & Co is doing — yes, with caveats around lead times and selective quality. The honest buying strategy: start with lighting and textiles where the price of being wrong is lower. If those pieces work in your space and you love them, scale up to furniture with more confidence. The curation value is real, the best pieces are excellent, and the brand has enough track record that you can research specific pieces before buying.

McGee & Co Products — Quick Comparison

ProductPrice RangeLead TimeBest For
Siena Sofa$3,000–$4,5008–12 weeksLiving room anchor
Thea Chandelier$500–$9002–4 weeksDining & entry rooms
Dawson Bed$1,800–$2,5008–12 weeksBedroom centrepiece
Textiles & Pillows$40–$4001–2 weeksBest entry point

McGee & Co is for people who want a designer-curated home without hiring a designer. Start with textiles, scale up to furniture when you're sure. The aesthetic is timeless — buy pieces you'll live with for years.

Shop McGee & Co — Official Site

I Tried the Origin Mattress for 6 Weeks — Here’s My Honest Take (Including Which Model to Actually Buy)

By Posted on 0 Comments8min read1 views

I Tried the Origin Mattress for 6 Weeks — Here’s My Honest Take (Including Which Model to Actually Buy)

Save 20% Off On Your All Orders

Save 20% Off On Your All Orders

Save 20% Off On Your All Orders
GaryW20Off1404
SHOW COUPON
On Going Offer
  • It Works 100% Success It Doesn’t
  • Get 5% Off On Your All Purchases

    Get 5% Off On Your All Purchases

    Get 5% Off On Your All Purchases
    FH25OFF8728
    SHOW COUPON
    On Going Offer
  • It Works 100% Success It Doesn’t
  • Get Free Shipping On Your All Orders

    Get Free Shipping On Your All Orders

    Get Free Shipping On Your All Orders
    ACTIVATE DEAL
    On Going Offer
  • It Works 100% Success It Doesn’t
  • Sale! Save Upto 34% Off On Selective Items

    Sale! Save Upto 34% Off On Selective Items

    Sale! Save Upto 34% Off On Selective Items
    ACTIVATE DEAL
    On Going Offer
  • It Works 100% Success It Doesn’t
  • Save £418 Off On Origin Lumbar Cloud Mattress

    Save £418 Off On Origin Lumbar Cloud Mattress

    Save £418 Off On Origin Lumbar Cloud Mattress
    ACTIVATE DEAL
    On Going Offer
  • It Works 100% Success It Doesn’t
  • Shop Our Mattresses Collection Starting From £279

    Shop Our Mattresses Collection Starting From £279

    Shop Our Mattresses Collection Starting From £279
    ACTIVATE DEAL
    On Going Offer
  • It Works 100% Success It Doesn’t
  • Checkout Our Origin Coolmax Latex Pillow For £98

    Checkout Our Origin Coolmax Latex Pillow For £98

    Checkout Our Origin Coolmax Latex Pillow For £98
    ACTIVATE DEAL
    On Going Offer
  • It Works 100% Success It Doesn’t
  • Buy Our Origin Contour Mattress Topper For £160

    Buy Our Origin Contour Mattress Topper For £160

    Buy Our Origin Contour Mattress Topper For £160
    ACTIVATE DEAL
    On Going Offer
  • It Works 100% Success It Doesn’t
  • I Tried the Origin Mattress for 6 Weeks — Here's My Honest Take (Including Which Model to Actually Buy)

    Let me start with the thing nobody told me before I bought mine.

    Origin rates the Hybrid mattress at 6.5 out of 10 on firmness. That’s their “medium-firm” positioning — the sweet spot that’s supposed to work for most sleepers. I am a side sleeper. I read that 6.5 and thought: perfect, that’s exactly what I need.

    Three nights in, my hips were aching.

    Not dramatically. Not in a “I need to call someone” way. Just that low, persistent complaint that builds across the day and tells you something isn’t right about how you’ve been sleeping. I switched to my back for a few nights — the aching stopped immediately. I stayed on my back. Aching stayed gone.

    What I’d actually bought was a firm mattress. Closer to an 8 out of 10 if you ask TechRadar’s tester, who spent three weeks on the same model and reached the same conclusion independently. “Much firmer than Origin rates it,” was her exact phrase. She’s right. They’re underselling the firmness, which sounds like a strange complaint to make about a mattress you might actually love — if you’re a back or stomach sleeper.

    I’ll come back to that. First, what Origin actually got right.

    The Thing That Genuinely Surprised Me: How Quiet This Mattress Is

    My partner moves a lot in his sleep. I mean a lot. We’ve tried various mattresses over the years and the nightly earthquake situation has been an ongoing background issue in our relationship — not serious, just persistent and mildly irritating.

    The Origin Hybrid produced the quietest nights we’ve had since we started sleeping in the same bed.

    I didn’t immediately connect this to the mattress. I assumed we were both just tired. But after a week of unusually uninterrupted sleep, I started paying attention. He was moving the same amount. I was just not feeling it the way I normally would.

    NapLab’s independent lab test later confirmed what I’d experienced: the Origin Hybrid produces 30% less motion transfer than the category average across all mattresses they’ve tested. That’s a measured, specific number, not a marketing claim. The wool and memory foam elements in the comfort layer absorb movement before it travels across the surface.

    For couples with mismatched sleep styles, this is genuinely significant. It’s one of the best things about this mattress and one of the least talked-about.

    The Cooling: Real, Effective, Possibly Too Effective

    I’m a cold sleeper. My partner runs hot. We’ve spent years navigating this incompatibility — he pushes the duvet off at 2 a.m., I pull it back, someone is always losing.

    The Origin Hybrid has a bamboo foam layer, a HexaGrid foam structure with an open design that allows air circulation, and a Tencel cover made from wood pulp that regulates surface moisture. These aren’t marketing words for the same thing — they’re three distinct mechanisms that together produce real, measurable cooling.

    TechRadar’s reviewer described her hot-sleeping husband feeling “cool and refreshed throughout the night.” She also described herself — a cold sleeper, like me — as finding it “a little too effective” and feeling “a bit chilly in the night.”

    That’s us exactly. My partner has slept better on this mattress than anything we’ve previously owned. I’ve been wearing thicker socks.

    If you’re a hot sleeper, this is genuinely excellent. If you’re a cold sleeper buying this mattress for yourself, know that the cooling really does work and factor that into your bedding choices.

    The HexaGrid: What It Actually Means in Practice

    Origin’s proprietary HexaGrid is described on their website with enough enthusiasm that I was skeptical before sleeping on it. Developed with orthopaedic specialists, zoned support, pressure distribution, etc. The usual.

    Here’s what it means in practice: the mattress doesn’t feel uniform from head to foot. The center section — roughly where your torso and lower back land — provides more resistance and support. The areas around your shoulders and knees give slightly more. This is the zoned support concept, and it’s a real thing rather than a marketing concept.

    For back sleepers, this matters specifically because your lower back is the area that most needs support and most commonly gets inadequate support on a mattress that’s too soft in the middle. The HexaGrid concentrates support exactly there.

    For people with lower back pain specifically, the Trustpilot UK reviews are full of specific, detailed accounts describing morning improvement. Not vague “I slept better” testimonials — specific descriptions of pain that had been present for years reducing or disappearing within weeks. One buyer describes the LumbarCloud as “the best mattress I ever had, so comfortable. I honestly recommend to anyone who suffers from back pain.”

    I can’t verify individual health claims. But the volume and specificity of back pain improvement accounts across this mattress is unusual enough to be worth noting directly.

    The Edge Support Situation

    Here’s something the origin website definitely doesn’t lead with: the edges of this mattress compress noticeably more than the center.

    I noticed this on the first night when I sat on the edge of the bed to put on my shoes and felt the side compress more than I expected. TechRadar specifically identifies edge support as below average. BestMattressAustralia notes it as a limitation.

    For most sleeping situations this doesn’t matter — you sleep in the middle of the mattress, not on the edge. But if you regularly sleep near the edge (common in couples where one person gets pushed to the perimeter), or if you sit on the edge of the bed as a regular routine, it’s worth knowing before you buy.

    Six Weeks In: What I'd Tell Someone Considering This Mattress

    The Origin Hybrid is a genuinely good mattress. The motion isolation alone made a measurable difference in our household’s sleep quality. The cooling is real and works exactly as described. The construction quality feels appropriate for the price. The 200-night trial (in the UK) is one of the most generous in the category, and the 15-year warranty is meaningfully longer than the 10-year standard most competitors offer.

    But I need to be honest about who it’s for and who it isn’t.

    It’s for you if you’re a back sleeper. This is where the Origin genuinely excels. The firm surface, the zoned HexaGrid support, the lumbar emphasis — all of it is optimized for the position where you need support more than cushioning. Multiple independent testers who sleep primarily on their back describe this as among the best mattresses they’ve used at the price point.

    It’s for you if you’re a stomach sleeper. Same logic. Stomach sleepers need a firm surface to keep their hips level with their shoulders and maintain spinal alignment. The Origin delivers this directly.

    It's for you if you sleep hot. The cooling is real. Ask my partner.

    It might not be for you if you’re a side sleeper. I’m going to be direct here: the firmness means it doesn’t provide adequate cushioning at the shoulder and hip for sustained side sleeping. I know this from my own aching hips in week one. TechRadar’s reviewer confirms it independently. If you’re a dedicated side sleeper, the LumbarCloud is the Origin product designed for you — or look elsewhere in the category.

    It’s for you if you’re on a budget. The near-permanent sale pricing (typically 35–56% off listed RRP with easily-found discount codes) puts this mattress in a tier that’s significantly more accessible than its quality level would suggest if you were paying full price. NapLab rates it the fourth-best mattress they’ve tested within its price tier. That’s a specific, credible framing of what you’re getting for the money.

    The Products: Which Origin to Actually Buy

    The Origin lineup has expanded since launch. Here’s the honest breakdown of which product fits which buyer.

    This is what I bought and what most of this blog is based on. The standard hybrid with the HexaGrid layer, bamboo foam, and pocket springs. Firmly positioned toward back and stomach sleepers at an accessible price.

    Buy this if: You’re a back or stomach sleeper, you run hot at night, you share a bed and motion isolation matters, or you’re on a tighter budget and want the strongest value-per-pound in the Origin lineup.

    Skip this if: You’re a dedicated side sleeper. The firmness will work against you.

    Trial period: 200 nights (UK) | 120 nights (Australia) | 100 nights (US)
    Warranty: 15 years

    The LumbarCloud adds a pillow-top comfort layer over the core hybrid structure, creating a softer initial feel without losing the underlying lumbar support that the HexaGrid provides. It’s the product that addresses the standard Hybrid’s most consistent criticism.

    Dweva’s multi-week testing team — who tested both models simultaneously — found the LumbarCloud “felt gentler on joints” and produced “fewer sleep disruptions when one person moved.” If you’ve read this far and kept thinking “this sounds good but I sleep on my side,” this is the Origin product you’re looking for.

    Buy this if: You’re a side sleeper, a lighter sleeper who wants more cushioning, or you’ve tried firm mattresses before and found them uncomfortable. Also the better choice for couples where sleep positions differ — the pillow-top smooths out what can otherwise feel like a hard landing for the lighter or more pressure-sensitive partner.

    Skip this if: You specifically want a firm surface. The pillow-top softens the initial feel, which is a feature for most buyers and a drawback for the minority who want maximum firmness.

    The Hybrid Plus adds adjustable firmness settings, which allows you to calibrate the feel after purchase rather than committing to a single firmness at the point of sale. This is specifically useful if the gap between Origin’s stated firmness and the independently-tested firmness has made you uncertain about which model to choose.

    Buy this if: You’re genuinely unsure about firmness, or you and your partner have significantly different firmness preferences and want post-purchase adjustment capability.

    Before You Buy: Three Things to Check First

    1. What position do you primarily sleep in?

    This is the only question that really matters for determining which Origin product is right for you. Back or stomach sleeper: standard Hybrid. Side sleeper: LumbarCloud or reconsider the category.

    2. Do you run hot or cold?

    If you’re a hot sleeper, the Origin’s cooling technology is genuinely one of its best features and worth seeking out specifically. If you’re a cold sleeper, the same technology means you may want to upgrade your bedding or sleepwear before the mattress arrives.

    3. Have you checked for a discount code?

    Origin runs near-permanent promotions at 35–56% off listed RRP. The “full price” on the website is rarely what anyone actually pays. Look for a current code before completing your purchase — if there isn’t one active today, there will be one in a few days.

    The Honest Bottom Line

    I came away from six weeks on the Origin Hybrid with a clear, specific view: this is one of the best back-sleeper mattresses available at this price point in the UK market right now. The motion isolation is genuinely excellent, the cooling works, and the 200-night trial is long enough to give you real confidence in your evaluation.

    I wish someone had told me clearly — not in fine print, not buried in a FAQ — that “6.5 firmness” on Origin’s scale means something closer to “firm” on an independent scale. That information would have saved me three nights of hip aching and sent me directly to the LumbarCloud.

    Go in with accurate firmness expectations, matched to your sleep position, and Origin is a genuinely strong purchase at a genuinely competitive price. Go in expecting medium-soft cushioning and you’ll spend your first week confused about what happened.

    The 200-night trial is long enough to figure it out. Just know what you’re expecting before you start the clock.

    Can You Wear Rothy’s in the Kitchen?

    By Posted on 0 Comments10min read0 views

    Can You Wear Rothy’s in the Kitchen?

    Can You Wear Rothy's in the Kitchen?

    I’ll be upfront with you: this is not a question I expected to spend any serious time thinking about.

    Rothy’s are fashion flats. They’re the shoes Meghan Markle wore to a castle. They live in the intersection of “sustainable lifestyle” and “I have my life together enough to spend $149 on a pair of pointed-toe flats made from recycled water bottles.” The kitchen, with its spilled olive oil and flour-dusted floors and the occasional dropped pan, does not immediately feature in that picture.

    And yet.

    The more I thought about it — and the more time I actually spent wearing mine around the house, including in the kitchen — the more the answer started shifting from an automatic “no” to a more considered “actually, yes, with some caveats.”

    Here’s the full, honest case.

    What Makes Rothy's Actually Suited to Kitchen Wear

    The single feature that makes Rothy’s genuinely viable in a kitchen context is the one that defines the entire brand: machine washability.

    Think about what happens to your feet in a kitchen over the course of a normal cooking session. A splash of pasta water. A dusting of flour that works its way under the counter. Olive oil on the floor that you don’t notice until your sock slides slightly. The general accumulation of cooking smells — garlic, fish, roasted vegetables — that embeds itself in fabric over time.

    Now think about what happens to most shoes in that environment. They absorb it. They hold it. You wipe the outside, but the inside stays. Fabric shoes get progressively more kitchen-scented regardless of how carefully you cook. Leather shoes absorb cooking fat in ways that are genuinely difficult to reverse. Most shoes simply aren’t designed to be cleaned from the inside out on a regular basis.

    Rothy’s are.

    The recycled plastic knit construction that makes up the entire upper — the same material that gives these shoes their distinctive woven appearance — is fully machine washable. Gentle cycle, cold water, air dry overnight. The shoe comes out clean. Not just cleaner. Actually clean. The odors, the flour, the general kitchen accumulation — gone.

    Multiple long-term Rothy’s owners confirm this holds up not just once but repeatedly, across months and years of regular washing. A PureWow editor who has owned the same pair of Rothy’s sneakers for five years describes them as maintaining their shape and structure through repeated machine wash cycles. The knit doesn’t degrade, the shape doesn’t distort, and the cleaning process is no more involved than any other item in your laundry.

    For kitchen wear specifically, this is a significant practical advantage over almost every alternative at a comparable price point.

    The Spill Question

    Here’s where the honest answer gets more nuanced, and I want to be direct about it rather than just making the case for the purchase.

    Rothy’s are not waterproof. They are not water resistant. The open-weave knit construction that makes them breathable and lightweight also means that liquid — water, cooking oil, broth, anything wet — goes straight through to your foot.

    For kitchen wear, this means two things.

    The first is actually fine: small splashes, flour, light mess. These sit on the surface of the knit, don’t immediately soak through if you address them quickly, and wash out completely in the next machine cycle. The everyday cooking mess that accumulates in most home kitchens — steam, light splashing, general food prep — is exactly the kind of thing the machine washability handles cleanly.

    The second is genuinely not fine: significant liquid spills directly onto the shoe. If you’re draining a full pot of pasta water and some goes sideways, or you knock a glass off the counter, your feet will be wet. Not damp. Wet. The knit absorbs liquid with the same efficiency it absorbs everything else.

    So the honest kitchen verdict is: Rothy’s handle normal cooking conditions well. They handle actual spills the same way any fabric flat would — which is to say, not particularly well. If you cook in a way that regularly involves significant liquid near your feet, keep that in mind.

    The good news: if your feet do get wet, you throw the shoes in the wash. There’s no permanent damage. No staining. Just a cycle through the machine and they’re fine again.

    The Grip and Safety Reality

    This is worth addressing directly because kitchen floor safety is a genuine practical consideration, not just a theoretical one.

    Rothy’s have a flat, smooth rubber sole. They’re not non-slip shoes. They’re not designed for environments where floor traction is a safety priority. On a dry kitchen floor — tile, hardwood, laminate — they perform fine. The sole grip is adequate for normal movement.

    On a wet or oily kitchen floor, they’re no better or worse than any other flat-soled shoe without specific grip technology. Which means: be aware, wipe up spills when they happen, and don’t wear them in a commercial kitchen environment where floor safety standards require proper non-slip footwear.

    For home kitchen use, this is rarely a practical concern as long as you’re maintaining normal kitchen floor hygiene. Most home cooks aren’t navigating oily or wet floors as a regular condition — they’re cleaning up as they go. In that context, Rothy’s grip is adequate.

    The Comfort Question for Long Kitchen Sessions

    Anyone who has spent three hours on their feet preparing a dinner party knows that kitchen comfort is a real, physical consideration. Standing on hard tile for extended periods in the wrong shoes produces fatigue that starts in your feet and works its way up your legs and lower back by the time you’re plating the dessert.

    Here’s where I need to be honest with you about Rothy’s and arch support, because it comes up in every serious review of these shoes and it applies in the kitchen context too.

    Rothy’s provide minimal arch support. The standard footbed is flat and thin. Multiple independent reviewers describe them as inadequate for extended periods of standing, particularly for anyone with flat feet, plantar fasciitis, or any pre-existing foot condition. One multi-year Rothy’s owner specifically describes needing to give away most of her pairs after having children because her support needs changed — “I just wish they had more support.”

    For a thirty-minute dinner prep, this probably doesn’t matter. For a three-hour Thanksgiving cook, it might.

    The practical fix, if you want to wear Rothy’s in the kitchen for extended sessions: add an aftermarket insole. A basic half-insole from any pharmacy — around $8 to $12 — provides enough additional cushioning to extend the comfortable wearing time meaningfully. It fits within the shoe without changing the external appearance and doesn’t affect the machine-washability since the insole is removed before washing.

    Some Rothy’s styles now come with what the brand calls the In Love Insole — a more cushioned footbed than the original. It’s not a structural arch support insert, but it does provide more initial cushioning than the standard footbed. Worth looking for on current styles if extended standing is a concern.

    Which Rothy's Style Actually Works Best in the Kitchen

    Not all Rothy’s are equally suited to kitchen wear, and it’s worth being specific here rather than just saying “any pair will do.”

    The styles that work best in the kitchen are the ones with the simplest construction — the fewest components that can accumulate kitchen mess and the fastest to clean. Elaborate bows, multiple-part closures, and delicate embellishments create more surface area for flour and cooking residue to settle into.

    The styles with more structural complexity — the Mary Jane with the bow tie that must be tied tightly, the clog with the ankle construction — have also shown more durability concerns in independent reviews generally. A Mary Jane strap tearing after a few wears, clogs showing wear at the ankle area. These aren’t defects specifically related to kitchen use, but they suggest that the simpler, more structurally straightforward styles are better long-term bets.

    For the kitchen specifically, the flat slip-on styles are the clear recommendation. Easy on, easy off, no components to catch mess, fully machine-washable from a single piece of knit construction.

    The Smell Issue — and Why It's Actually Less of a Problem Than You'd Think

    Every honest review of Rothy’s eventually mentions the smell concern. The recycled plastic knit doesn’t breathe the way natural materials do. After enough wear in warm conditions — a summer kitchen, an evening of cooking over a hot stove — they can develop an odor.

    In a regular shoe, this is a problem you manage around. You spray them, air them out, hope for the best.

    In Rothy’s, this is a problem you solve directly. Machine wash. Gentle cycle. Cold water. Air dry overnight. The next morning the shoes smell like nothing at all.

    The kitchen is actually one of the better use cases for Rothy’s specifically because it’s an environment where regular washing makes sense anyway. You’re cooking. Your clothes go in the wash. Your apron goes in the wash. Throwing your Rothy’s in on the same cycle is a perfectly natural extension of the post-cooking cleanup routine rather than an additional chore.

    The Honest Bottom Line

    Can you wear Rothy’s in the kitchen? Yes, with clear eyes about what you’re working with.

    They handle everyday home cooking conditions well. They clean up completely and repeatedly through machine washing. They’re comfortable for moderate cooking sessions, more comfortable with an added insole for longer ones. They look significantly better than dedicated kitchen shoes, which means you can go from food prep to having people over without changing your footwear.

    What they won’t do: protect your feet from significant liquid spills, provide non-slip grip on genuinely wet floors, or support your arches through a marathon cooking session without some help.

    The machine-washability is the thing that makes this work. Without it, Rothy’s would be a terrible kitchen shoe. With it, they become a genuinely practical option for home cooks who want something that looks good, performs adequately, and can be fully cleaned after every use.

    The Products: Which Rothy's to Buy for Kitchen Wear

    The brand’s flagship pointed-toe flat and the strongest recommendation for kitchen wear. The construction is a single piece of knit with a flat rubber sole — minimal components, maximum washability, no delicate elements to catch cooking mess. The Point is also the most extensively reviewed style in the entire Rothy’s catalog, with multiple 4–5 year ownership accounts confirming it holds up through repeated machine washing cycles.

    Size up half a step from your usual. The toe box runs narrow and this is consistent across independent reviews — ordering your standard size will leave your toes compressed.

    Best for: Home cooks who want a smart-looking flat that functions well during normal cooking sessions and cleans up completely afterward.

    Care in the kitchen: Machine wash on gentle cycle, cold water, air dry. Do not tumble dry. If an aftermarket insole is added for support, remove it before washing.

    The rounded-toe version of The Point, offering the same single-knit construction and full machine washability in a slightly more relaxed silhouette. Where The Point’s pointed toe can feel slightly more formal, The Flat reads as everyday casual — which many home cooks find more appropriate for kitchen and around-the-house wear.

    The same size-up-half-a-step guidance applies. The Flat runs narrow across the toe box in the same way The Point does.

    Best for: Buyers who find pointed toes uncomfortable for extended wear or who prefer a more casual everyday silhouette for home cooking and kitchen use.

    If you want the most comfortable Rothy’s for extended kitchen sessions, this is the one. The sneaker construction is the most accommodating silhouette in the lineup — it’s the style most often recommended for wider feet, and it provides slightly more structure around the foot than the flat styles. Multiple reviewers describe it as the most comfortable option for longer-duration wear.

    It’s also the style with the strongest durability evidence in the entire catalog. A PureWow editor’s five-year ownership account is specifically about the sneaker — through repeated machine washes, the knit remained intact and the shape was maintained. That’s the kind of confirmed long-term durability that matters when you’re using a shoe in an environment where regular washing is part of the routine.

    Best for: Home cooks who spend longer periods on their feet in the kitchen, buyers with slightly wider feet, and anyone who prioritizes durability and comfort over the more polished appearance of the flat styles.

    A loafer-adjacent slip-on that sits between the flat styles and the sneaker in terms of formality. Easy to get on and off — relevant in kitchen contexts where you might be stepping out to the garden and back — and the same fully machine-washable single-knit construction.

    One documented note from independent reviews: the loafer and driver category has shown slightly more fabric durability variation than the core Point and Sneaker styles. At least one account describes loafer fabric deteriorating after hand-washing with mild detergent. For kitchen use specifically, machine wash rather than hand-wash, and this concern is largely avoided.

    Best for: Home cooks who want a slightly more structured silhouette than a flat but don’t want the athletic look of the sneaker. Good for the transition from kitchen to sitting down with guests without looking like you’re wearing cooking shoes.

    A Note on Insoles

    If you’re planning to use Rothy’s for extended kitchen sessions — think full holiday cooking, lengthy dinner party prep, or any situation where you’re on your feet for two hours or more — add a basic half-insole before you start. Around $8 to $12 at any pharmacy. The arch support in Rothy’s standard footbed is minimal, and the insole makes a meaningful practical difference for longer wear without affecting the shoe’s appearance or machine-washability. Remove the insole before washing, replace it after.

    Quick Reference: Rothy's in the Kitchen


    The Point

    The Flat

    The Sneaker

    The Driver

    Kitchen suitability

    ✅ Strong

    ✅ Strong

    ✅ Strong

    ✅ Good

    Machine-washable

    ✅ Yes

    ✅ Yes

    ✅ Yes

    ✅ Yes

    Best for extended standing

    Average

    Average

    ✅ Best

    Average

    Wide foot suitability

    Narrow

    Narrow

    ✅ Most accommodating

    Moderate

    Ease of on/off

    Slip-on

    Slip-on

    ✅ Slip-on

    ✅ Slip-on

    Durability evidence

    ✅ 4–5 year accounts

    Good

    ✅ 5-year account

    Good

    Starting price

    $149

    $145

    $149

    $149