House On The Crescent

You are viewing Blog

Your blog category

SoloPerformance App Review: The Coaching Platform Built for the Gym Floor

SoloPerformance App Review: The Coaching Platform Built for the Gym Floor

SoloPerformance App Review: The Coaching Platform Built for the Gym Floor

SoloPerformance’s most practically distinctive feature in a crowded coaching software market is the one competitors have not built: a smart TV projection mode that displays the current training session on a gym screen during group training, eliminating the paper printouts and individual phone-checking that interrupt session flow. For a strength and conditioning coach managing a team of 15–30 athletes through a circuit or strength session, projecting the workout eliminates five minutes of transition time per exercise — time that compounds across a full training week. The platform’s position in the market is specific: not a personal training app, not a gym management platform, but a tool built specifically for performance staff who manage athlete programming across multiple teams or sport codes simultaneously.

Quick Highlights

✅ Smart TV projection during live group sessions — no equivalent in competing platforms. The ability to project a training session onto a gym screen from a coach’s smartphone or tablet, updating in real time as athletes complete exercises, is SoloPerformance’s most immediately practical differentiator from TeamBuildr, TrueCoach, and Smartabase.

✅ %RM and %BW auto-calculation personalises every session without manual work. Once each athlete’s tested maximums are entered, every session prescription auto-calculates the actual load for that individual. A programme written at 70% 1RM generates a different weight for every athlete automatically — meaningful time savings for coaches with large squads.

✅ Multi-coach collaboration built into the architecture. Head coaches, assistant coaches, performance directors, and sport scientists can all operate within the same platform with appropriate access levels — sharing athlete data, programme templates, and training timelines without the siloed spreadsheet problem that persists in most sports institutions.

✅ Performance Hub dashboard provides cross-programme visibility simultaneously. Coaches managing multiple teams or sport codes can view all programme timelines, athlete loads, and session statuses in a single dashboard — the decision-support tool for a performance director overseeing a full athletic department.

✅ 14-day free trial with no credit card required — the right evaluation structure. Software that costs $49–$99-plus per month should be tested with real athletes before commitment. SoloPerformance’s no-credit-card trial eliminates the barrier to proper evaluation.

✅ Programme and athlete history stay with the coach — not the institution. For coaches who build intellectual property in their programming systems, SoloPerformance’s documented portability policy means workout libraries, athlete histories, and programme templates travel with the coach between employers.

✅ HSA/FSA eligible with the Sleep Disruption Test documentation. For coaches who are also athletes managing their own recovery, HSA eligibility is a documented cost tool — though this applies more to the athlete-facing side of the platform than coaching subscription costs.

❌ No nutrition tracking, habit coaching, or lifestyle monitoring tools. SoloPerformance delivers strength and conditioning programme management — it does not cover nutrition, sleep tracking, or lifestyle habits. Coaches who want a single platform covering all aspects of athlete management need supplementary tools alongside it.

❌ Team and enterprise pricing requires direct sales engagement — not transparent publicly. WifTalents’ comparison documents team plan pricing starting from $99/month, but institutional and enterprise pricing requires contacting SoloPerformance directly. For coaches proposing software to an institution’s procurement process, this comparison friction is a genuine barrier.

❌ Newer entrant versus established competitors with longer track records. TeamBuildr, TrueCoach, Teamworks, and Smartabase all have longer institutional adoption histories, documented case studies, and larger user communities. For coaches who need established credibility to pass an institutional procurement review, this track record gap is a real consideration.

Who It's Actually For

SoloPerformance is the right evaluation for: strength and conditioning coaches at club, academy, or collegiate level who manage teams of 10-plus athletes and want a professional-grade programming platform. Sports scientists or performance directors who oversee multiple training programmes simultaneously. Any coach who runs group gym sessions and wants to eliminate paper printouts and phone-checking through smart TV projection.

SoloPerformance App Review: The Coaching Platform Built for the Gym Floor

It is not designed for: individual personal trainers who want a client management platform with billing, nutrition, and habit coaching built in. Gym owners who want facility management alongside programming tools.

SoloPerformance vs Competitors

Feature

SoloPerformance

TeamBuildr

TrueCoach

Teamworks

TrainHeroic

Starting Price

~$49/mo

~$99/mo

~$26/mo

Enterprise

~$45/mo

Smart TV Projection

✅

❌

❌

❌

❌

%RM Auto-Calc

✅

✅

✅

✅

✅

Multi-Coach Collaboration

✅

✅

✅

✅

✅

Nutrition Tracking

❌

❌

❌

✅

❌

Free Trial

✅ 14 days

✅ 14 days

✅ 14 days

❌

✅

Data Portability

✅

✅

✅

⚠️ Varies

✅

Track Record

Newer

✅ Established

✅ Established

✅ Established

✅ Established

Final Verdict

SoloPerformance delivers the one feature no competing platform has — smart TV gym projection for live group sessions — alongside a professionally complete strength and conditioning programme management system. The platform serves its intended user — performance staff managing team athletes — with specific, practical functionality rather than trying to be everything to everyone. The honest limitations are track record depth versus established competitors and team pricing that requires sales engagement. Start with the 14-day free trial, run a real squad through a full training week, and compare the workflow against TeamBuildr and TrueCoach before committing.

Category

Score

Smart TV Projection

9.5 / 10

Programme Design Tools

8.5 / 10

%RM Auto-Calculation

9.0 / 10

Multi-Coach Architecture

8.5 / 10

Nutrition/Lifestyle Tools

2.0 / 10

Pricing Transparency

6.5 / 10

Track Record

6.0 / 10

Trial Structure

9.0 / 10

Overall

7.9 / 10

Frank Green Review: The Grammy’s Cup — What US Buyers Actually Get

Frank Green Review: The Grammy’s Cup — What US Buyers Actually Get

Frank Green Review: The Grammy's Cup — What US Buyers Actually Get

Frank Green earned a specific and independently verifiable honour: it was selected as the official reusable cup of the Grammy Awards — a credential that distinguishes it from every other reusable cup brand in the US market and signals mainstream cultural relevance beyond the sustainability niche. The honest reality documented by US buyers on Trustpilot is more complicated: the ceramic lining genuinely delivers on its promise of eliminating metallic taste, but the paint durability on newer models is inconsistent enough that a US buyer who purchases based on the Grammy association and expects premium durability will sometimes be disappointed within the first month.

Quick Highlights

✅ Official reusable cup of the Grammy Awards — the most recognisable entertainment cultural endorsement in the drinkware category. No other reusable cup brand has a Grammy association. For US buyers who want a cup that signals both sustainability commitment and cultural currency, Frank Green’s Grammy credential is a genuine differentiator.

✅ Ceramic inner lining eliminates metallic taste — the feature that separates it from stainless competitors. Stainless steel cups affect the taste of coffee and tea for sensitive palates. The ceramic lining creates a taste-neutral surface — documented consistently by buyers who switched specifically for this reason.

✅ Colour customisation is unmatched in the US reusable cup market. Mix-and-match lid, base, and button across dozens of colour options. No competitor offers this depth of personalisation for a standard reusable cup.

✅ BPA-free, FDA and EU-approved materials — documented safety standard. All Frank Green products use BPA-free, FDA and EU-approved materials. For buyers concerned about chemical leaching from daily hot beverage contact, this certification is the relevant safety baseline.

✅ 15 uses to carbon-neutral — documented sustainability break-even. Frank Green documents 15 uses as the point where the carbon cost of manufacturing the cup is offset by disposable cup elimination. For US buyers motivated by environmental impact, this specific break-even point is more actionable than generic sustainability language.

✅ Monogramming service available — strong gifting appeal in the US market. US buyers document Frank Green cups as well-received, visually distinctive gifts — the colour customisation and monogramming service creates a personalisation level that generic stainless cups cannot offer.

❌ Paint chipping documented within one month on newer models. Multiple US and Australian Trustpilot buyers document paint chipping within weeks to months of purchase — not after years of use. For a US buyer spending $40-plus on a reusable cup, one-month paint failure is an unacceptable quality outcome at any price point.

❌ Warranty response documented as inconsistent — blame deflected to buyer. Paint flaking blamed on dishwasher use despite buyer explicitly confirming hand-washing only. Warranty claims for structural paint failures classified as “general wear and tear.” US buyers who expect straightforward warranty coverage for manufacturing defects may encounter resistance.

❌ Lid leaking documented — contradicts “spill-proof” marketing. Multiple Trustpilot buyers document the cup leaking when upright. Frank Green’s own marketing calls the lid spill-proof. The documented buyer experience on specific units directly contradicts this claim.

❌ No change-of-mind returns from the US site. Frank Green’s North America policy states no change-of-mind returns are accepted. For a product where colour mismatch between website photography and delivered item is documented, this is a meaningful buyer risk.

Is Frank Green Worth It for US Buyers?

Best for: US buyers who specifically want a ceramic-lined cup for taste, want the Grammy cultural association, and are purchasing for aesthetic gifting where the colour customisation is the primary value.

Better alternatives for most US buyers:

  • Thermal performance priority: Yeti Rambler — documented superior insulation, proven US warranty enforcement
  • Ceramic lining + better quality: Joco — similar ceramic lining approach with stronger durability documentation
  • US-manufactured: Fellow Carter Everywhere Mug — US-designed with strong build quality and wide US retail availability
Frank Green Review: The Grammy's Cup — What US Buyers Actually Get.

Buy from Amazon: If purchasing Frank Green in the US, Amazon’s return policy provides meaningful protection if paint failure or lid leaking occurs — more practical than navigating Frank Green’s direct warranty process.

Category

Score

Grammy Cultural Credential

9.5 / 10

Ceramic Taste Performance

8.0 / 10

Paint Durability (Newer Models)

4.5 / 10

Colour Customisation

9.5 / 10

Lid Reliability

5.5 / 10

Warranty Enforcement (US)

4.5 / 10

Value vs Competitors

5.5 / 10

Gifting Appeal

9.0 / 10

Overall

7.0 / 10

Lulus vs Revolve — The Fashion Brand Comparison Worth Reading Before You Buy

Lulus vs Revolve — The Fashion Brand Comparison Worth Reading Before You Buy

Lulus vs Revolve — The Fashion Brand Comparison Worth Reading Before You Buy

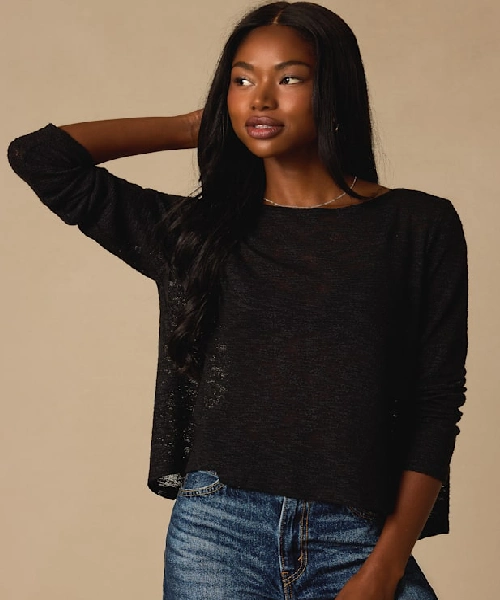
If you’ve spent any time shopping for occasion wear or elevated everyday fashion online, you’ve landed on both of these sites. Possibly multiple times. Possibly with multiple browser tabs open, comparing the same type of dress across both, trying to figure out which one to trust.

I’ve been there. I’ve also now bought from both brands enough times across enough different categories to give you an account that’s based on experience rather than on promotional copy. Here’s what I found out.

Products

Lulus built its reputation on occasion dresses — the bridesmaid category, the wedding guest category, the formal event category where you need something that photographs well, fits properly, and doesn’t require spending significantly more than you want to on a dress you’ll wear twice. The quality for the price in this specific category is consistently above what the price suggests. The silhouettes are current without being aggressively trend-driven. The sizing runs true to the published size chart in most cases, which matters more than it might seem for a brand where most purchases are made without trying things on.

  • Available at: Lulus (lulus.com)
  • Best for: Occasion wear, bridesmaid dresses, wedding guest looks, and any situation where you need something that looks significantly more expensive than it is without spending significantly more than you want to

Beyond occasion wear, Lulus produces an everyday range of blouses, tops, and casual dresses that extends the brand beyond the event category. The quality here is more variable than the occasion wear — the best pieces are excellent for the price, the weaker pieces are obviously more mass-market in their construction. The everyday range rewards specific searching rather than broad browsing: knowing the category you want and reading the individual product reviews rather than trusting the brand as a whole.

  • Available at: Lulus (lulus.com)
  • Best for: Completing an outfit around a specific Lulus occasion piece, or finding specific elevated basics at accessible prices when the individual product quality reviews support it

Revolve is not a clothing brand in the way Lulus is — it’s a multi-brand retailer that carries a curated selection of independent and premium brands alongside its own private labels. The dresses at the upper end of the Revolve range are genuinely premium — better fabric, better construction, better finishing than the occasion wear at Lulus. They are also priced accordingly, with $200–$400 representing the middle of the range rather than the top of it.

  • Available at: Revolve (revolve.com)
  • Best for: Investment occasion pieces where quality genuinely matters, event dressing where the dress will be worn multiple times and needs to hold up, or specific brands only available through Revolve’s curation

The Quality Gap — What the Price Difference Actually Buys

This is the most important question in this comparison and the one most reviews answer vaguely.

At equivalent price points, Lulus and Revolve’s own label products are comparable in quality. The fabric weights are similar. The construction finishing — seam allowances, zipper quality, lining — is in the same tier. Lulus has spent years refining the specific categories it’s known for, particularly occasion wear, and the quality in those categories is consistently competitive with brands that charge more.

At higher price points, Revolve’s third-party brand curation pulls ahead. A $280 dress from a brand Revolve carries — AMUR, Lovers + Friends, NBD — is a genuinely better-made garment than a $280 hypothetical at Lulus, because Revolve at that price is sourcing from brands that make that quality their standard, not their ceiling.

The practical implication: if your budget is under $150, Lulus consistently provides better value than Revolve. If your budget is over $200 and quality longevity matters, Revolve’s premium brands deliver the quality the price suggests.

Sizing — The Variable That Trips Everyone Up

Lulus sizing is relatively consistent and their size chart is reliable. The brand publishes measurements for each size, the model height and measurements are listed on product pages, and the community review sizing notes are accurate often enough to be genuinely useful. You can buy from Lulus with reasonable confidence that the size chart will tell you what you need to know.

Revolve sizing is considerably more complicated because Revolve carries dozens of brands, each with its own sizing conventions. A size S in one brand on Revolve is not the same garment dimension as a size S in another. The individual product pages vary in how much sizing guidance they provide. Returns are processed, but shipping back international returns adds friction.

For first-time purchases, Lulus is significantly less risky from a sizing perspective. For Revolve purchases, reading the specific brand reviews rather than general Revolve reviews is essential — sizing notes for a brand are brand-specific, not site-specific.

Returns — The Experience That Reveals the Brand

Lulus returns are free within the US and the process is straightforward. The return window is reasonable. The refund process is consistent. For a brand operating primarily online, the returns experience is one of the things they’ve clearly invested in getting right — because a buyer who has a frictionless return is more likely to buy again than one who fought for a refund.

Revolve’s returns are also free within the US. The Prime Wardrobe-style try-before-you-buy approach they offer for some customers is genuinely useful for the multi-brand sizing uncertainty issue. The return process is functional, though the scale and variety of brands means resolution occasionally takes longer than Lulus’ more controlled operation.

Both brands are better than the average online fashion retailer on returns. Neither should give you pause about ordering something you’re uncertain about.

The Instagram Aesthetic Question

Both brands have built significant social media presences and both have cultivated specific visual identities through influencer marketing. Lulus’ aesthetic skews younger, more accessible, more trend-responsive. Revolve’s aesthetic is more aspirational, more vacation-and-event-focused, more aligned with the specific visual language of the high-follower lifestyle influencer.

This matters more than it seems because buying into an aesthetic that isn’t yours produces the specific disappointment of a garment that looked right in the content you saw it in and looks wrong in the context of your actual life and wardrobe. Lulus is more versatile precisely because its aesthetic is less specific. Revolve is more distinctive precisely because its aesthetic is more specific — which means it’s right for you or it isn’t.

The Honest Verdict

Buy from Lulus if: you need occasion wear that looks expensive without being expensive, your budget is under $150 for individual pieces, you want reliable sizing and easy returns, or you’re shopping for bridesmaid or wedding guest looks where coordinating across multiple people requires a consistent quality floor.

Buy from Revolve if: your budget reaches the premium tier where Revolve’s brand curation delivers genuine quality improvement, you’re looking for specific brands that Revolve carries exclusively, or the specific Revolve aesthetic is genuinely yours rather than an aspiration.

Buy from both if you’re smart about it: Lulus for occasion dresses and the specific categories where they’ve refined their quality, Revolve for investment pieces and the premium brands whose quality justifies their price. The brands are not in competition for the same customer in the same moment — they serve different budgets doing different things, and using them accordingly is more useful than choosing one as definitively better than the other.

Vessi vs Allbirds — The Comfortable Sneaker Comparison That Actually Tells You Something

Vessi vs Allbirds — The Comfortable Sneaker Comparison That Actually Tells You Something

Vessi vs Allbirds — The Comfortable Sneaker Comparison That Actually Tells You Something

The comfortable, casual, daily-wear sneaker category has become genuinely crowded in the past few years, and Vessi and Allbirds represent two of the most consistently recommended options in it — for reasons that are more different from each other than their visual similarity implies.

Both brands make lightweight, casual sneakers that prioritise everyday comfort over athletic performance. Both have strong sustainability narratives. Both have built significant followings among buyers who want footwear that works for a full day of walking without the visual language of a traditional running shoe. That’s approximately where the similarities end.

The specific difference that determines which brand is right for you comes down to one question: does it rain where you live, or do you care about it raining when it does?

Products

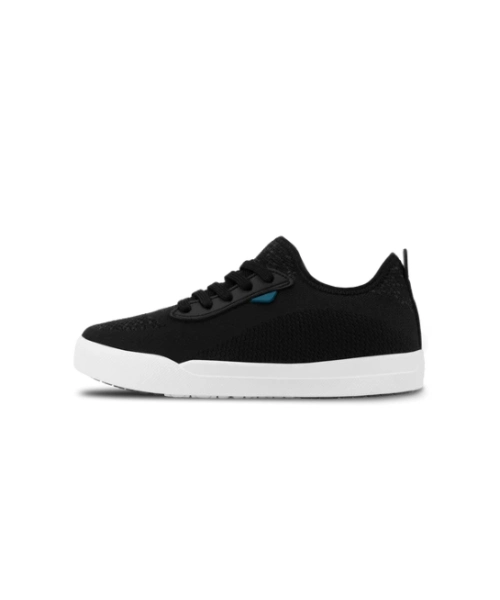
The Everyday Move is Vessi’s core casual sneaker — the shoe built on their proprietary Dyma-tex waterproof knit upper that blocks water completely while remaining breathable enough for year-round daily wear. The waterproofing is not a coating applied over fabric. The fabric itself is the waterproof element, woven in a way that prevents water penetration from outside while allowing moisture vapour from the foot to escape. It works. Not approximately — completely. Water does not get through the Vessi upper.

  • Available at: Vessi (vessi.com)
  • Best for: Anyone who walks in wet conditions regularly, commutes in variable weather, or simply wants the freedom of not thinking about whether it’s going to rain — the shoe that removes weather as a footwear consideration entirely

The Weekend is Vessi’s slightly more casual, slightly lower-profile silhouette — the same Dyma-tex waterproof knit in a shape that sits closer to a classic canvas sneaker than the Everyday Move’s athleisure profile. For those who want the waterproofing in a shoe that works more naturally with casual and smart-casual outfits rather than activewear, the Weekend is the better fit.

  • Available at: Vessi (vessi.com)
  • Best for: Those who want Vessi’s waterproofing in a more versatile casual silhouette — works with jeans and chinos in a way the Everyday Move doesn’t quite achieve

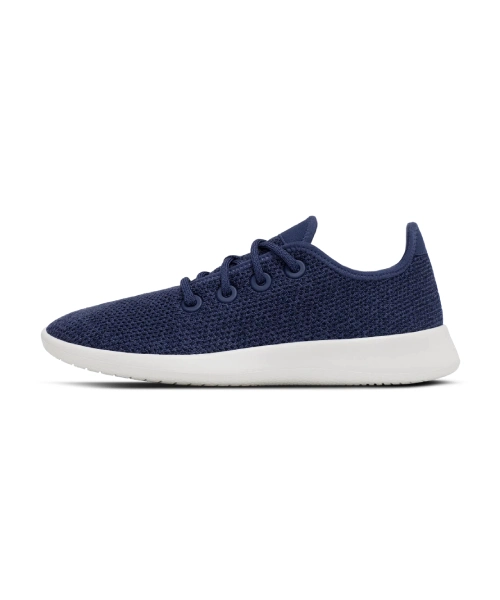
The Tree Runner is Allbirds’ flagship — the shoe that built the brand. A lightweight, breathable sneaker made from TENCEL lyocell with a natural rubber sole and the specific cushioning that made Allbirds the shoe that technology company offices adopted as the unofficial uniform for approximately three years. The comfort is genuine. The breathability is excellent. The shoe is not waterproof in any meaningful sense.

  • Available at: Allbirds (allbirds.com), select retailers
  • Best for: Dry climates and indoor environments where waterproofing is irrelevant and breathability and comfort are the primary requirements — the shoe that genuinely is the most comfortable thing on feet that don’t need to be dry

The Wool Runner uses merino wool — a warmer, slightly more structured upper than the Tree Runner’s lyocell. The wool construction provides natural odour resistance and temperature regulation that makes the shoe comfortable across a wider temperature range than most synthetics. Still not waterproof — merino wool in rain is a wet foot waiting to happen — but the warmth and comfort profile makes these the better Allbirds choice for cooler, drier weather.

  • Available at: Allbirds (allbirds.com), select retailers
  • Best for: Cooler weather where breathability is less critical than warmth, and where weather conditions are predictable enough that rain isn’t a regular variable

The Waterproofing Gap — The Most Honest Thing I Can Tell You

This is the difference that everything else in this comparison flows from.

Vessi’s Dyma-tex upper is genuinely, completely waterproof. Not water-resistant — that coating that keeps light drizzle out for the first six months before it starts to fail. Genuinely waterproof, in the way that a proper rain jacket is waterproof. I have walked through puddles deep enough to feel the water pressing against the upper and come out with completely dry feet. This works. Consistently. Across the full expected lifespan of the shoe.

Allbirds are not waterproof. The Tree Runner’s lyocell upper and the Wool Runner’s merino upper both absorb water when wet. Not dramatically — neither shoe becomes a sponge in light drizzle — but in genuine rain or puddle contact, your feet will get wet. This is the honest bottom line.

For anyone who lives somewhere it rains regularly, commutes on foot or by public transit in variable weather, or simply does not want to check the weather before choosing shoes, this difference is decisive. Vessi solves a real daily problem. Allbirds does not attempt to.

For anyone in a dry climate where rain is genuinely rare, or who primarily wears shoes indoors or in controlled environments, the waterproofing advantage is theoretical rather than practical. In those conditions, the Allbirds’ superior breathability and the specific lightweight comfort of the Tree Runner is the more relevant factor.

Comfort — The Variable That's Harder to Quantify

Both brands are comfortable. The nature of the comfort is different.

Allbirds’ comfort comes primarily from the cushioning — the SweetFoam midsole has a soft, slightly springy quality that makes standing and walking for extended periods less fatiguing than most shoes at a comparable price. The shoe is extremely lightweight, which amplifies the comfort during long days. The upper conforms to the foot without pressure points in a way that requires very little break-in period. You can wear Allbirds on the day you buy them for twelve hours without paying for it.

Vessi’s comfort is solid but different in character. The Dyma-tex knit upper has a slightly firmer texture than the Tree Runner’s lyocell — it’s comfortable and breathable, but it doesn’t have the same next-to-nothing quality that makes Tree Runners feel almost like wearing nothing at all. The midsole cushioning is adequate rather than exceptional. If you stand in place for long periods, Allbirds wins this comparison. If you walk for long periods, the difference is smaller.

Durability — What Holds Up Over Time

Vessi holds up well. The waterproof knit maintains its integrity across the expected life of the shoe — the waterproofing doesn’t degrade the way applied waterproof coatings do, because the waterproofing is structural rather than applied. The soles show normal wear. The upper doesn’t fray or lose shape significantly with regular use.

Allbirds has a more variable durability record, particularly with the Tree Runner. The lyocell upper can develop pilling and matting with heavy daily use. The shoe is washable — machine washing on a cold gentle cycle is the recommended maintenance — and washing helps extend the life. But the Tree Runner at six to twelve months of daily use often shows wear that Vessi at the same usage level typically doesn’t.

The Wool Runner is more durable in terms of the upper maintaining its appearance, but the wool can felt slightly with washing if not handled carefully.

The Sustainability Narrative — Worth Reading Beyond the Marketing

Both brands lead with sustainability credentials and both are genuine rather than purely marketing in this.

Allbirds is certified B Corp, uses TENCEL lyocell from sustainably sourced eucalyptus, Merino wool from ZQ-certified farms, and carbon offsets their entire supply chain. The carbon footprint transparency — Allbirds labels each shoe with its specific carbon footprint in grams of CO2 equivalent — is genuinely unusual and worth acknowledging.

Vessi uses recycled materials in the Dyma-tex knit and has B Corp certification. The waterproof construction also has an indirect sustainability argument: a shoe that can be worn in any weather without damage lasts longer in practical daily use than a non-waterproof alternative that gets avoided in wet conditions and potentially replaced sooner.

Neither brand’s sustainability commitment should be the primary purchase driver, but both are genuinely ahead of the footwear industry’s mainstream on this dimension.

The Honest Verdict

Buy Vessi if: you live somewhere it rains, you commute in variable weather, you want to stop thinking about weather when choosing shoes, or you’ve been disappointed by water-resistant coatings that failed within a year. The waterproofing is the entire case for Vessi and it’s a strong case.

Buy Allbirds if: weather genuinely isn’t a variable in your daily life, you stand more than you walk, you want the most comfortable casual shoe in the category from the first wear, or the breathability of the Tree Runner’s construction is specifically important to you.

Buy neither if: you need arch support, plan to run or do serious exercise in them, or want a shoe that will hold up to genuinely rough conditions. Both are casual everyday sneakers and both are best used as exactly that.

McGee & Co vs Pottery Barn — The Home Decor Comparison Nobody Is Being Honest About

McGee & Co vs Pottery Barn — The Home Decor Comparison Nobody Is Being Honest About

McGee & Co vs Pottery Barn — The Home Decor Comparison Nobody Is Being Honest About

There is a particular type of home decor brand comparison that gets written constantly and says almost nothing. It lists the price differences, reproduces the marketing language of both brands, and arrives at a conclusion so hedged it could apply to any two things in the same general category.

This is not that comparison.

McGee & Co and Pottery Barn occupy genuinely different positions in the home decor market, and understanding what those positions actually are — rather than what each brand’s Instagram presence implies they are — is what makes this comparison useful. I have purchased from both, lived with pieces from both, and returned things from both. Here is what that experience actually taught me.

Products

The Larkin is one of McGee & Co’s most consistently recommended upholstered pieces — a tight-back, bench-seat sofa with clean lines and the specific kind of restrained silhouette that reads as considered rather than trend-driven. The fabric options run toward natural linens and bouclés that photograph beautifully and require the specific care that natural fiber upholstery always requires. The lead time is the thing to know before ordering: custom upholstered pieces from McGee & Co run eight to fourteen weeks as a standard expectation, occasionally longer. This is not a sofa you order on Tuesday and have by the weekend.

  • Available at: McGee & Co (mcgeeandco.com)
  • Best for: Those building a room with a specific aesthetic in mind and for whom the wait time is manageable — the sofa that holds a room together rather than competing with it

The Pottery Barn Roll Arm is the upholstered piece that has been in the Pottery Barn range long enough to qualify as a classic rather than a current offering — the rolled arm silhouette, the deep seat, the variety of fabric options that spans performance weaves to natural linens. The lead time is typically shorter than McGee & Co for in-stock fabric options, and the performance fabric choices are genuinely better for households with children, pets, or the specific anxiety about a light linen sofa in a high-use room.

  • Available at: Pottery Barn (potterybarn.com), in stores
  • Best for: Those who want upholstered furniture in a proven, timeless silhouette with better performance fabric availability and shorter lead times than boutique alternatives

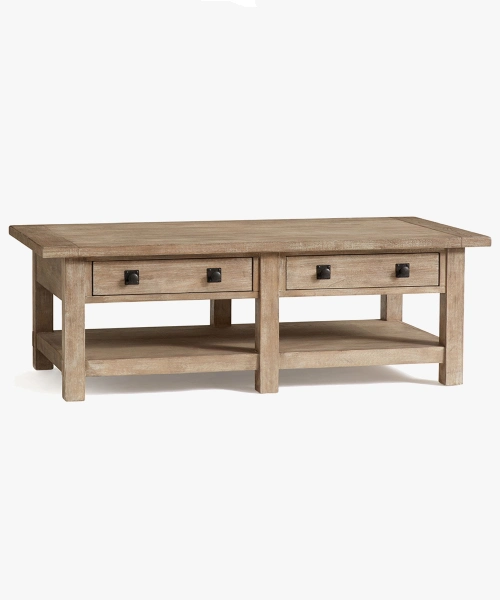
The Benchwright is Pottery Barn’s solid wood coffee table — genuinely solid, not veneered, in a reclaimed wood finish that has been a consistent seller because it works in most living room aesthetics without demanding a specific style commitment. The construction quality is honest for the price point and the finish wears well. It’s not a bespoke furniture piece. It is a reliably well-made, solid wood coffee table at a price that Pottery Barn’s scale makes possible.

  • Available at: Pottery Barn (potterybarn.com), in stores
  • Best for: Solid wood quality at a mid-range price — the table that does its job without demanding attention

What McGee & Co Actually Is — And What It Isn't

McGee & Co started as the product line of Studio McGee, the interior design firm behind the Netflix series. This context matters for understanding what the brand is selling and who it’s selling it to.

The brand’s aesthetic is specific and internally consistent — warm neutrals, natural materials, pieces with visual weight that photographs beautifully in the specific way that matters for interior design content. The pieces are designed to work together within that aesthetic, and they do. If the Studio McGee visual language is your visual language, the pieces are genuinely excellent for creating the rooms the brand is known for.

What the brand is not: a furniture manufacturer with decades of quality control refinement across every category. Some pieces are outstanding. Others are beautiful in product photography and less impressive in person. The woven and textured pieces tend to deliver on the visual promise consistently. The upholstered pieces are more variable — the quality depends significantly on the specific piece and the fabric choice.

The pricing is premium without being luxury. You are paying for the curation, the aesthetic coherence, and the brand association with a design studio that has a specific and significant cultural reach. Whether that premium is worth it depends on whether the aesthetic is genuinely yours or whether you’re buying into an aspirational version of it.

What Pottery Barn Actually Is — And What It Isn't

Pottery Barn is a mall brand that has been making home furnishings longer than most of its newer competitors have existed. This longevity cuts both ways: the brand has refined what it does well over decades, and it has also calcified in some areas where newer brands have moved ahead.

What Pottery Barn does consistently well: solid wood furniture at mid-range prices, upholstered furniture with genuinely good performance fabric options, and a consistent quality floor that means the worst thing you’ll buy from Pottery Barn is probably not a disaster. The quality control is real, the returns process is functional, and the lead times for in-stock items are manageable.

What Pottery Barn doesn’t do particularly well: the aesthetic. The Pottery Barn look is safe, coastal-adjacent, and recognisable in a way that immediately marks a room as Pottery Barn rather than Pottery Barn as part of a considered room. For buyers who want their home to have a distinct personality rather than a brand identity, this is the limitation.

The sale pricing at Pottery Barn is also worth knowing about specifically. The brand runs promotions frequently enough that paying full price is rarely the right decision. Patience is rewarded with meaningful discounts that aren’t available at McGee & Co, whose pricing is more stable and less promotion-driven.

Quality — The Honest Head-to-Head

Upholstered furniture: Comparable quality at similar price points, with Pottery Barn having better performance fabric availability and McGee & Co having better aesthetic coherence within their specific design language.

Solid wood furniture: McGee & Co uses solid wood more consistently across the range. Pottery Barn uses solid wood in specific pieces — like the Benchwright — but engineered wood with veneer is more common at the mid-range price points than the product descriptions always make immediately clear.

Accessories and decor: McGee & Co is consistently better. The textiles, the ceramic vessels, the woven baskets and lighting — the curation is more considered and the quality is more uniformly above what mass market brands provide.

Rugs: McGee & Co wins clearly in this category. The rug range is more specifically designed, better calibrated for room scale, and available in the specific colorways that work within the brand’s aesthetic rather than the broader market.

The Delivery and Returns Reality

McGee & Co lead times are long and need to be planned for. Eight to fourteen weeks for custom upholstery is not an unusual wait — it’s the standard expectation. For anyone furnishing a home on a timeline, this requires either planning ahead or buying from stock rather than custom.

Pottery Barn’s lead times vary significantly between in-stock and made-to-order items. In-stock items ship reasonably quickly. Custom upholstery lead times approach McGee & Co’s — four to eight weeks is common. The returns process at Pottery Barn is more established for a brand of its scale, with in-store return options that McGee & Co, as a primarily online brand, doesn’t offer.

The Honest Conclusion

Buy from McGee & Co if: the Studio McGee aesthetic is genuinely yours, you’re building a room with a specific visual coherence in mind, you care about decor accessories and rugs as much as furniture, and you can work within their lead times.

Buy from Pottery Barn if: you need performance fabric options for a high-use room, you want solid wood furniture at mid-range prices without the boutique premium, you want in-store availability and returns, or you want to wait for a sale rather than paying full price.

The comparison that is least useful: treating one as obviously better than the other. They’re not in the same market. McGee & Co is selling a specific and coherent aesthetic with the quality to support it. Pottery Barn is selling reliable home furnishings at scale with the finish and service infrastructure that comes from decades of refinement. Both are legitimate. Neither is right for everyone.

How to Cook Steak on a Pit Boss Pellet Grill – Getting the Perfect Crust and the Right Internal Temperature

By Posted on 0 Comments9min read0 views

How to Cook Steak on a Pit Boss Pellet Grill – Getting the Perfect Crust and the Right Internal Temperature

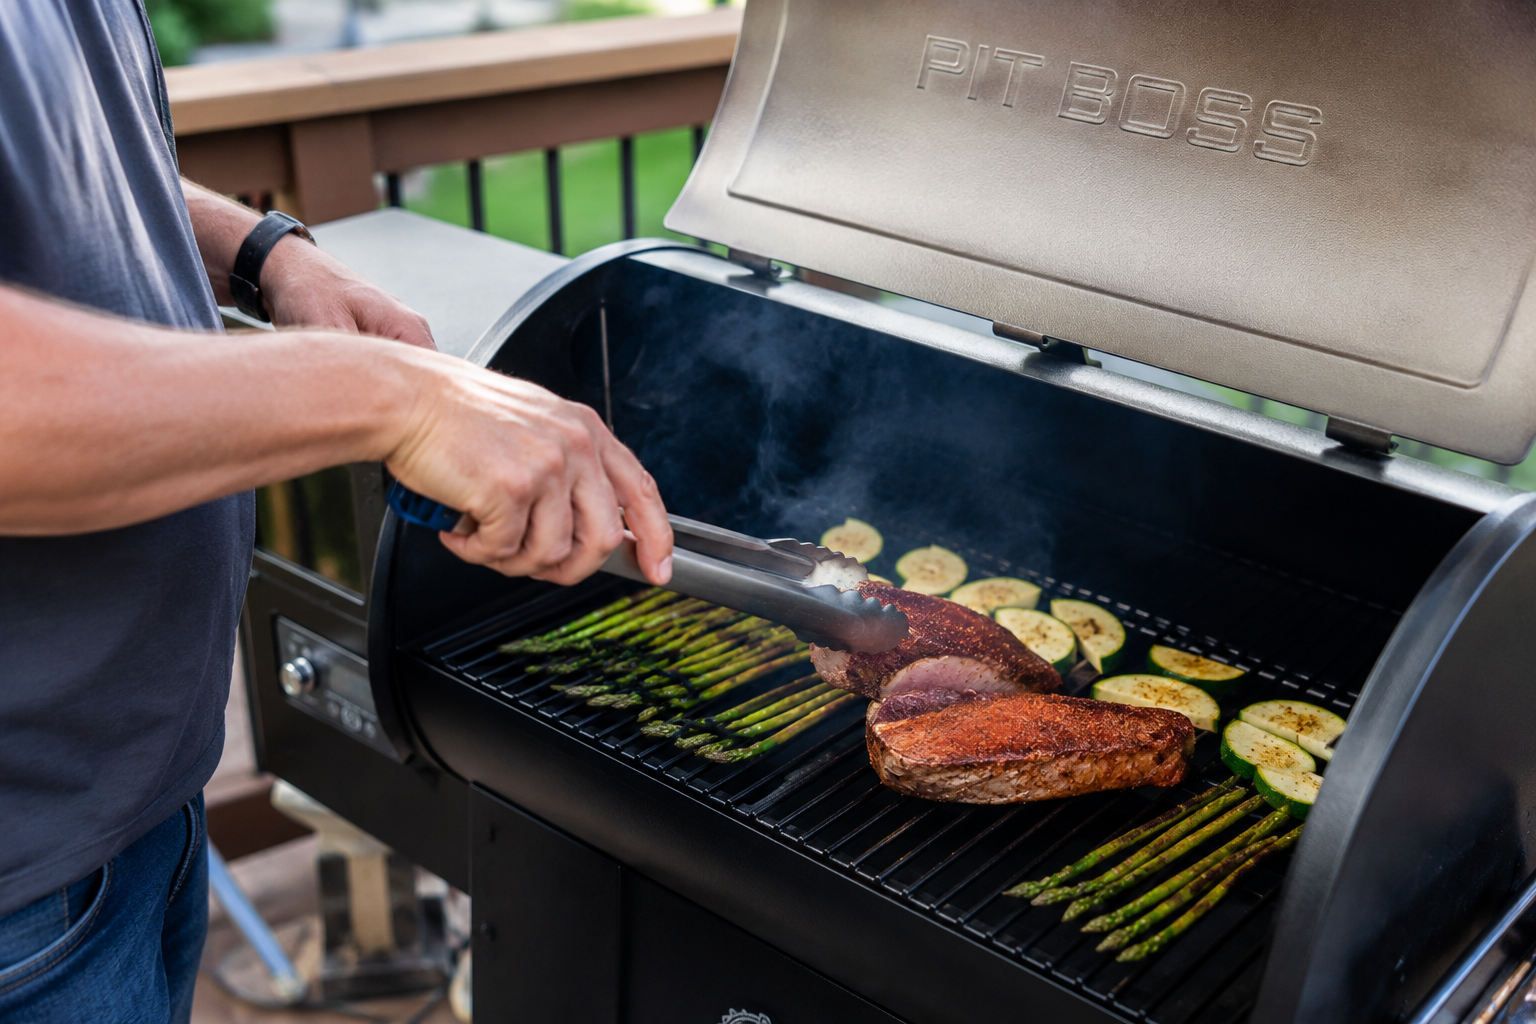
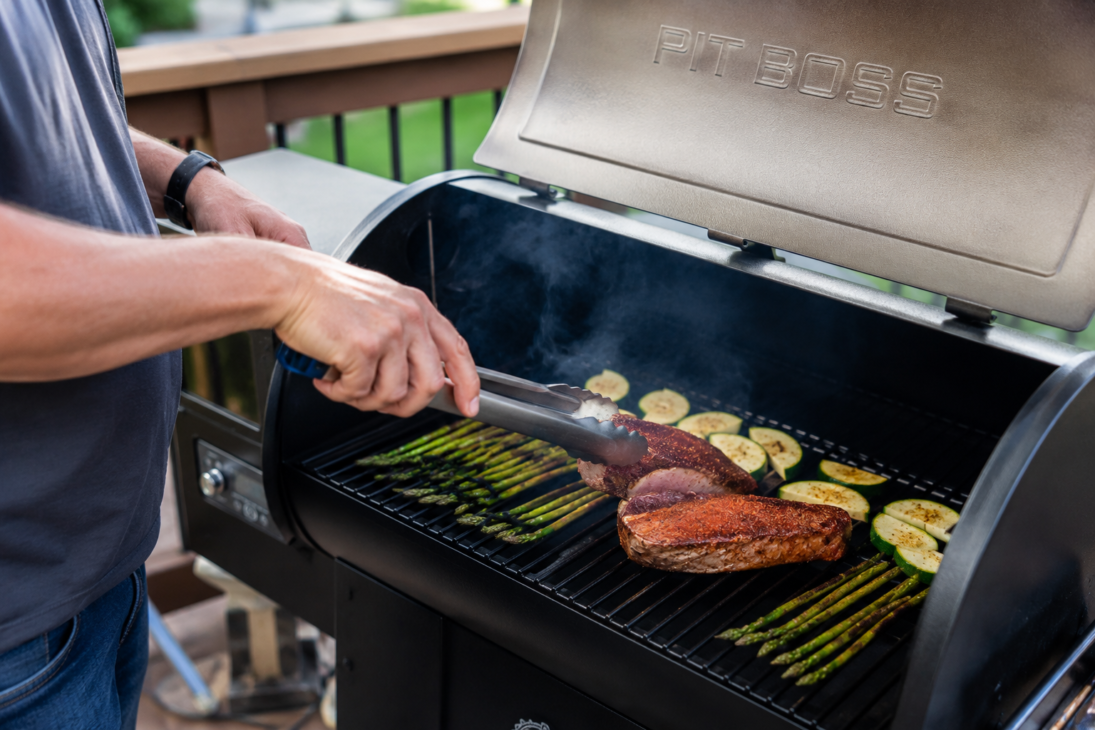
How to Cook Steak on a Pit Boss Pellet Grill

People who say you can’t cook a great steak on a pellet grill haven’t figured out how to use a pellet grill correctly. That’s the honest starting point of this guide.

The common criticism of pellet grills for steak is valid but solvable. The concern is that pellet grills don’t get as hot as gas or charcoal grills, and a hot sear is what produces the Maillard reaction — the browning that gives a steak its crust, its flavor, and the reason it looks and smells the way a properly cooked steak should. The criticism is true. The default pellet grill temperature range of 225°F to 450°F doesn’t match the 600°F+ that a charcoal chimney at full roar produces.

The solution is the reverse sear method, which takes this apparent limitation and turns it into a genuine advantage. When you understand what the reverse sear is doing and why, you’ll cook better steak on your Pit Boss than most people cook on any grill.

Choosing the Right Steak

Not every steak is equally suited to the pellet grill or to the reverse sear method.

Best choices for the Pit Boss:

Ribeye — The most popular steak on a pellet grill for good reason. The fat content in a ribeye (the eye of fat in the center, the marbling throughout the muscle) provides self-basting during the cook and an intensely beefy flavor that stands up to smoke beautifully. A 1.5-inch ribeye on a Pit Boss with a proper reverse sear is one of the best things you can eat.

New York Strip — Less fat than the ribeye, firmer texture, beefy flavor. The strip has a fat cap on one edge that renders down beautifully during the smoke phase. Slightly less forgiving than the ribeye if overcooked because there’s less fat to provide moisture, so temperature monitoring is more critical.

Tomahawk — The ribeye with the long rib bone still attached. Visually spectacular, cooks exactly like a ribeye but takes longer because of the bone’s effect on heat transfer. The bone also conducts heat through the thicker part of the steak which can affect cooking evenness if you don’t know to expect it.

How to Cook Steak on a Pit Boss Pellet Grill — Getting the Perfect Crust and the Right Internal Temperature

T-Bone and Porterhouse — A strip and a tenderloin separated by a T-shaped bone. The challenge is that the tenderloin cooks faster than the strip, so the two different muscles will reach different temperatures at the same time. Manageable but requires attention.

Filet Mignon — Beautiful cut, extremely tender, very little fat. Works on the Pit Boss but is the most expensive cut and the least smoke-appropriate because the mild flavor of the tenderloin doesn’t gain as much from smoke exposure as the more robustly flavored cuts. If you’re cooking filet, a shorter smoke time and more emphasis on the sear is the right approach.

Thickness matters more than anything else: Thin steaks (under 1 inch) are not candidates for the reverse sear. They cook too quickly at low temperature and don’t have enough mass to develop any smoke flavor before they’re done. For steaks under an inch, skip the reverse sear and cook directly at high heat.

The sweet spot for the Pit Boss reverse sear is 1.5 inches to 2 inches thick. If you’re buying steaks for pellet grill cooking, ask your butcher to cut them to this thickness. Most grocery store steaks are cut thinner than this for display purposes; a butcher will cut to your specifications.

Seasoning

Great steak doesn’t need much. The goal is to enhance the beef flavor, not cover it.

Minimum approach:

  • Kosher salt — applied generously, at least 45 minutes before cooking or the night before
  • Coarse black pepper — applied just before the steak goes on the grill

That’s it. Salt and pepper is the foundation that every more complex steak seasoning is building on.

Why salt in advance: When you salt a steak and let it sit, the salt draws moisture to the surface (you can see a wet puddle on the steak within a few minutes). This moisture then slowly reabsorbs back into the meat over 30 to 45 minutes, taking the salt with it and seasoning the meat rather than just the surface. Salt applied immediately before cooking sits on the surface and draws out moisture that doesn’t have time to reabsorb, which can make the exterior wet and interfere with browning.

If you don’t have 45 minutes, salt immediately before the steak goes on — you’ll lose some of the deep seasoning benefit but you won’t have the wet surface problem either. What you want to avoid is salting 10 to 20 minutes before cooking, which is the worst of both worlds.

For more complex flavor:

  • Garlic powder (not garlic salt — it already contains salt and will make the steak too salty)
  • Smoked paprika
  • Onion powder
  • A small amount of cayenne if you like heat

Some people apply a light coat of olive oil or avocado oil before the rub to help the seasoning adhere and promote browning. Both work. Avocado oil has a higher smoke point than olive oil, which matters more during the sear phase than the smoke phase.

Pellet Selection for Steak

Beef is robust enough to handle stronger smoke woods than chicken or fish.

Hickory — The classic beef smoke wood. Strong, assertive, slightly sweet. For steaks specifically, where the smoke exposure time is shorter than a brisket cook, hickory works extremely well.

Oak — The most versatile beef smoke wood. Post oak in particular is the traditional smoke wood of Texas barbecue culture. Medium intensity, slightly nutty, never overpowering. Excellent with steak.

Cherry — Adds a deep mahogany color to the exterior of the steak and a mild, slightly sweet smoke flavor. Works well blended with hickory or oak to add color while the oak or hickory provides the primary smoke character.

Mesquite — The most intense smoke wood in common use. Works for steak only because the smoke exposure during a reverse sear is brief enough that mesquite doesn’t have time to turn bitter. If you love that campfire, southwest Texas smoke character, mesquite on a short steak cook is one place it works. Avoid it for longer cooks.

The Reverse Sear Method — The Approach That Changes Everything

The reverse sear takes the conventional grilling order — sear hot first, then finish at lower heat — and inverts it. You cook the steak slowly at low temperature first to bring it close to your target internal temperature throughout the entire thickness of the meat, then you sear it at maximum heat at the end to build the crust.

Why does this work better?

When you sear first and finish at lower heat, the outside of the steak goes through a temperature gradient. The crust is above 300°F while the center might be 70°F when the sear starts. By the time the center gets close to target temperature, the outer portion of the steak has been cooked through a range that can result in a thick gray band of overcooked meat surrounding a smaller perfect center.

The reverse sear eliminates this. By bringing the entire steak to near-target temperature slowly at 225°F, the whole thing is at nearly the same temperature edge-to-edge before the sear starts. The sear then happens over less surface area that needs heat, and it happens faster, creating the crust without continuing to cook the interior. The result is a steak that’s the right temperature from edge to edge with a perfect crust rather than a bullseye cross-section of overcooked-less overcooked-perfect-less overcooked-overcooked.

The steps:

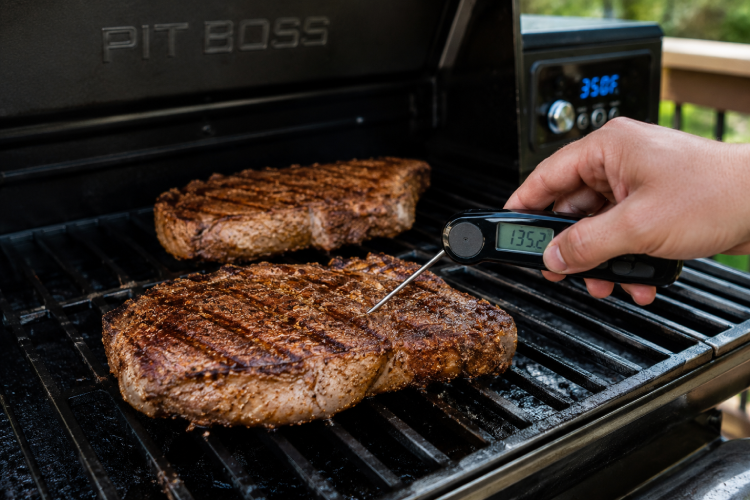
Step 1: Set the Pit Boss to 225°F and let it fully preheat. Place the seasoned steaks on the grill and insert a probe thermometer into the thickest part of one of them, horizontally through the edge of the steak so the tip is at the center.

Step 2: Smoke at 225°F until the internal temperature reaches the target pull temperature. This varies by your preferred doneness:

  • Rare: Pull at 110°F to 115°F
  • Medium-rare: Pull at 120°F to 125°F
  • Medium: Pull at 130°F to 135°F
  • Medium-well: Pull at 140°F to 145°F

At 225°F, a 1.5-inch ribeye takes approximately 25 to 40 minutes to reach these temperatures. Check after 20 minutes and then every 5 minutes.

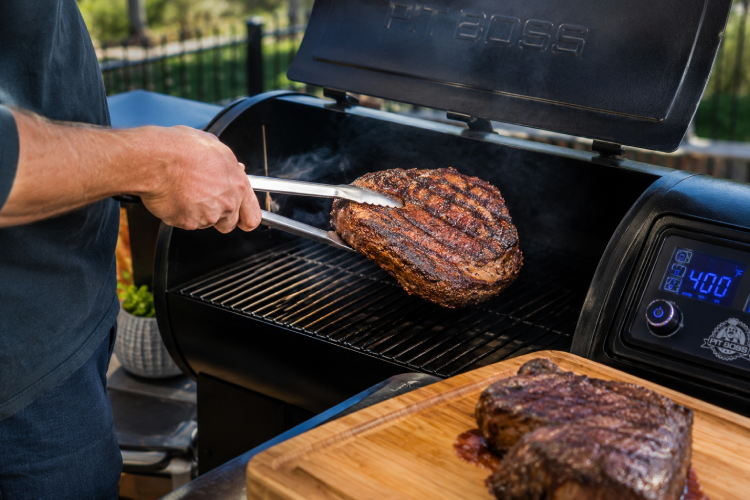
Step 3: Remove the steaks from the grill. Crank the Pit Boss to maximum temperature — the highest setting, typically 450°F to 500°F. On some Pit Boss models there is a sear mode or a slide plate that gives you direct flame access; use this if your model has it. It takes 15 to 20 minutes to fully preheat to maximum temperature. While the grill is preheating, let the steaks rest uncovered.

Step 4: When the grill is at maximum temperature, put the steaks back on. Sear for 1 to 2 minutes per side. You’re not cooking them further — you’re developing the crust. Don’t leave them on longer than this or you’ll push past your target internal temperature.

Step 5: Remove and rest for 5 minutes.

Direct High-Heat Method (for thinner steaks)

For steaks under 1 inch thick, the reverse sear doesn’t have enough time to work correctly. For these steaks, cook directly at the highest temperature your Pit Boss can produce.

How to Cook Steak on a Pit Boss Pellet Grill — Getting the Perfect Crust and the Right Internal Temperature

Lorem ipsum dolor sit amet, consectetur adipiscing elit. Ut elit tellus, luctus nec ullamcorper mattis, pulvinar dapibus leo.

Set to maximum temperature and preheat for 15 to 20 minutes. Place the steaks directly on the grates. Cook 2 to 3 minutes per side for medium-rare, monitoring temperature throughout. At high heat, a thin steak goes from undercooked to overcooked faster than you expect.

Finished Internal Temperatures

These are the finished temperatures after the rest period:

  • Rare: 120°F to 125°F (very red center, slightly warm)
  • Medium-rare: 130°F to 135°F (pink center, warm throughout)
  • Medium: 140°F to 145°F (slightly pink center, fully warm)
  • Medium-well: 150°F to 155°F (very little pink, fully cooked through)
  • Well done: 160°F+ (no pink, fully grey throughout)

The USDA recommends cooking whole muscle beef to 145°F internal. A medium-rare steak at 130°F is below the USDA guideline — this is the choice most steak-eating adults make daily with full understanding of the trade-off. If you’re cooking for someone with a compromised immune system, elderly individuals, or children, cooking to at least 145°F is the responsible choice.

The Butter Baste

This is optional but not really optional if you want the best possible steak. During the sear phase, a butter baste adds flavor and helps produce a more even, glossy crust.

In a small cast iron skillet or disposable aluminum pan on the grill during the sear phase, melt 2 tablespoons of butter with a smashed garlic clove and a sprig of thyme or rosemary. As the steaks sear, spoon the hot butter over them repeatedly. The butter promotes browning, the garlic and herbs infuse into the crust, and the result is a steak that tastes like something you’d pay $60 for at a restaurant.

Resting

Steak needs 5 minutes minimum rest. For large steaks over 1.5 inches thick, 8 to 10 minutes is better.

The standard advice about “the juices need time to redistribute” is accurate but it’s also worth noting what’s actually happening. Muscle fibers contract during cooking and squeeze liquid toward the center. During rest, the fibers relax and reabsorb some of that liquid. Cut in immediately and the liquid pours out; rest first and it stays in the meat.

Don’t tent the steak with foil during the rest unless the room is cold — foil traps steam and softens the crust you just worked to build.

Serving

Cut against the grain. This is the rule that matters as much as the cook itself. Find the direction of the muscle fibers and cut perpendicular to them. The same steak cut with the grain requires significantly more chewing than the same steak cut against the grain — the grain-against cut shortens the fibers, the grain-with cut means you’re chewing through long, intact muscle fibers.

For ribeye and strip steaks, the grain typically runs lengthwise through the steak. Cut across the width in ¾-inch to 1-inch slices.

Finish with a pinch of flaky salt (Maldon or similar) over the cut surface. The flaky salt adds crunch and pops the beefy, smoky flavor in a way that the kosher salt applied before cooking doesn’t replicate.

Quick Reference

Doneness

Pull temp (smoke phase)

Finished temp

Rare

110°F–115°F

120°F–125°F

Medium-rare

120°F–125°F

130°F–135°F

Medium

130°F–135°F

140°F–145°F

Medium-well

140°F–145°F

150°F–155°F

  • Pellets: Hickory, oak, or cherry
  • Smoke phase: 225°F, 25 to 40 minutes
  • Sear phase: Maximum heat (450°F+), 1 to 2 minutes per side
  • Rest: 5 to 10 minutes
  • Slice: Against the grain

Chicken Breast on a Pit Boss Pellet Grill — The Guide to Juicy Every Single Time

By Posted on 0 Comments7min read0 views

Chicken Breast on a Pit Boss Pellet Grill — The Guide to Juicy Every Single Time

Chicken Breast on a Pit Boss Pellet Grill — The Guide to Juicy Every Single Time

Chicken breast has a reputation problem and I get it. It’s the protein people default to when they’re trying to eat healthy, and because of that it gets cooked in a hurry, at the wrong temperature, with no preparation, and it comes out dry and flavorless and somehow gets blamed on the chicken rather than the technique. The chicken breast itself is fine. The cooking is usually the problem.

On a Pit Boss pellet grill, chicken breast can be something genuinely special — juicy with smoke flavor working all the way through, a slight char on the outside, and enough texture contrast to make it interesting rather than the protein you’re eating because you feel like you should. But it requires understanding a few things that most grilling guides skip over because they’re writing for people who are okay with mediocre chicken.

The Fundamental Problem with Chicken Breast

Chicken breast is lean, boneless, and completely unforgiving of overcooking. There’s no fat marbling inside the muscle to provide moisture as the temperature rises, and no bone to slow down the heat transfer. When chicken breast hits 165°F, the USDA says it’s done. When it hits 175°F, it’s dry. The window between done and too dry is about 10 degrees and can close in less than 5 minutes at high heat.

The solution is two-fold: prepare the chicken correctly before it goes on (brine), and cook it to the correct temperature while monitoring it constantly (thermometer).

Brining the Chicken Breast

This is the step that makes the biggest single difference to the end result. A brined chicken breast holds moisture through the cook in a way that unbrined chicken simply doesn’t.

Simple brine:

  • 4 cups cold water
  • 3 tablespoons kosher salt
  • 1 tablespoon sugar
  • Optional: garlic cloves, peppercorns, fresh thyme

Dissolve the salt and sugar in the water (you can use a cup of warm water to dissolve them and then add cold water to bring it to volume). Submerge the chicken breasts completely and refrigerate for at least 30 minutes. 1 to 2 hours is ideal. More than 4 hours and the texture starts to get mushy from the salt.

After brining, remove the chicken from the brine and pat completely dry with paper towels. Dry surface is important for getting any color or texture on the exterior.

If you don’t have time to brine: At minimum, season the chicken generously and let it sit at room temperature for 20 to 30 minutes before grilling. Cold chicken straight from the refrigerator onto the grill means the outside is cooking while the center is still catching up, which increases the risk of the exterior overcooking before the interior is done.

Getting the Chicken Breasts the Same Thickness

This is a step almost no home cook does and almost every good cook does. Chicken breasts taper from thick at one end to thin at the other. The thin end cooks twice as fast as the thick end. If you cook to the right temperature at the thick end, the thin end has been overcooked for 10 minutes. If you cook to the thick end’s timing, the thin end is dry and tough.

The fix is simple: pound the chicken breast to an even thickness using a meat mallet or rolling pin. Place each breast between two pieces of plastic wrap or in a zip-lock bag, and pound from the center outward until the entire breast is a consistent ¾ inch to 1 inch thick.

This is five minutes of work that produces dramatically more consistent results than any other single step besides brining.

Seasoning Options

Simple everyday seasoning:

  • 1 teaspoon kosher salt
  • ½ teaspoon black pepper
  • ½ teaspoon garlic powder
  • ½ teaspoon onion powder
  • ½ teaspoon smoked paprika
  • Drizzle of olive oil to help the seasoning stick and promote browning

Mix together and coat both sides of each chicken breast thoroughly. The olive oil also helps the exterior get some color on the grill rather than staying pale.

BBQ approach:
Start with the basic seasoning above and finish with a coat of your favorite barbecue sauce applied during the last 5 minutes of cooking. The sugar in BBQ sauce burns if applied too early, so brush it on at the end and let it caramelize rather than char.

Italian herb approach:

  • Salt, pepper, garlic powder
  • Dried oregano
  • Dried basil
  • Dried rosemary
  • Lemon zest if you have it

All of these work. The pellet grill adds smoke flavor that works as a fifth seasoning regardless of what you put on the outside, so simple seasonings often produce the best results because they let the smoke contribute without fighting it.

Pellet Selection

Chicken breast is mild enough that it can handle a range of smoke woods without being overpowered.

Apple or cherry wood pellets are the most popular choice for chicken. The mild, slightly sweet smoke complements poultry and produces good color on the exterior. Apple is the safer, more neutral choice; cherry gives a slightly darker color and a fraction more smoke intensity.

Pecan pellets work beautifully with chicken — slightly nuttier smoke, a little more depth than apple without being heavy.

Hickory: Use carefully with chicken breast. Hickory is strong enough that a full cook of chicken breast in heavy hickory smoke can produce a result that tastes more like smoke than chicken. If you like hickory, mix it 50/50 with apple to moderate the intensity.

Cooking Methods on the Pit Boss

There are two approaches that work well for chicken breast on a Pit Boss, and which you choose depends on whether you prioritize maximum smoke flavor or a grilled exterior.

Method 1: Low and slow, then sear

This is the “reverse sear” approach for chicken breast.

Start at 225°F. Place the chicken breast on the grill and smoke until the internal temperature hits 145°F to 150°F. This takes approximately 45 minutes to an hour depending on the size of the breast. At this point the chicken has absorbed significant smoke flavor and is close to done but not there yet.

Then crank the Pit Boss to its highest temperature setting (typically 450°F to 500°F) and sear the chicken for 2 to 3 minutes per side to develop color and texture on the exterior. Pull when internal temperature hits 160°F to 165°F.

This method gives you the best of both approaches — real smoke flavor from the low temperature phase, and good exterior texture from the high heat sear.

Method 2: Medium-high and direct

Set the Pit Boss at 375°F to 400°F and cook the chicken directly on the grates. At this temperature, the chicken develops color on the exterior while the interior cooks to temperature in approximately 15 to 20 minutes.

This method produces less smoke flavor than the reverse sear approach but takes half the time and still produces good results — the pellet grill ambient smoke during any cook contributes flavor even at higher temperatures.

Temperature Monitoring

Get a reliable instant-read thermometer and use it without apology. Cooking chicken breast without temperature monitoring is how you end up with dry chicken breast and a burned reputation for grilling.

Target internal temperature: 165°F at the thickest part of the breast. This is the USDA safe temperature. If you want to be more precise and are using a reliable thermometer, you can pull at 160°F — carryover cooking during the 5-minute rest will bring it to 165°F.

Insert the thermometer into the thickest part of the breast, parallel to the surface rather than straight down, to get a reading from the center of the meat rather than the underside. Keep the probe tip away from the grill grates or it’ll read the grate temperature rather than the meat temperature.

Resting

Chicken breast needs a rest of 3 to 5 minutes before cutting. This is less critical than with large cuts like brisket or turkey, but it’s still worthwhile — the juices redistribute during rest rather than running out onto the cutting board when you cut in immediately.

Tent the chicken loosely with foil while it rests. Tight foiling traps steam and softens any crust that formed on the exterior.

Serving

Slice against the grain of the chicken breast for the most tender result. The grain runs lengthwise through the breast; cutting perpendicular to this produces shorter, more tender mouthfuls.

A squeeze of fresh lemon over sliced smoked chicken breast makes the smoke flavor pop in a way that’s surprising if you’ve never tried it. The acid brightens everything.

Smoked chicken breast works in a dozen applications beyond serving whole — sliced over salads, chopped for tacos, folded into pasta, used in sandwiches. The smoke flavor carries through however you use it.

Troubleshooting

Chicken is dry: Almost always overcooked. Invest in a good thermometer and start checking at 155°F internal.

No color on the exterior: Skin or surface was wet before grilling. Pat completely dry and add a thin coat of olive oil or avocado oil before seasoning.

Rubbery texture: Could be undercooked, or the chicken went straight from the fridge to the grill. Let it come to room temperature before cooking.

No smoke flavor: Cook temperature was too high. Smoke absorption is most efficient at lower temperatures — cook at 225°F for at least the first half of the cook.

Quick Reference

  • Brine time: 30 minutes minimum, 2 hours ideal
  • Pound to: ¾ to 1 inch even thickness
  • Pellets: Apple, cherry, or pecan
  • Method 1: 225°F to 145°F, then sear at 450°F to 165°F
  • Method 2: 375°F to 400°F directly, 15 to 20 minutes
  • Done temperature: 165°F internal
  • Rest time: 3 to 5 minutes

Smoking Brisket on a Pit Boss Pellet Grill — How to Actually Get It Right

By Posted on 0 Comments9min read0 views

Smoking Brisket on a Pit Boss Pellet Grill — How to Actually Get It Right

Smoking Brisket on a Pit Boss Pellet Grill — How to Actually Get It Right

Brisket is the cook that sorts people into two groups. The first group tried it once, pulled a tough, dry, grey slab off the grill after eight hours and never went back to it. The second group figured out what went wrong, adjusted, and discovered that properly smoked brisket is the best thing you will ever eat off a grill. The gap between those two outcomes is almost entirely process.

Brisket is unforgiving of shortcuts in a way that other cuts aren’t. A chicken breast you pull 10 degrees too early is still edible. Brisket pulled too early is shoe leather. But when brisket comes off the Pit Boss exactly right — the flat sliceable and moist, the point falling apart, the smoke ring pink through the first quarter inch of meat, the bark dark and slightly crusty on the outside — it’s worth every hour it took.

This guide covers everything from buying the right brisket to slicing it correctly. Read through it completely before you start. Brisket is the one cook where you really need to understand the full picture before the meat hits the grill.

Choosing the Brisket

Brisket is a primal cut from the lower chest of the cow. The full packer brisket includes two distinct muscles: the flat (the leaner, thinner portion that most people picture when they think of brisket slices) and the point (sometimes called the deckle — a thicker, fattier muscle that sits on top of the flat and is the source of burnt ends if you’re making them separately).

Buy the full packer, not just the flat. A flat-only brisket cooked on a smoker almost always dries out because it lacks the fat protection of the point. The full packer allows the point’s fat cap to baste the flat during the cook. If you can only find a flat at your butcher, ask them to leave as much fat on it as possible.

Grade matters:

USDA Select is the minimum grade brisket in most grocery stores. The fat marbling is minimal and the results on a smoker are variable at best.

USDA Choice is what most competition pitmasters use and what you should aim for. Better marbling, more moisture in the flat, more consistent results.

USDA Prime is the top tier, with the most fat marbling. If you can find it at a price you’re comfortable with, it’s worth it — the additional intramuscular fat makes the flat significantly more forgiving during the long cook.

Wagyu brisket exists and is extraordinary if you have the budget. It’s also expensive enough that most people rightfully decide to get their technique sorted on Choice grade before spending Wagyu money.

Size: A full packer brisket typically runs 12 to 18 pounds. After trimming and shrinkage during the cook, you’ll lose roughly 30 to 40 percent of the raw weight. A 15-pound raw brisket yields approximately 9 to 10 pounds of finished meat. Plan for about ½ pound of cooked brisket per person.

Trimming the Brisket

This step takes 15 to 20 minutes and makes a meaningful difference to the finished result. Don’t skip it.

The fat cap — the thick layer of fat on one side of the brisket — needs to be trimmed down to approximately ¼ inch thick. This is enough fat to protect the flat during the cook and render down into flavor. More than ¼ inch and the fat doesn’t fully render, leaving a waxy, unpleasant layer. Less than ¼ inch and you lose the protection.

Smoking Brisket on a Pit Boss Pellet Grill — How to Actually Get It Right

Use a sharp boning knife or a flexible fillet knife. A dull knife on a brisket is genuinely dangerous because you end up using more pressure and losing control. Sharp knife, slow careful strokes.

Also trim off any hard, white fat chunks that you can see — particularly on the sides and underneath where the flat and point meet. Hard fat doesn’t render well and should be removed.

The brisket will look uneven after trimming. That’s fine. You’re going for a consistent fat cap thickness, not cosmetic perfection.

The Rub

Brisket in Texas — where the smoked brisket tradition is most deeply established — is cooked with nothing but salt and coarse black pepper. This “SPG” (salt, pepper, garlic) approach lets the beef flavor and the smoke do the talking, and it produces extraordinary results.

Classic Texas rub:

  • 2 parts kosher salt
  • 2 parts coarse black pepper (16 mesh is the standard — this is the grind you want, not fine ground)
  • 1 part garlic powder (optional, but most pitmasters include it)

Mix and apply generously to every surface of the brisket. Be more generous than you think is necessary — the brisket is a large piece of meat and a thin application of rub disappears into the bark without contribution.

Some people add additional spices — smoked paprika, onion powder, cayenne. These all work. But if this is your first brisket on the Pit Boss, start simple. Understand what the beef and smoke taste like together before you start adding complexity.

Apply the rub and let the brisket sit at room temperature for 30 minutes before it goes on the grill, or apply the rub the night before and refrigerate overnight uncovered. The overnight approach helps develop bark by drying the surface slightly.

Pellet Selection

Brisket is the cook where oak or hickory belongs.

Post oak: The traditional Texas smoke wood. Medium intensity, slightly nutty, no sweetness. Post oak complements beef without fighting it and has been the pit wood at the great Texas barbecue joints for generations. If you can find post oak pellets, use them.

Hickory: Stronger than oak, with a more pronounced smoke flavor. Works extremely well with brisket. If this is your first brisket cook, hickory produces the “this smells like barbecue” smoke that most people associate with the style.

Oak and cherry blend: Some pitmasters use a 70/30 oak and cherry blend. The cherry adds a slight sweetness and a darker bark color without changing the fundamental beef-and-oak flavor profile.

Avoid: Fruit woods alone (apple, peach) on brisket — they’re too mild for a 12-hour cook and the smoke flavor gets lost. Mesquite has too much intensity for a cook this long and can produce a bitter result.

Setting Up the Pit Boss

Fill the hopper completely. A brisket cook will run 12 to 16 hours. You’ll probably need to refill the hopper at least once — check it every 4 to 5 hours and refill before it runs low. Running out of pellets mid-cook and having the temperature drop significantly is the mistake you most want to avoid.

Temperature: 225°F to 250°F. This is the cooking temperature you’ll maintain through the majority of the cook. Some pitmasters cook entirely at 225°F for maximum smoke absorption. Some cook at 250°F to shorten the overall time slightly. 225°F gives you more time in the smoke and a slightly more pronounced smoke flavor; 250°F shaves an hour or two off the total time. Both approaches produce excellent brisket.

Let the Pit Boss fully preheat to temperature before the brisket goes on. This takes 15 to 20 minutes. Make sure you’re at stable temperature, not still climbing.

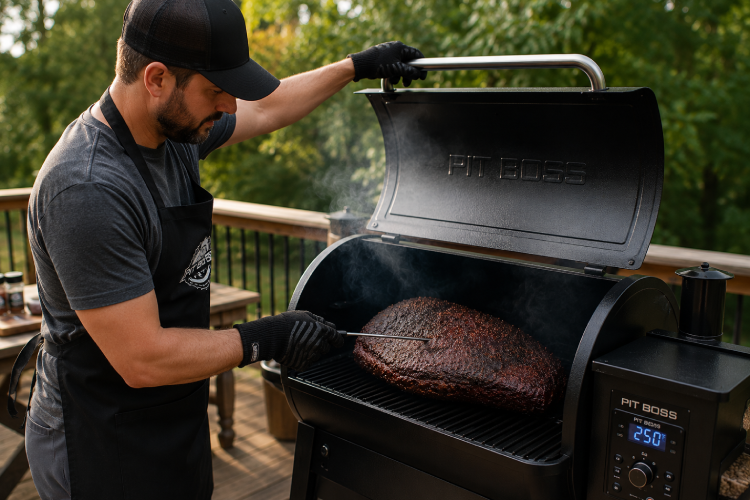
Read our full Pit Boss Grill Review!

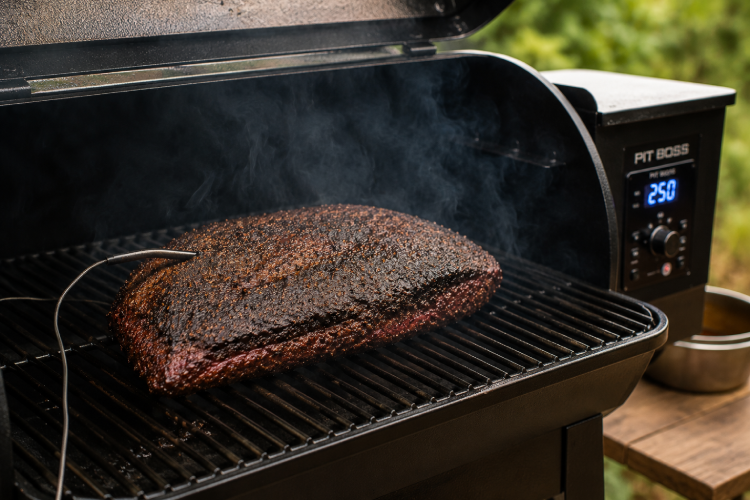
Probe placement: Insert a leave-in probe thermometer into the thickest part of the flat, angled toward the center of the muscle. This is where the flat is slowest to cook and where you’re going to track the temperature through the stall and to the finish.

Placement on the grates: Put the brisket fat-side up or fat-side down? This is one of the most argued questions in barbecue. Fat-side up lets the rendering fat baste the meat as it drips down. Fat-side down creates a barrier between the direct heat from below and the flat. On a Pit Boss pellet grill with its convection-style heat, the heat source isn’t primarily from below the way it is on an offset smoker, so fat-side up works well and is the common recommendation.

The Cook — Phase by Phase

Phase 1: The Smoke (225°F, first 4 to 6 hours)

This is where the magic happens. The brisket is absorbing smoke at maximum efficiency during this phase because the surface is still cool and moist enough to attract smoke particles. Don’t open the lid unnecessarily during this phase — every lid lift drops the temperature 25 to 30°F and extends the cook time. Trust the process.

The bark is beginning to form during this phase. You’ll see the surface darken from the rub and the smoke exposure. This is good. You’re building the exterior crust that’s the defining feature of great smoked brisket.

Phase 2: The Stall

At some point between 150°F and 175°F internal temperature, the thermometer will stop moving. It will sit at the same temperature for what can feel like an alarming amount of time — sometimes 2 hours, sometimes 4 hours. This is completely normal and has a known explanation.

As the surface of the brisket heats up, moisture inside the meat migrates to the surface and evaporates. The energy being put into the brisket by the grill is being consumed entirely by this evaporative cooling effect — the same reason sweating keeps you cool on a hot day. The temperature isn’t rising because the energy balance is in equilibrium.

The stall resolves on its own. You can wait it out, or you can wrap the brisket at this point (see below).

Phase 3: The Wrap (optional but recommended)

Most pitmasters wrap the brisket in butcher paper or foil when it hits the stall (approximately 160°F to 165°F internal). Wrapping traps the heat and eliminates the evaporative cooling effect, pushing the brisket through the stall more quickly and protecting the bark from over-darkening during the remainder of the cook.

Butcher paper vs foil:

Butcher paper (specifically pink or peach unlined butcher paper, not wax paper) is the preferred wrapping method for most competition pitmasters. It breathes slightly, allowing some moisture to escape while still accelerating the cook. The bark holds up better through a butcher paper wrap than through foil.

Smoking Brisket on a Pit Boss Pellet Grill — How to Actually Get It Right

Foil (the “Texas crutch”) wraps tighter and accelerates the cook more aggressively. It can soften the bark if you wrap too early or leave it wrapped too long. The benefit is a more braised, tender result — some people prefer this.

To wrap: pull the brisket, place it on two overlapping sheets of butcher paper (or heavy-duty foil) fat-side down, pour a small splash of beef tallow or melted butter on top if you have it, and wrap tightly. Return to the grill.

Phase 4: The Finish

After wrapping, the temperature will begin rising again. You’re now cooking to probe tenderness, not just temperature. The target internal temperature for the flat is 200°F to 205°F, but temperature is the starting point for the probe test, not the finish line.

The probe test: Push the instant-read thermometer probe into the thickest part of the flat. It should slide in with essentially no resistance — like inserting a probe into room temperature butter. If you feel any resistance at all, the brisket isn’t ready. Put it back on for another 30 minutes and test again. This “probe tender” test is how you know the collagen has fully converted to gelatin and the brisket will actually slice and eat the way you want it to.

A brisket that tests probe tender at 195°F is done. A brisket that still has resistance at 210°F needs more time. The thermometer reading is a guideline; the probe feel is the actual indicator.

The Rest — The Most Important Step

More than any other cut of meat, brisket needs a proper rest. A minimum of 1 hour. Two hours is better. Some competition pitmasters rest brisket for 4 to 8 hours in a cambro cooler.

Here’s why this matters: brisket is full of collagen that has converted to gelatin during the long cook. This gelatin is what makes the meat moist and gives it that characteristic sticky richness. During the rest period, this gelatin sets slightly and the juices redistribute throughout the muscle. Cut into a brisket immediately off the grill and the juices run out and the gelatin hasn’t set — you get dry, stringy slices. Rest the brisket properly and you get slices that hold together and release moisture in your mouth rather than onto the cutting board.

How to rest: Wrap the brisket (still in its butcher paper or foil) in a towel and place it in a cooler. The insulation keeps it at safe serving temperature for 4 to 6 hours without any refrigeration needed. This is the hack that allows you to finish the brisket ahead of time without serving it cold.

Slicing

This is the final step that most people rush and it matters more than most people expect.

Separate the flat and the point before slicing. The flat and point have different grain directions, and you need to slice against the grain of each independently. Slicing with the grain produces chewy, stringy slices; slicing against the grain cuts through the muscle fibers and gives you tender slices.

Find the grain direction of the flat and slice perpendicular to it in ¼-inch thick slices. These are your primary brisket slices.

The point can be sliced similarly or cubed into burnt ends. Burnt ends — cubed, sauced, and returned to the smoker for another hour — are arguably the best thing that comes from a whole packer brisket.

Quick Reference

  • Best cut: Full packer, USDA Choice or Prime
  • Trim fat cap to: ¼ inch
  • Rub: Kosher salt, coarse black pepper, garlic powder
  • Pellets: Post oak, hickory, or oak-cherry blend
  • Cook temperature: 225°F to 250°F
  • Wrap at: 160°F to 165°F internal (butcher paper preferred)
  • Done temperature: 200°F to 205°F, probe tender
  • Rest time: Minimum 1 hour, 2 hours preferred

How to Smoke a Turkey on a Pit Boss Pellet Grill — The Complete Guide

By Posted on 0 Comments8min read0 views

How to Smoke a Turkey on a Pit Boss Pellet Grill — The Complete Guide

How to Smoke a Turkey on a Pit Boss Pellet Grill — Everything You Need to Know

Let me be honest with you about something before we get into any of this. Smoked turkey gets a bad reputation in a lot of households because someone, at some point, pulled a dried-out bird off a grill and declared the whole idea a mistake. That reputation is completely undeserved and almost always the result of two problems — no brine, and cooking too hot for too long without any attention to internal temperature.

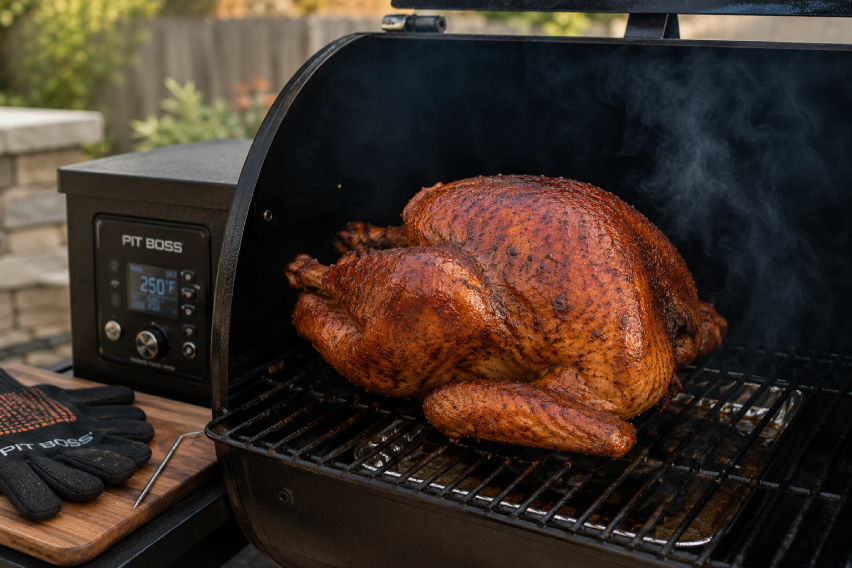
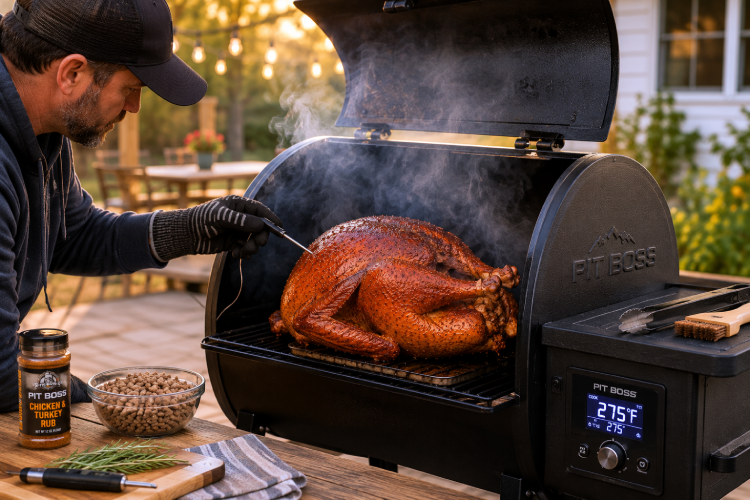
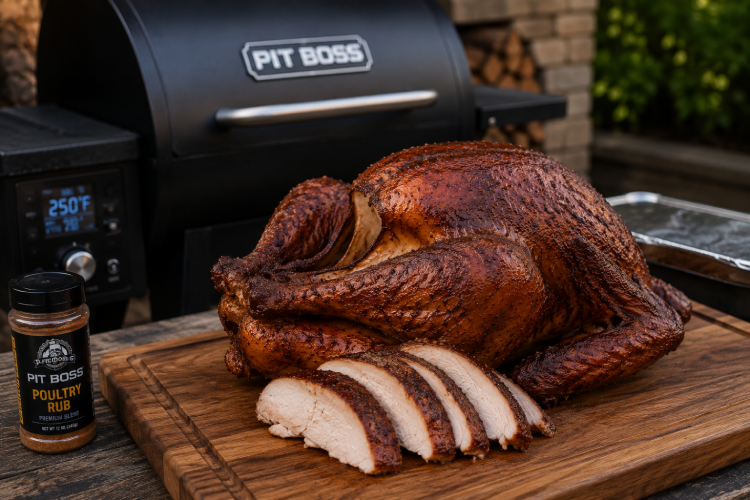
Get those two things right and a smoked turkey from a Pit Boss is genuinely one of the most impressive things you can put on a table. The smoke that gets into the skin and the meat during a low and slow cook does something to a turkey that oven roasting simply can’t replicate. You get this mahogany color on the outside, a faint smokiness in every bite, and — if the brine did its job — meat that’s actually moist rather than the chalky dry texture that’s ruined so many Thanksgiving memories.

So let’s talk about how to actually do this correctly.

Choosing the Right Turkey

Size matters on a pellet grill in a way it doesn’t in an oven, and this is the first decision most people don’t think carefully enough about.

A 12 to 15 pound turkey is the sweet spot for smoking. It fits comfortably on most Pit Boss grill grates with clearance for the lid, it takes 4 to 5 hours at smoking temperature, and it cooks evenly without the dramatic temperature difference between breast and thigh that larger birds develop. A 20-pound bird is manageable but requires more patience and more attention to ensure the thigh comes up to temperature before the breast dries out.

If you’re feeding a big group, smoke two 12-pound turkeys rather than one 22-pounder. Two smaller birds give you more surface area for smoke penetration, cook in less time, and carve into more manageable portions.

Fresh vs frozen: If you’re using frozen, give it a full 24 hours in the refrigerator for every 4 to 5 pounds of bird. A 14-pound turkey needs at least 3 days to fully thaw in the fridge. Partially thawed turkey going onto the grill is a food safety issue and a cooking nightmare — the outside will cook and dry out while the inside is still fighting to come to safe temperature.

The Brine — Don't Skip This

This is non-negotiable. Turkey is lean meat with very little fat marbling to protect it during a long cook. Without a brine, even a carefully cooked smoked turkey can finish dry. With a brine, you’ve given the meat a fighting chance.

Simple wet brine:

  • 1 gallon cold water
  • 1 cup kosher salt (not table salt — it’s too fine and too salty by volume)
  • ½ cup brown sugar
  • 2 tablespoons black peppercorns
  • 4 cloves garlic, smashed
  • Fresh herbs if you have them — thyme and rosemary work well
  • Optional: 1 orange cut in half, squeezed and dropped in

Dissolve the salt and sugar in a cup of hot water first, then add everything to the cold water. Submerge the turkey completely. If the bird floats, weight it down with a plate. Brine in the refrigerator for at least 12 hours and up to 24 hours. Longer than 24 hours and you start to get an unpleasantly salty result.

How to Smoke a Turkey on a Pit Boss Pellet Grill — Everything You Need to Know

After brining, remove the turkey, rinse it thoroughly under cold water, and pat it completely dry with paper towels. This is important — wet skin doesn’t crisp. Dry skin crisps.

Some people prefer a dry brine, which is exactly what it sounds like: rub kosher salt generously all over the bird, including under the skin if you can get your hand in there, and let it sit uncovered in the refrigerator for 24 to 48 hours. The salt draws out moisture, which then reabsorbs back into the meat along with the salt. Same principle, different process. Dry brining also dries the skin out beautifully for crispy results.

Pellet Selection

This is one of those decisions that sounds complicated and really isn’t. Turkey is mild enough that it takes smoke flavor well without being overwhelmed by it, which gives you some flexibility.

Apple wood pellets are the most popular choice for poultry and with good reason. The smoke is sweet, mild, and slightly fruity. It complements the turkey without dominating it. Apple is hard to go wrong with.

Cherry wood pellets give you a slightly deeper color on the skin — that dark mahogany look that makes a smoked turkey look like it belongs on a magazine cover. The smoke flavor is similar to apple but with a little more depth. Cherry and apple mixed is one of the classic poultry combinations.

Pecan pellets are a Texas tradition with poultry. Slightly nuttier smoke, more pronounced than apple but still solidly in the medium category. Works extremely well with turkey.

Hickory or mesquite: Use with caution. Both are heavy smoke woods that can overpower turkey meat during a long cook. If you love the idea of hickory, mix it 50/50 with apple to soften the intensity.

Setting Up Your Pit Boss

Start by filling the hopper completely. A whole turkey takes 4 to 6 hours and you don’t want to be refilling pellets mid-cook.

Temperature: Start at 225°F for the first 2 to 3 hours. This is where the smoke absorption happens — low temperature, maximum time for smoke to penetrate the meat. After 2 to 3 hours, bump it up to 325°F to finish. This higher heat crisps the skin, which stays soft and rubbery if you cook the entire bird at 225°F.

Turn on your Pit Boss and let it fully preheat before the bird goes on — this takes about 15 minutes. Make sure the grates are clean. Clean grates mean better heat distribution and no residual flavors from whatever you cooked last time.

Drip pan: Place a drip pan on the lower rack or directly below the turkey with about a cup of chicken broth in it. This does two things — it catches drips that would otherwise cause flare-ups, and the moisture from the simmering broth helps maintain a slightly humid cooking environment that protects the breast meat from drying out.

Prepping the Bird

Remove the giblets from the cavity — the turkey usually comes with a bag tucked inside the body cavity and sometimes one inside the neck cavity. Check both. Giblets going onto the grill with the turkey won’t ruin anything but they’re wasted space.

Spatchcocking (optional but worth considering): Removing the backbone and flattening the turkey before smoking is the move that solves almost every turkey problem simultaneously. The bird cooks in half the time, the skin across the entire surface gets equal exposure to heat, and the breast and thigh reach finished temperature at nearly the same time rather than the breast drying out while you wait for the thigh.

To spatchcock: place the turkey breast-side down, use heavy-duty kitchen shears to cut along both sides of the backbone and remove it. Flip the bird breast-side up and press firmly on the breastbone until you hear a crack and the bird lies flat. That’s it. Simple, and it transforms the cooking result.

Butter under the skin: Slide your hand between the breast skin and the breast meat and create a pocket. Push softened butter mixed with garlic, thyme, and a pinch of salt directly onto the breast meat. As the turkey cooks, the butter melts into the breast meat and keeps it moist while adding flavor that dry rubs on the outside can’t deliver into the meat itself.

Exterior rub: Mix together:

  • 2 tablespoons olive oil
  • 1 tablespoon kosher salt
  • 1 teaspoon black pepper
  • 1 teaspoon garlic powder
  • 1 teaspoon onion powder
  • 1 teaspoon smoked paprika
  • ½ teaspoon dried thyme
  • ½ teaspoon dried rosemary

Rub this over every exposed surface of the turkey. Work it into every crease and cavity.

The Cook

Whole turkey cook timeline (12–14 lb bird):

Smoke at 225°F for approximately 2 to 3 hours, then increase to 325°F until finished. Total time: 4 to 5 hours.

Spatchcocked turkey cook timeline:

Cook entirely at 325°F. Total time: 2 to 2.5 hours.

These are guidelines, not guarantees. Every turkey is different, every grill runs slightly differently, and ambient temperature affects cook time. The only thing that tells you the turkey is done is a thermometer.

Target temperatures:

  • Breast meat: 165°F — this is the USDA safe temperature. If you want juicier breast meat, pull at 160°F and let carryover cooking finish the job during the rest period.
  • Thigh meat: 175°F — the thigh is dark meat with more collagen, and it actually benefits from a slightly higher temperature to break that collagen down into gelatin. A thigh pulled at 165°F can be slightly chewy.

Insert the thermometer probe into the thickest part of the breast without touching bone for the breast reading, and into the thickest part of the thigh (avoiding the bone) for the thigh reading.

How to Smoke a Turkey on a Pit Boss Pellet Grill — Everything You Need to Know

The stall: You may notice the internal temperature stops rising somewhere around 150°F to 155°F and just sits there for 30 to 45 minutes. Don’t panic. This happens because moisture evaporation from the surface of the meat cools it at the same rate the heat is adding to it. It resolves on its own. Don’t crank the heat trying to push through it.

The Rest

This is the step that most people skip because the turkey looks done and the family is hungry. Don’t skip it.

Pull the turkey from the grill when the thigh hits 175°F. Tent it loosely with foil and let it rest for at least 20 to 30 minutes before carving. During this rest period, the temperature inside the bird continues to rise slightly (carryover cooking) and the juices that have been driven toward the center of the meat by heat redistribute back through the muscle fibers. Cut into a turkey immediately off the grill and those juices run out onto the cutting board. Rest the turkey first and they stay in the meat.

Carving and Serving

Remove the legs by cutting through the joint where the thigh meets the body — it should separate easily if the turkey is fully cooked. Separate the thigh from the drumstick the same way.

For the breast meat, slice parallel to the breastbone rather than across it. This cuts with the grain of the breast meat rather than against it, which gives you longer, cleaner slices.

The smoked turkey will have a pink ring just below the skin — the smoke ring. This is not undercooked meat. It’s a chemical reaction between the smoke compounds and the myoglobin in the muscle. It’s actually the visual evidence that your smoke penetrated the meat, which is exactly what you want.

Quick Reference

  • Bird size: 12 to 15 pounds ideal
  • Brine: Minimum 12 hours, maximum 24
  • Pellets: Apple, cherry, or pecan
  • Temperature: 225°F for 2–3 hours, then 325°F to finish
  • Breast done: 165°F internal
  • Thigh done: 175°F internal
  • Rest time: 20 to 30 minutes minimum

I Wore Rothy’s for a Year — Here’s What Nobody Tells You Before You Buy

By Posted on 0 Comments6min read0 views

I Wore Rothy’s for a Year — Here’s What Nobody Tells You Before You Buy

Save $20 Off On Your All Orders

Save $20 Off On Your All Orders

Save $20 Off On Your All Orders
WELCOME20
SHOW COUPON
On Going Offer
  • It Works 100% Success It Doesn’t
  • Get $10 Off On Your All Purchases

    Get $10 Off On Your All Purchases

    Get $10 Off On Your All Purchases
    WELCOME10
    SHOW COUPON
    On Going Offer
  • It Works 100% Success It Doesn’t
  • Signup & Get $20 Off On Your First Order

    Signup & Get $20 Off On Your First Order

    Signup & Get $20 Off On Your First Order
    ACTIVATE DEAL
    On Going Offer
  • It Works 100% Success It Doesn’t
  • Get Free Shipping On Your All Orders

    Get Free Shipping On Your All Orders

    Get Free Shipping On Your All Orders
    ACTIVATE DEAL
    On Going Offer
  • It Works 100% Success It Doesn’t
  • Sale! Save Upto 40% Off On Selective Items

    Sale! Save Upto 40% Off On Selective Items

    Sale! Save Upto 40% Off On Selective Items
    ACTIVATE DEAL
    On Going Offer
  • It Works 100% Success It Doesn’t
  • Save 12% Off On Your All Orders

    Save 12% Off On Your All Orders

    Save 12% Off On Your All Orders
    ACTIVATE DEAL
    On Going Offer
  • It Works 100% Success It Doesn’t
  • Shop Our New In Collection Starting From $55

    Shop Our New In Collection Starting From $55

    Shop Our New In Collection Starting From $55
    ACTIVATE DEAL
    On Going Offer
  • It Works 100% Success It Doesn’t
  • Checkout Our Bestsellers Collection Starting From $59

    Checkout Our Bestsellers Collection Starting From $59

    Checkout Our Bestsellers Collection Starting From $59
    ACTIVATE DEAL
    On Going Offer
  • It Works 100% Success It Doesn’t
  • I Wore Rothy's for a Year — Here's What Nobody Tells You Before You Buy

    Let me be honest with you: I bought my first pair of Rothy’s because Meghan Markle wore them.

    I’m not proud of it. But there it is.

    I’d been seeing them everywhere — on Instagram, in airport terminals, on every woman who looked like she had her life together in a way I aspired to. Shoes made from recycled water bottles that you could throw in the washing machine. Stylish enough for work. Comfortable enough for a full day on your feet. The sustainable choice that didn’t look like a sustainable choice.

    So I spent $149 on a pair of The Points in a deep burgundy and waited for them to arrive.

    What followed was a year of genuine surprises — some great, a few frustrating, and one that made me stop and reconsider the whole thing. Here’s what I wish someone had told me first.

    The First Week: The Sizing Situation Nobody Talks About Enough

    The Points arrived and looked exactly like the photos. Slim, elegant, that signature pointed toe. I slid them on and immediately felt my toes compress into the front of the shoe like they were late for a meeting.

    I’d ordered my usual size. Classic mistake.

    After some research and a quick exchange — Rothy’s return process is genuinely painless — I went up half a size and suddenly understood why people love these shoes so much. The fit clicked into place. Not roomy, but right. Just enough space for your toes to exist as separate entities rather than one consolidated unit.

    I Wore Rothy's for a Year — Here's What Nobody Tells You Before You Buy

    This is the piece of advice every Rothy’s review mentions and yet somehow every new buyer still learns the hard way: size up half a step. Every time. For every style.

    If you have wide feet, size up and cross your fingers, or honestly consider whether the Sneaker style might be a better fit for you — it’s the most accommodating silhouette they make.

    The Rainy Tuesday That Humbled Me

    About three weeks in, I wore my Points on a day that looked dry but wasn’t.

    By the time I made it from the tube station to my office — maybe a seven-minute walk — both feet were completely soaked through. Not damp. Soaked. I spent the next four hours at my desk in what felt like wet swimming socks, slowly air-drying from the inside out.

    Here’s what I learned: Rothy’s are not waterproof. They’re not even water-resistant. That beautiful open-weave knit construction that makes them breathable and flexible and lightweight? It also absorbs water with impressive efficiency.

    These are fair-weather shoes. Not shoes for British weather. Not shoes for “it probably won’t rain” days. Fair. Weather. Only.

    If you live somewhere it rains with any regularity, keep a backup pair of options you don’t mind getting wet. Wear Rothy’s on the days the forecast is genuinely clear.

    Month Two: The Smell Conversation Nobody Wants to Have

    Somewhere around the eight-week mark, after daily wear through a warm stretch of weather, I came home and my partner made a face.

    Not a subtle face.

    The recycled plastic knit that makes Rothy’s so washable also doesn’t breathe the way natural materials do. After enough warm-weather wear, they develop a smell. This is documented by enough independent reviewers that I feel comfortable calling it a feature of the shoe rather than a fault of my personal hygiene.

    The good news: this is exactly what the machine-washable design is for.

    Gentle cycle. Cold water. No dryer — air dry overnight. The next morning, they come out smelling like nothing at all and looking nearly new. I’ve done this more times than I can count and the knit has held up every single time without any visible degradation in the fabric.

    That washability isn’t a marketing gimmick. It’s a genuine, practical, weekly feature of owning these shoes — especially in summer.

    The Arch Support Conversation (Or Rather, the Lack of One)

    By month three I was wearing my Rothy’s four or five days a week. Work, errands, weekend brunches, the occasional longer walk. And my feet started talking back.

    Not dramatically. Just the low-grade tiredness that comes from spending hours in a shoe with minimal arch support on a thin, flexible sole.

    I want to be clear: Rothy’s do not pretend to be orthopedic shoes. They’re fashion flats. But the gap between “comfortable for a few hours” and “comfortable for a full day on your feet” is real, and if you have any pre-existing foot concerns — plantar fasciitis, flat arches, anything that makes you reach for specific insoles in your other shoes — you will feel that gap in Rothy’s.

    The fix, for me, was a half-size insole from a pharmacy. About £8. It made the shoes genuinely wearable for longer days without changing the fit significantly.

    If you need serious arch support, no insole is going to turn Rothy’s into the right shoe for you. But for moderate daily wear with a simple insole addition, they work well enough that I kept reaching for them.

    The Washing Machine Test (Over and Over and Over)

    By month six, I had washed my Points at least a dozen times.

    Let me tell you what they look like now: almost exactly like they did the day they arrived. The knit hasn’t frayed. The color hasn’t faded significantly. The shape has been retained through every wash and air-dry cycle. The sole shows some wear at the toe from regular use, but the shoe itself looks like it has years left in it.

    This is not universally true for every Rothy’s style — I’ve read accounts of clogs unravelling at the ankle area after 18 months, and loafers deteriorating after hand-washing. My honest take is that the core styles — The Point and The Sneaker in particular — have the strongest long-term durability evidence, and the more structurally complex styles carry more documented risk.

    But for The Points specifically: yes, they wash as well as advertised, and they keep washing well for years, not just months.

    The Part That Bothered Me

    About eight months in, a friend bought a pair of Mary Jane style Rothy’s — the ones with the bow at the front. Within a couple of wears, the fabric on the straps tore. Not from rough use. Just from the tension created by tying the bow tightly enough to keep it from falling open.

    She contacted Rothy’s, explained what had happened, and described it as what it appeared to be: a design issue with how tightly the bow needed to be secured to stay in place.

    Their response: $30 off a new pair.

    On a $145+ shoe. For a defect she hadn’t caused.

    I Wore Rothy's for a Year — Here's What Nobody Tells You Before You Buy

    I’ve seen similar responses documented elsewhere — clogs unravelling after 18 months offered a link to the recycling programme. Fabric deteriorating after hand-washing with mild detergent dismissed as a washing issue. The pattern is consistent enough to be worth saying clearly: Rothy’s warranty responses tend toward store credit and replacement discounts rather than repair, refund, or replacement. That’s a real thing to factor into how you think about this purchase.

    A Year In: Would I Buy Them Again?

    Yes. And I have — twice.

    Here’s the honest version of what Rothy’s are: they’re genuinely stylish, genuinely washable, genuinely lightweight travel shoes that hold up better than most things at their price point for the specific use case they’re designed for. Fair-weather city wear, desk-to-dinner versatility, travel packing where space matters.

    They are not: waterproof, arch-supportive, suitable for all-day standing on hard floors without an insole, or backed by the kind of warranty that gives you real confidence when something goes wrong.

    The sweet spot is buying The Points or The Sneakers in a style you love, sizing up half a step without exception, adding a basic insole if you’re going to wear them for long days, and washing them regularly before the smell situation becomes anyone’s problem.

    Do that and you’ll understand why there are people still wearing their original pair five years later.

    Don’t do that and you might spend a very damp Tuesday wondering what you were thinking.

    Before You Buy: The Checklist

    Do buy Rothy's if:

    • You want a genuinely stylish, machine-washable everyday flat
    • You’re a fair-weather city dresser or frequent traveller
    • You’re comfortable sizing up half a step and doing it every time
    • You have normal-width feet or slightly narrow feet
    • Sustainability and recycled materials matter to you as a purchase factor

    Don't buy Rothy's if:

    • You live somewhere it rains regularly and want to actually wear your shoes
    • You need meaningful arch support or have plantar fasciitis
    • You have wide feet (the Sneaker is the exception — try that first)
    • You expect a generous, hassle-free warranty response if something goes wrong
    • You’re buying as a long-term investment piece expecting 10+ years from a single pair